Skip to content
This guide shows you how to create Appointment Types available for request in your Public Booking Portal, to learn how to configure and use your Public Booking Portal please review this article.
You should configure the Appointment Types to match the services you would like Customers to request online through the Public Booking Portal.
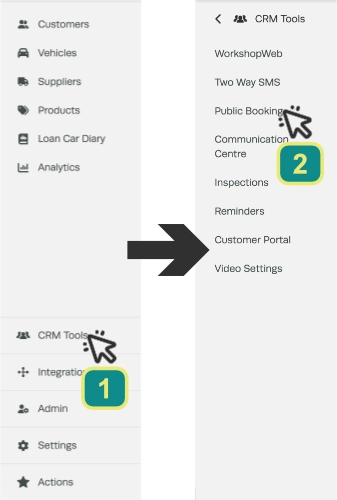
- To access and update your Public Booking settings first select CRM Tools (1) in the left hand sidebar menu, then click Public Booking (2).
- In the Appointment Types card click the + icon on the right hand side.
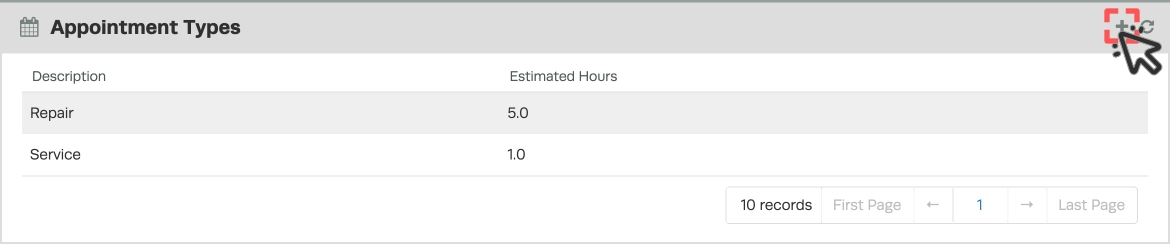
This allows you to add a new appointment type. You can create as many of these as you would like linking them to a Labour product and defining the time required in your Booking Diary.
Please Note: If you are integrated with VVGarage to ensure your appointment type syncs to the app you must fill out all 3 fields.
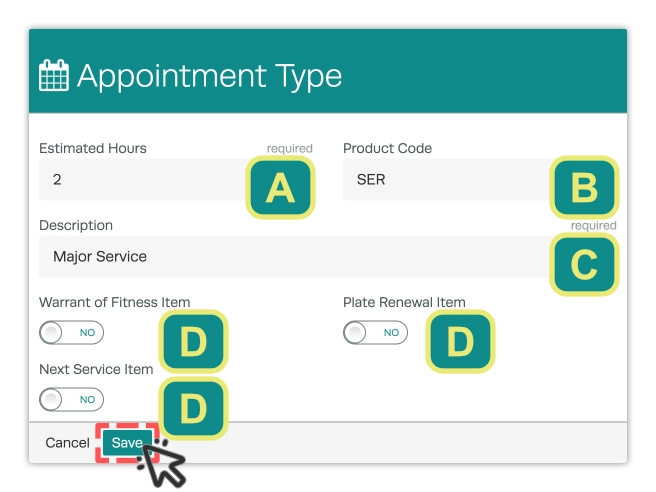
Estimated Hours (A) - Must be greater than 0.
Product Code (B) - Must be a Labour product.
Description (C) - The name of the Appointment as seen by your customer.
Warrant of Fitness / Plate Renewal / Next Service Item (D) - These toggles define if the appointment type requires NZ WOF, Plate Renewal or is a followup Service.
- To create your Appointment Type click the green Save button.
Good to Know
- Make sure you click Save after making your changes. If you navigate away before saving, your changes will be lost.
Frequently Asked Questions
Can customers see this in the Online Booking Portal?
Customers will see the Description of each Appointment Type in the Public Booking Portal.
Related Articles
- Public Booking Diary - Setting up Appointment Types
- How to Create a Booking in Workshop Software
- How to quickly create a booking in Workshop Software