Skip to content
A follow-up date lets you set a reminder on a customer invoice so you can contact the customer between normal servicing. You can then run a report to see all upcoming follow-ups.
Step 1: Set the Follow-Up Date
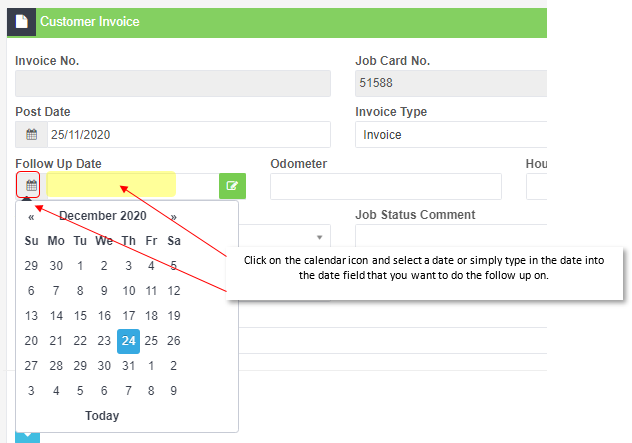
- Before processing the invoice, find the Follow Up Date field on the invoice.
- Click the Calendar icon or type the date directly into the field.
Step 2: Add a Follow-Up Note
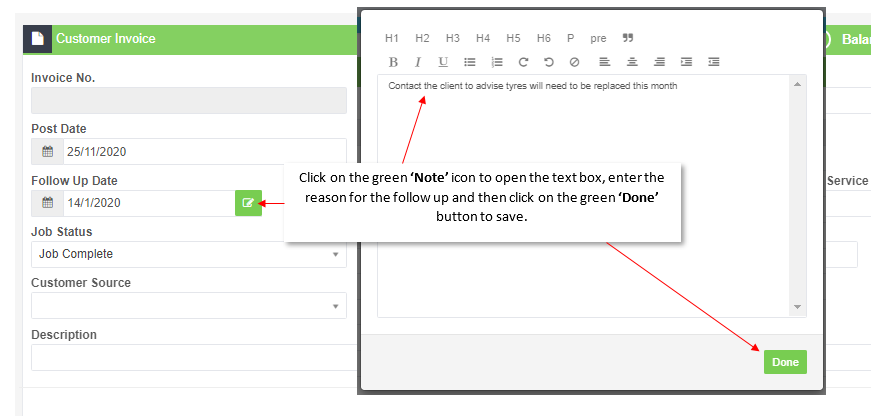
- Click the green Note icon next to the follow-up date.
- Enter a description or reason for the follow-up.
- Click the green Done button.
Step 3: Run the Follow-Up Report
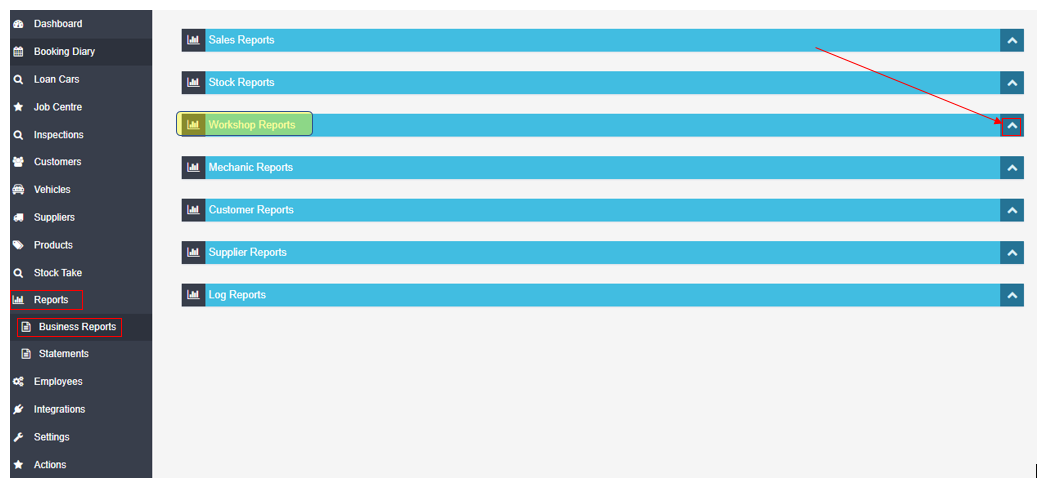
- Go to Reports > Business Reports > Workshop Reports.
- Open the Follow Up Report.
- Enter the date period you want to review.
- Click the green Printer icon to generate the report.

Good to Know
- Follow-up dates must be set before processing the invoice.
- Use the Follow Up Report regularly to stay on top of customer contact and never miss a follow-up opportunity.
- Adding a note helps your team understand why the follow-up is needed when they run the report later.
Can I change a follow-up date after setting it?
Yes, as long as the invoice has not been processed, you can update the follow-up date and note at any time.
Will I receive an automatic reminder?
There is no automatic pop-up reminder. You need to run the Follow Up Report periodically to see upcoming follow-ups.