Skip to content
Workshop Software's Booking diary is used to record planned future Jobs, along with the time, date and team members who will complete the work.
Bookings are a seperate record to your Job card, which may be Started from the Booking, the Job is the master reference of what will be Invoiced to a Customer, Job Notes and the Time your Mechanics record while working on a Vehicle.
This article explains each way a new Booking may be created, either independently or linked to an Inspection or Quote.
Creating a New Booking
Each method to create a Booking is explained below, once you have selected the Customer and their Vehicle remember to Save the Booking before assigning Event Times or navigating away.

Create a New Booking from any Screen
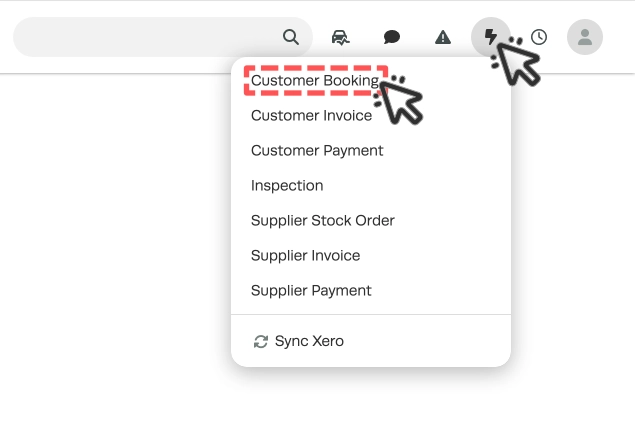
The Lightning Bolt drop down menu includes an option to create a Booking.
Please Note: These Bookings will default to today's date, please remember to change the Booking Date.
- Click the Lightning Bolt icon at the top of the page, and then select Customer Booking, this will open a new Booking screen.
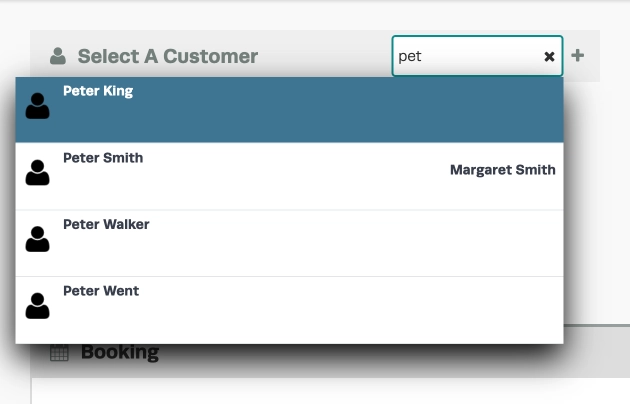
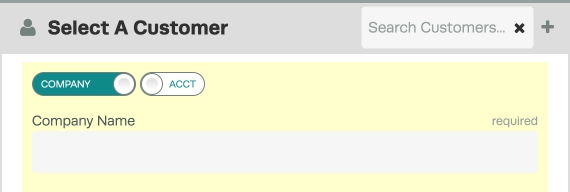
- To select a Customer you may search for an existing Customer by typing their name or details in the Customer search bar.
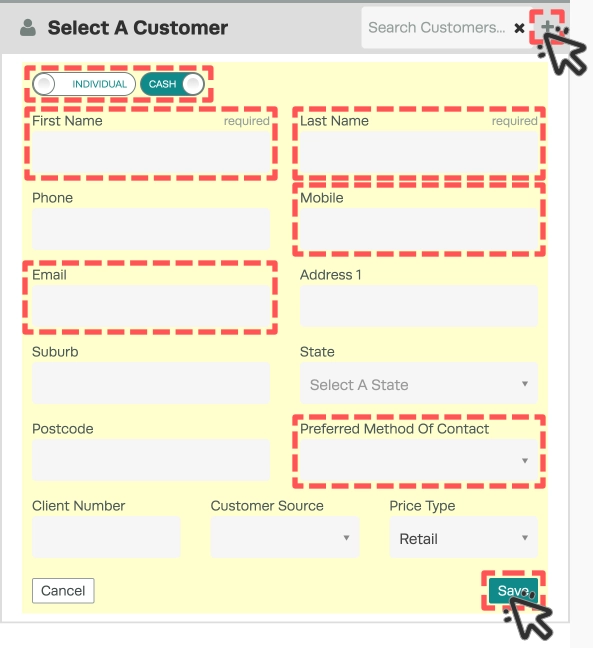
- If the booking is for a new Customer you may click the + icon to enter their details.
- When creating a new Customer we suggest defining if they are an Individual or Company and if they pay Cash on Delivery or will receive an Account with your business, the toggles at the top of the creation form allow you to do this.
- A First and Last Name will be required and we suggest also adding as a minimum their Mobile Number, Email and Preferred Method of Contact.
- After you have entered your Customer's details click the Save button
- If the Customer is a Company their Company Name is required instead.
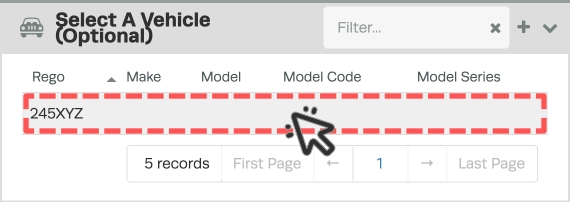
- Once you select your Customer you may click a Vehicle in their list to add it to the Booking.
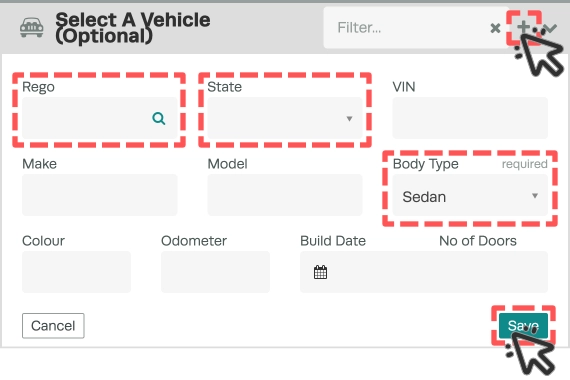
- You may add a vehicle to a Customer with the + icon to the right of the search bar.
- The Vehicle's Body Type is required.
- We suggest adding the Vehicle's Registration number and State of Registration.
- If you have enabled Registration Lookup you may also use the magnifying glass icon to populate other Vehicle details based upon the Registration and State.
- Please click the green Save button before continuing with your booking.
Create a New Booking from the Search Bar
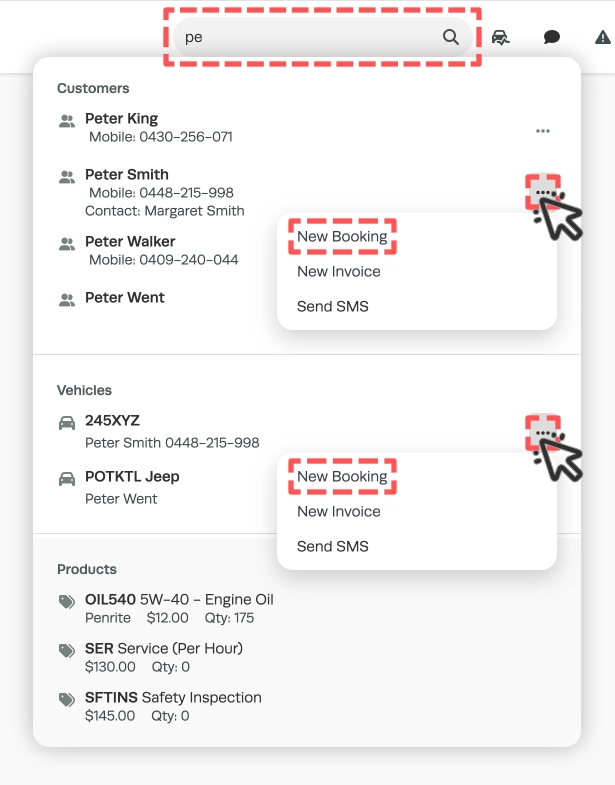
The Main Search bar may be used to find Customer's and their associated Vehicles or to search for a Vehicle by Registration number.
Please Note: These bookings will default to today's date, please remember to change the Booking Date.
- To create a Booking from the search bar first complete enough information to display the Customer or Vehicle you would like to use.
- You may then click the ... icon and select New Booking
- The Booking will be created pre-populated with the chosen Customer or Vehicle.
Create a New Booking from the Booking Diary
In the Booking Diary you may create a Booking for today's date or directly for the desired Date.
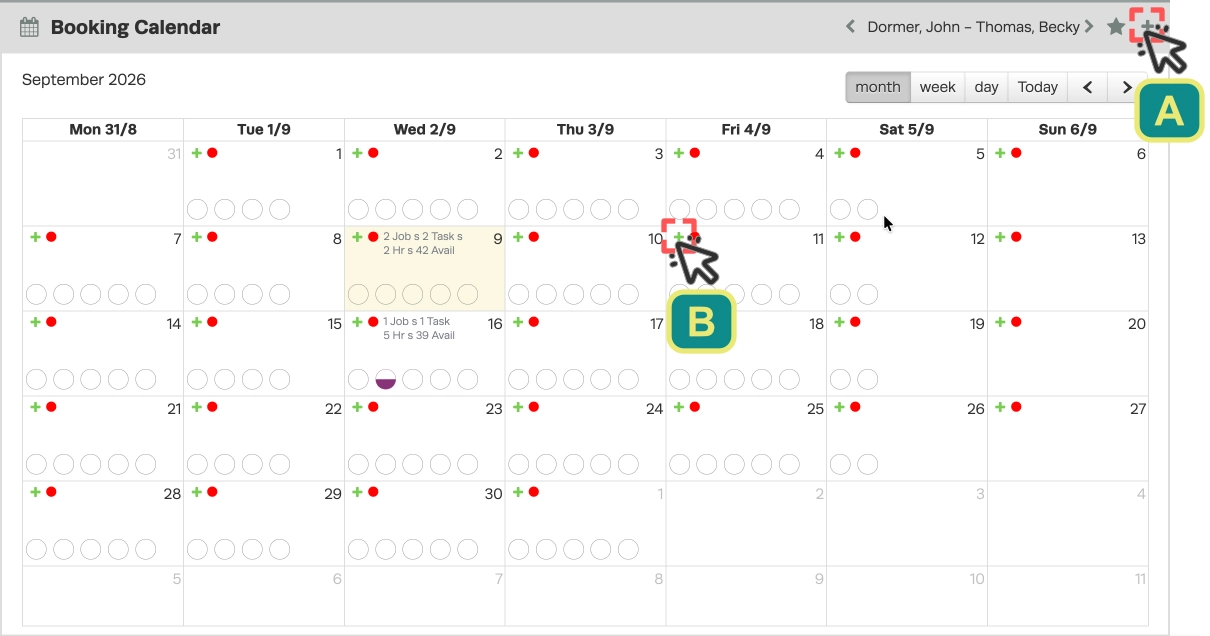
- In the Month view you may click the grey + icon (A) in the top right of the Booking Calendar card to create a new Booking for Today's date.
- If you click a green + plus (B) icon in a date's box the new Booking is created for the chosen date.
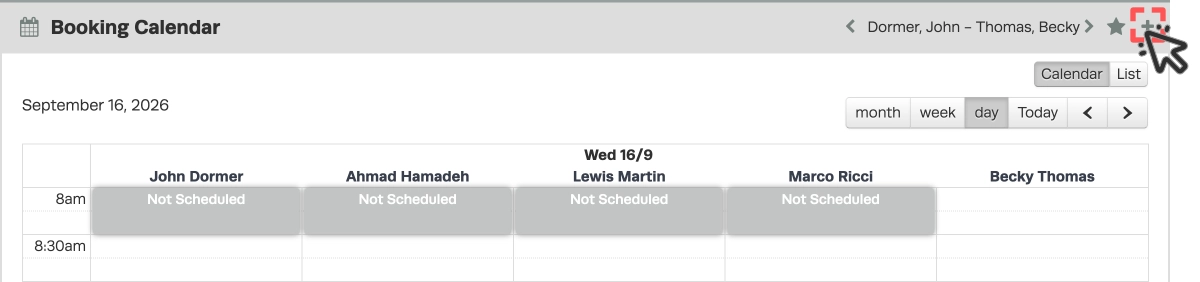
- In the Day view you may click the grey + icon in the top right of the Booking Calendar card to create a new Booking for the day displayed.
Create a New Booking from the Transaction Centre
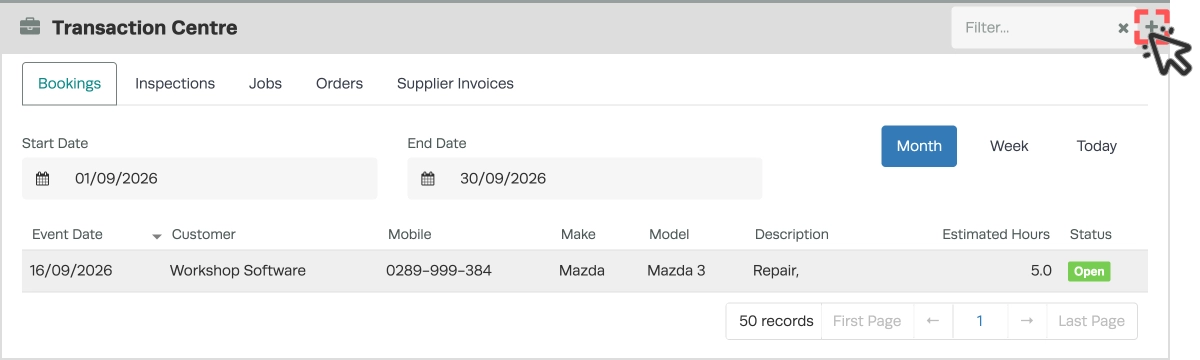
You may create a new Booking from the Bookings tab of your Transaction Centre.
Please Note: These bookings will default to today's date, please remember to change the Booking Date.
- To create your Booking click the grey + icon in the top right corner of the Transaction Centre card.
Create a New Booking from a Quote
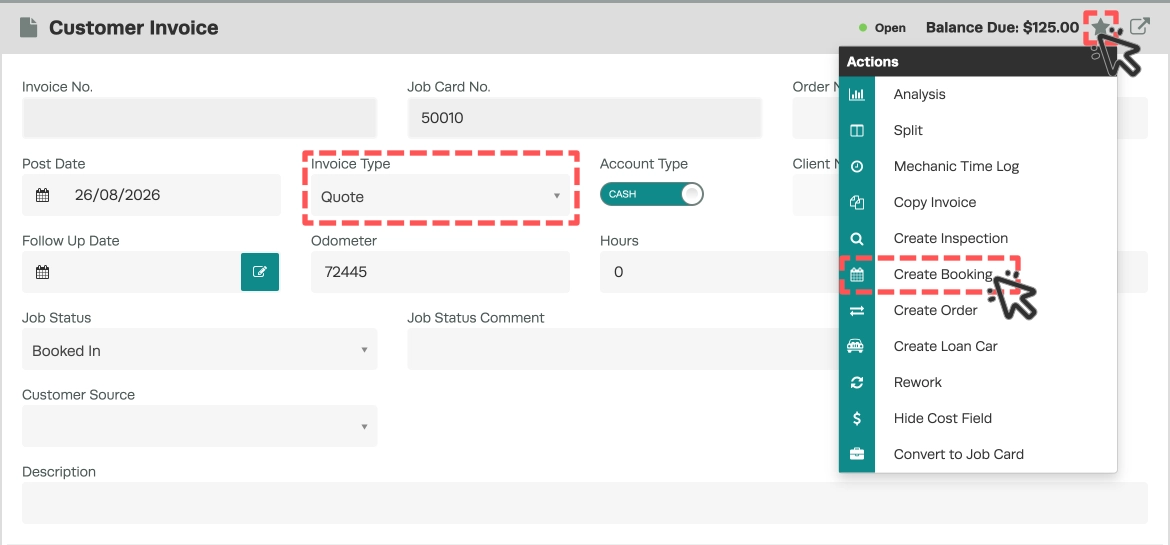
If you have created a Quote with no associated Booking you may create a new Booking pre-populated with the Quote's Customer and Vehicle details.
Please Note: These bookings will default to today's date, please remember to change the Booking Date.
- Open your Quote.
- Click the Star icon in the top right hand corner of the Customer Invoice card and select Create Booking.
Create a New Booking from an Inspection
You may create a new Booking from an Inspection that has been Finalised, the Inspection, Customer and Vehicle information will be associate with this new Booking.
Please Note: These bookings will default to today's date, please remember to change the Booking Date.
- In a Finalised inspection click the Star icon in the Inspection card then select the Convert To Booking option.
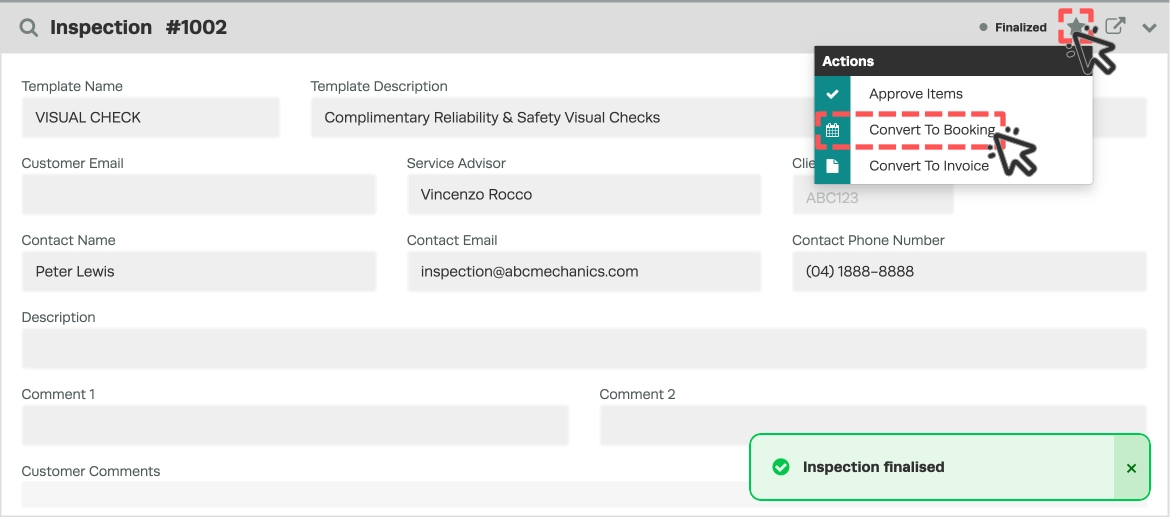
Warning: If there are no Approved items in your Inspection you must add a Labour line for the Booking to appear in your Booking calendar. You can use any product as long as its type is set to Labour.
Assigning a Mechanic / Event Times
Newly created bookings will have only their Booking Date set, you may change this date and assign Events to your mechanics, which represent a block of time in their calendar.
- To update the Booking Date change the Booking Date field, any Labour lines will update their Events as you make this change.

- By clicking the cog icon on the product line, you can assign a mechanic and edit the event times for a labour line.
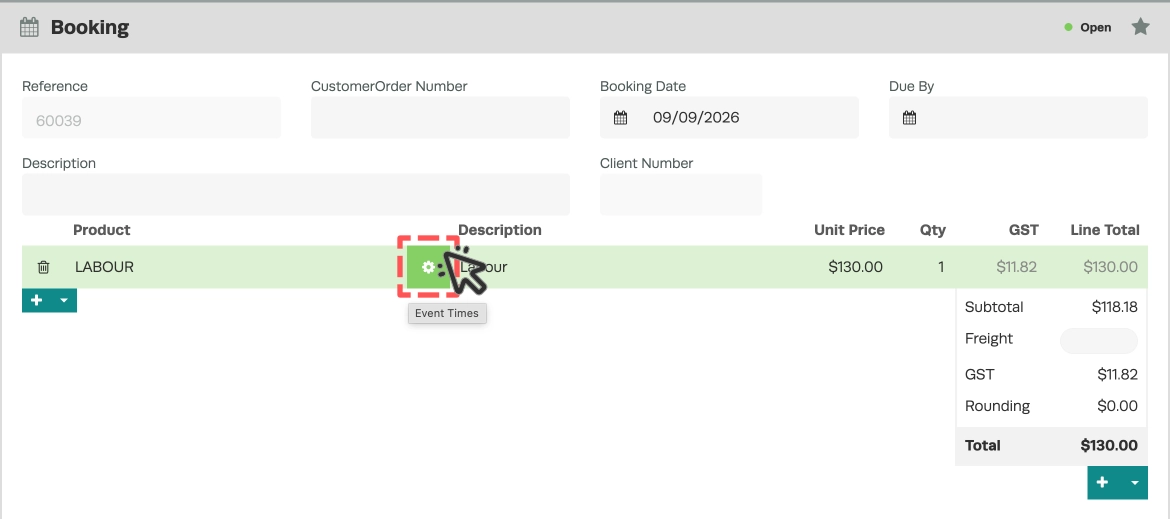
- For more details, refer to the articles: How to Assign a Mechanic to a Booking and Create Booking For A Job Across Multiple Days.
Booking Details Explained
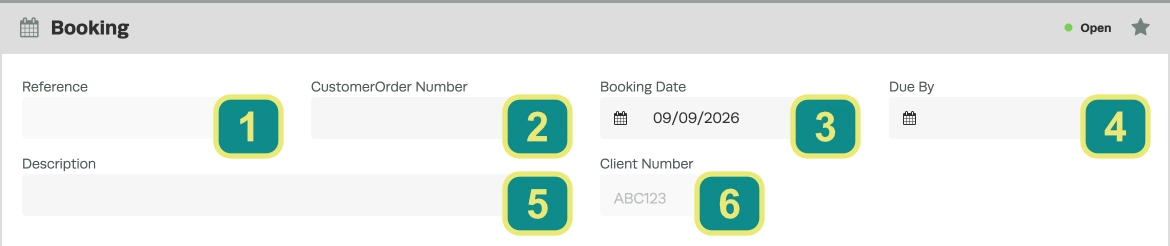
| Field | What it does |
|---|---|
| 1. Reference | This greyed-out field will have a number assigned to it once the Booking is saved. |
| 2. Customer Order Number | This field is optional and may be used to store a Customer's order number. |
| 3. Booking Date | Choose the date for the first day of the Booking, extra days can be assigned as Event Times. |
| 4. Due By | This is also optional and records when a Customer would like their work complete. |
| 5. Description | Enter a short description of the work that needs to be done. |
| 6. Member Number | If the Customer has a Member Number associated with their profile, it will be displayed in this field. |
Product List
In this section you may add and create Product's for the Booking that will be added to the Job when created.
Every Labour Product on a Booking will create an additional Event Time.
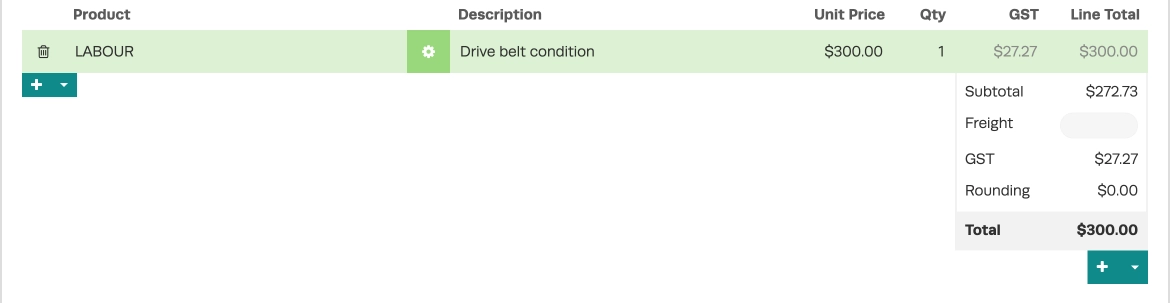
Please Note: If you like to Quote or Invoice your work using a detailed breakdown of Labour Codes it may be helpful to use one Labour Product on the Booking to allocate the time, then Start the Job and use that document to begin breaking down the work with many Labour Products.
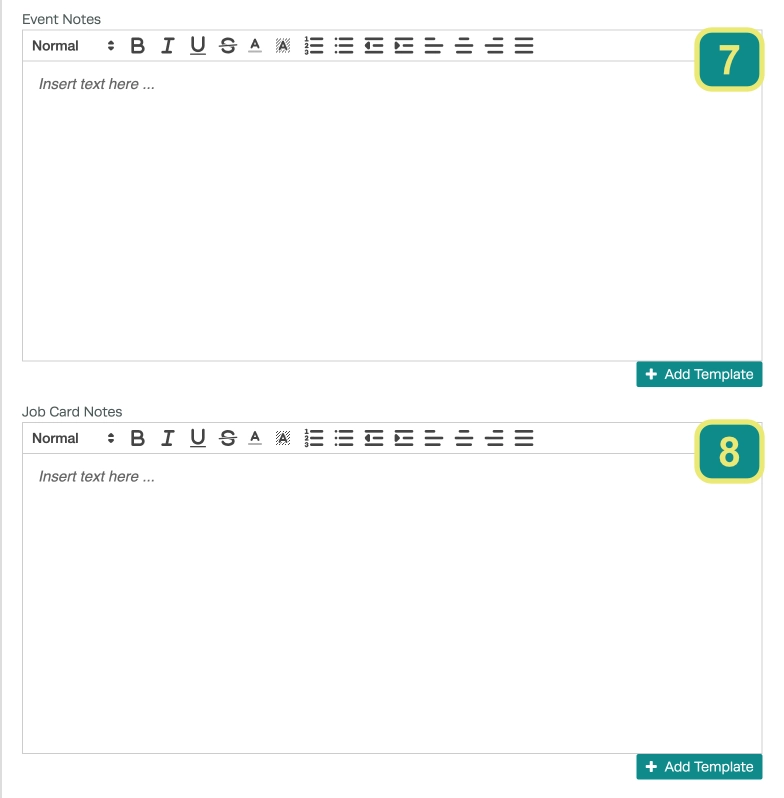
Booking Notes
| Field | What it does |
|---|---|
| 7. Event Notes | Will be converted into Invoice Notes which appear on your Customer's final Invoice. |
| 8. Job Card Notes | Are internal notes for the mechanic and will appear only on the job card. |