Skip to content
Every job starts with a customer and their vehicle. This article shows you how to create a new customer and add their vehicle, so you are ready to book them in and invoice them.
Step 1: Open the Customers Section
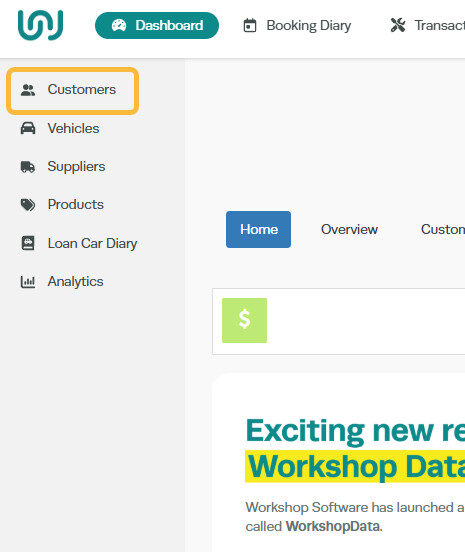
- Click Customers from the left-hand navigation menu.
Step 2: Create a New Customer
- Click the + icon at the far right corner of the blue Customers bar.

Step 3: Enter Customer Details
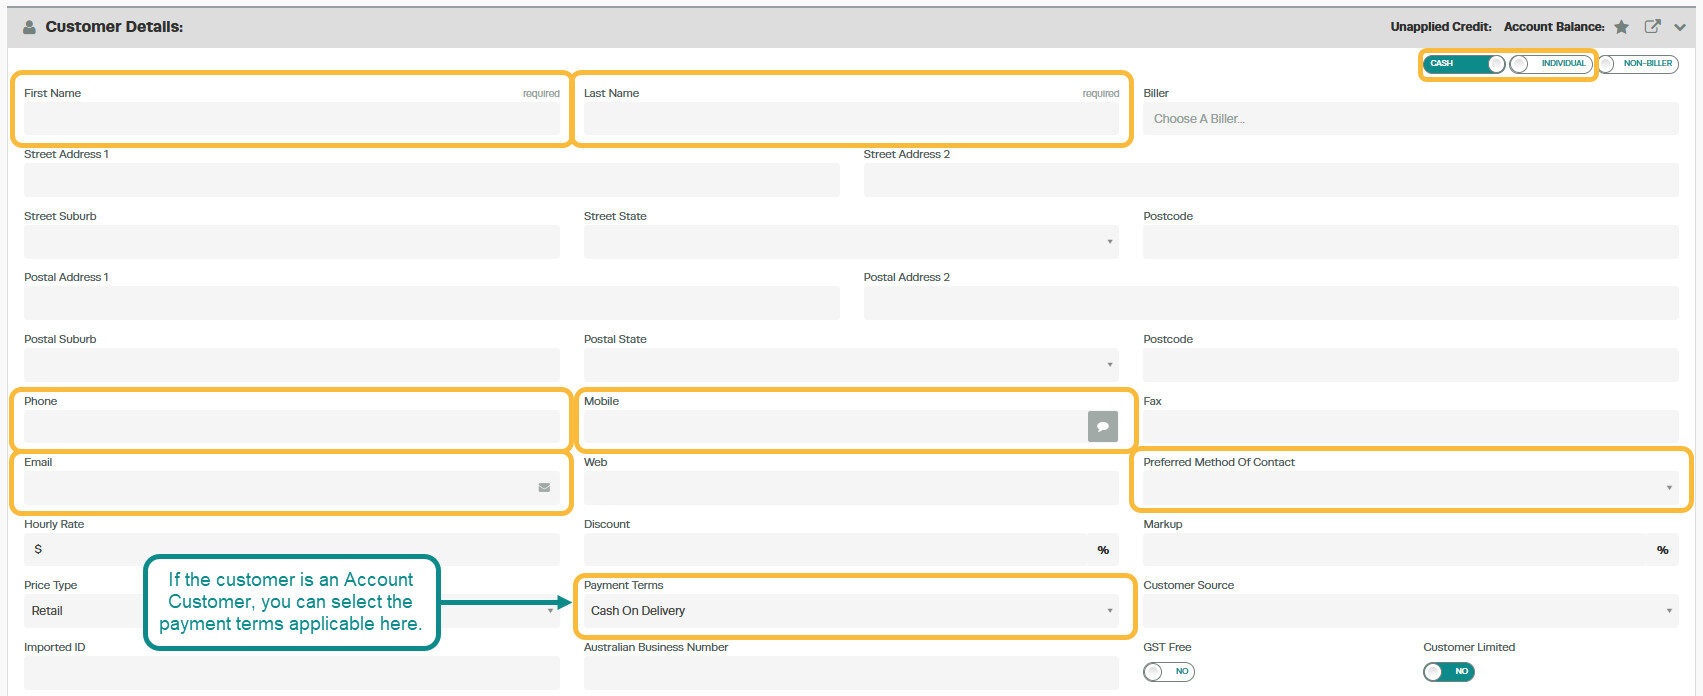
- The screen will refresh with a blank customer profile form. Fill in the following details:
- Select if the customer is an individual or a company
- Select if they are a cash or account customer (for account customers, you can set payment terms further down the form)
- Enter their name, contact details, and address, all other Customer Details are explained in this article.
- Once all details are entered, click the green Save button.
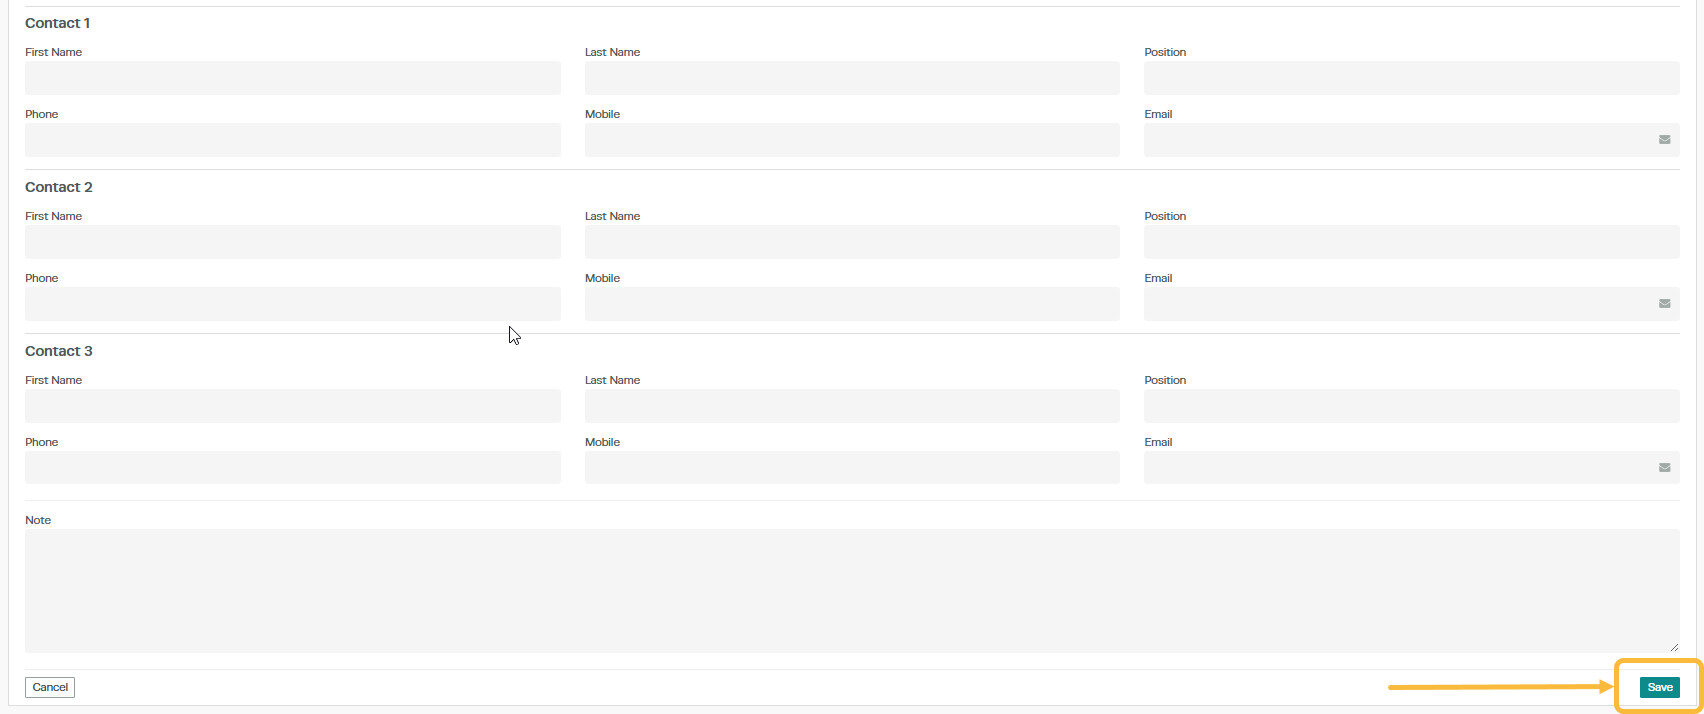
A green pop-up will appear in the bottom right corner confirming the customer has been saved.

Step 4: Add a Vehicle
- Once the customer is saved, scroll down to the Vehicles section of the customer profile.
- Click the + icon to add a new vehicle.
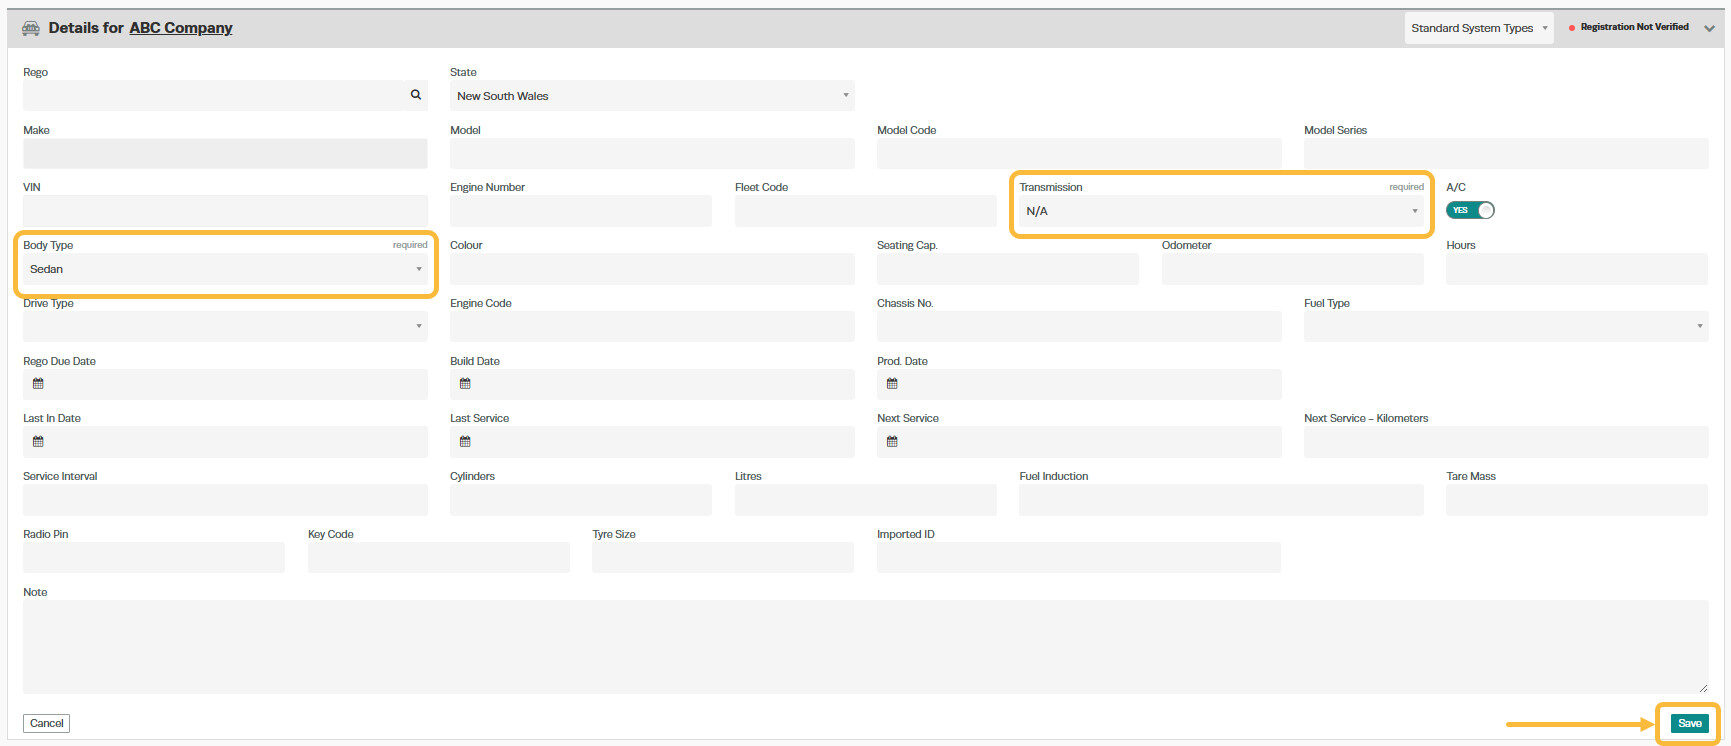
- Enter the vehicle details - registration, make, model, year, and any other relevant information.
- Click Save.

Good to Know
- You can add multiple vehicles to a single customer profile.
- Setting the correct account type (Cash or Account) at the customer level determines the default for all future invoices for that customer.
- The customer record is used across all areas of Workshop Software - invoicing, booking diary, reports, and communication.
Can I edit customer details after saving?
Yes, open the customer record at any time to update their details. Changes will apply to future invoices but will not affect previously processed invoices.