Skip to content

You can use a barcode scanner to scan parts on to Bookings, Invoices, Stock Orders or Supplier Invoices in Workshop Software and to quickly complete a stock take.
This article explains how to set up your barcode scanner, update your Products with barcode details, add Products and complete a stock take.
Setup your Barcode Scanner
Barcode scanners are seen by your PC or tablet as a Keyboard, which will type the barcode's content into any selected text box.
- Plug your Barcode Scanner into your computer or connect it to your tablet.
- If this is your first time plugging the scanner into your computer you might have to wait a minute while it sets up the device.
Add a Barcode to Products
In a Product the Item Code, Description, Description 2 and Searchable Tags fields are Searchable.
When entering a Product's barcode use the Searchable Tags field, which does not show on a Job Card, Invoice or Stock Order so is the best option as the field to hold barcode details..
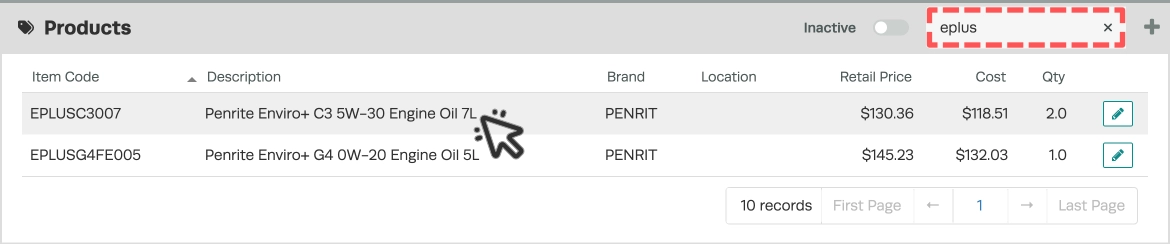
- To add a barcode to a Product search for and bring up the Product details in the main search bar or in your Product List.
- You may filter your Product list to locate your desired Product.
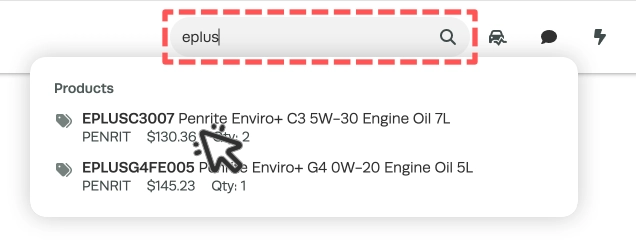
- You may also use the main search bar to find any Product in your system.
- Click into the Searchable Tags field and scan the barcode on the Product. This should insert the barcode number of the Product into the field.
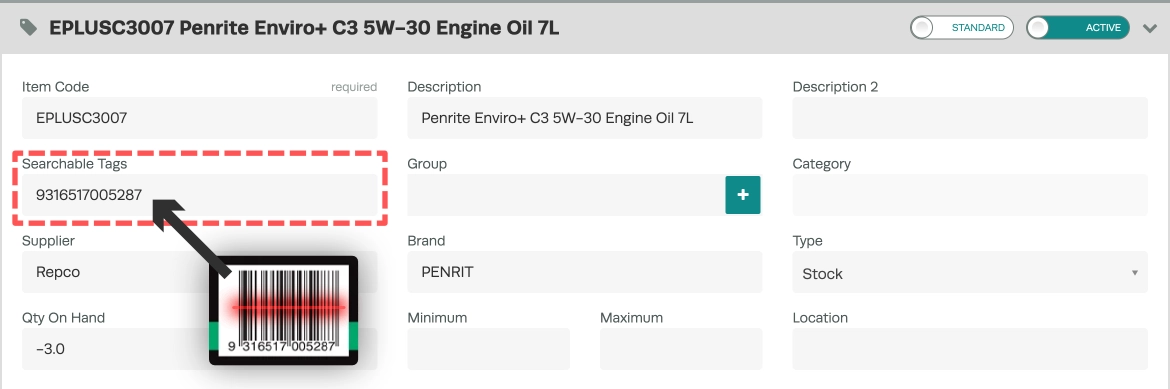
- Click Save in the right hand corner of the Products card to add the barcode as a Searchable Tag.

Adding Products to Jobs/Invoices
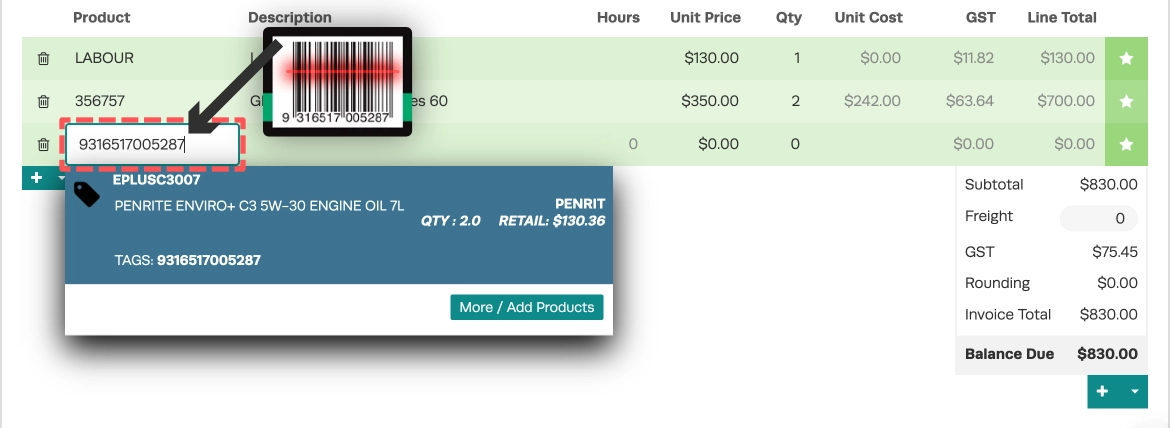
- To add the Product to a Booking, Job Card/Invoice, Stock Order or Supplier Invoice simply click into the Product field and scan the barcode.
- The scanner will insert the barcode number into the field, then click the Product or press enter to select the Product and add it to the list.
Using the Scanner for Stock Take
To use the barcode scanner to perform a stock take you will update the count of individual Products, then review and approve the draft stock take.
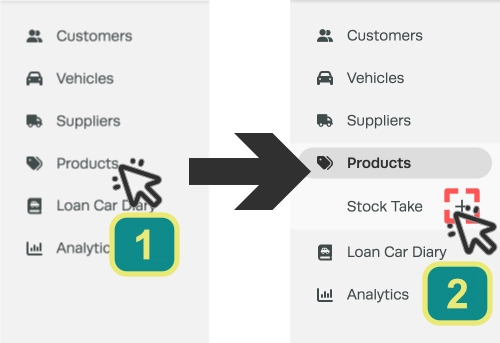
- To start or continue a draft stock take click Products in the left hand sidebar menu then select the + icon next to the Stock Take option to open the Single Item Pop Up.
- Click on the Select A Product field and scan the item with your barcode scanner.
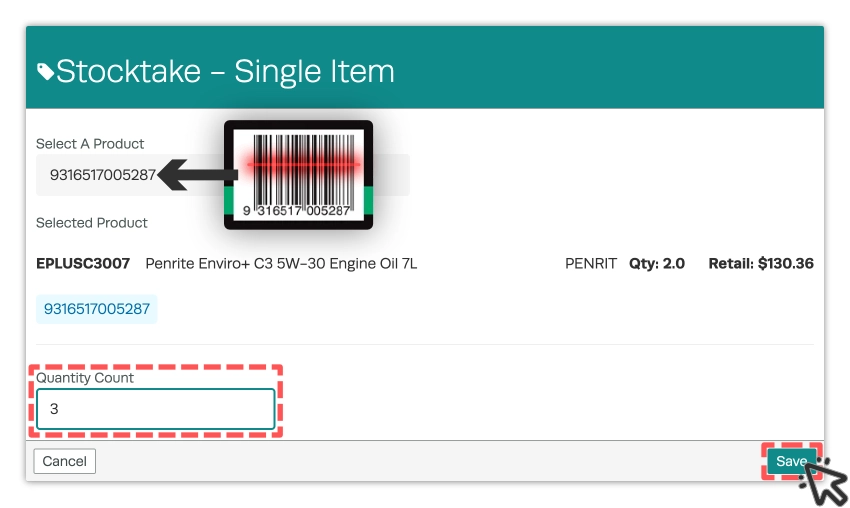
- The scanner will input the barcode number into the field. Update the Quantity Count field and click the green Save button to update your draft stock take.
- A message will appear confirming your draft stock take has been updated, the pop up window will clear and you may repeat this process for each Product you would like to update during the stock take.
- When you are done, click the Cancel button to exit the Single Item pop up.
Finalising a stock take
After you have scanned and updated the quantity of each Product you are able to review and process your draft stock take.
- To open the draft stock take click the Stock Take option in the left hand sidebar menu.
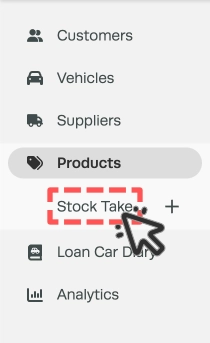
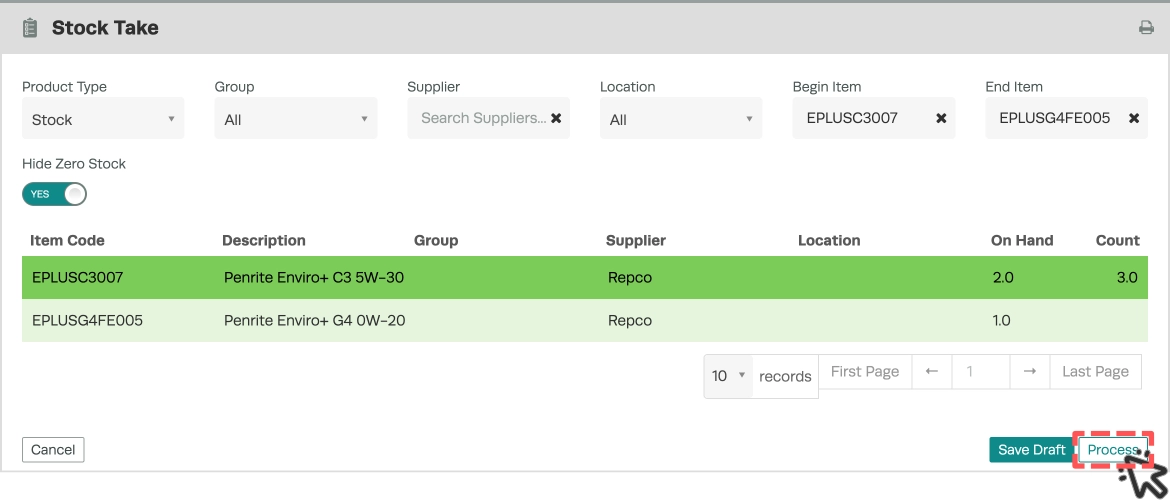
- Products with an updated count will be shaded dark green in the stock take list.
- Review the list and confirm your changes, then click the Process button in the bottom right hand corner of the card to finalise your stock take and update Product quantities.