Skip to content
Integrating Burson Ezyparts with Workshop Software streamlines Product creation and connects the two systems so data flows between them without manual entry. Once set up this integration saves time and reduces the chance of errors when working across platforms. Follow the steps below to configure the integration.
With this integration, you can:
- Create a job or quote, then log directly into your Burson account to check part prices.
- Add parts to your order and return them to Workshop Software.
- Once a quote is approved, order the parts directly from Workshop Software without switching tabs or copying item numbers.
Requirements for Integration
To integrate Burson with Workshop Software, you will need your:
- Username
- Password
- Account Number
You can obtain this information from your Burson Representative or by calling Burson Support at 1300 733 849.
Step-by-Step Integration Process
Enable Workshop Software in Burson Ezyparts
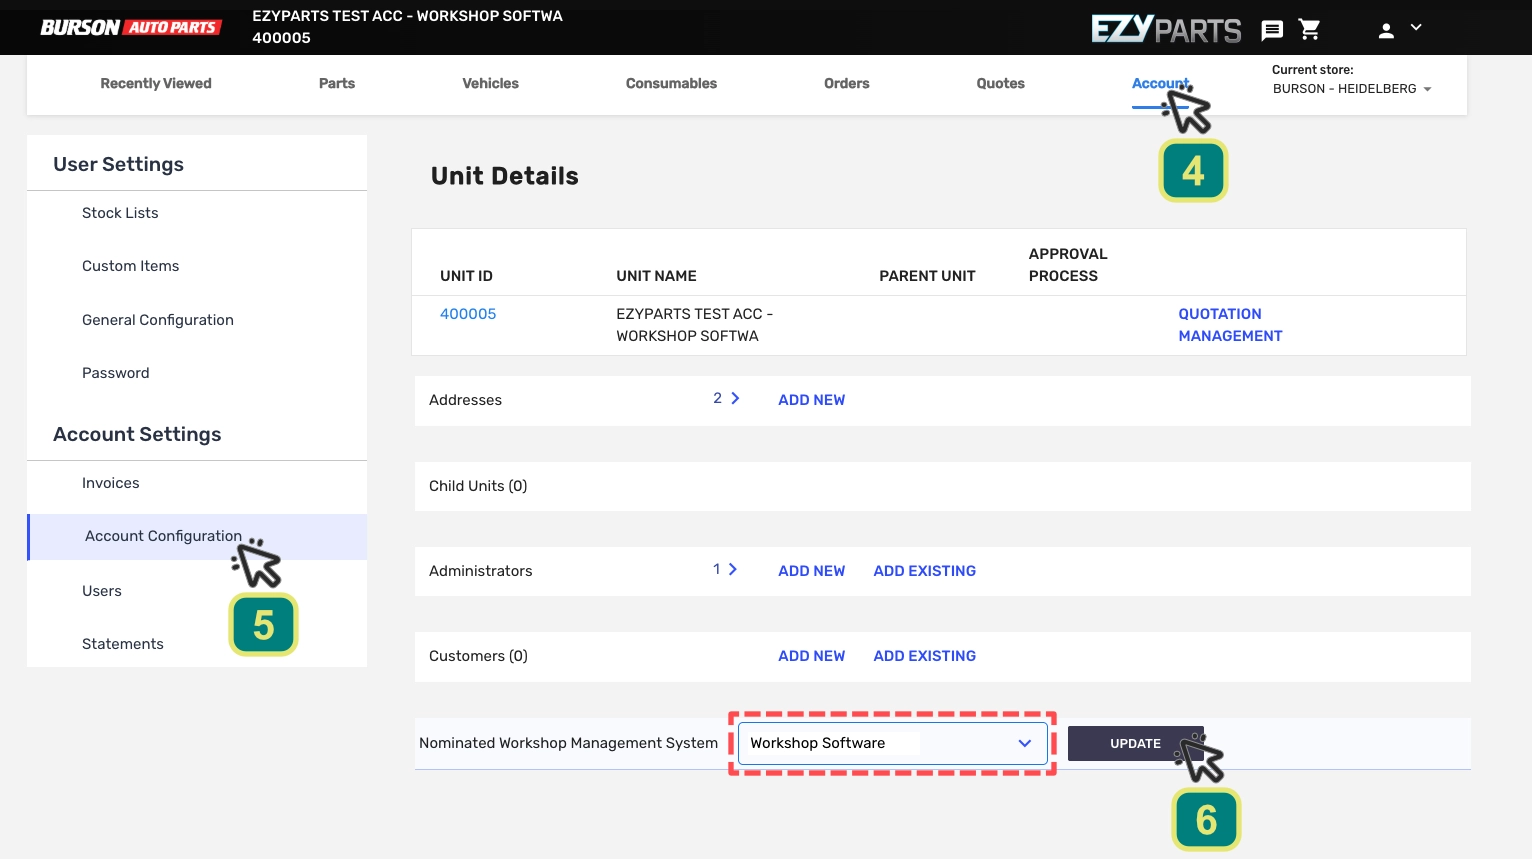
To correctly Order parts using the Burson Integration you must set "Workshop Software" as your Nominated Workshop Managment System inside Ezyparts.
- To check or change this setting open Ezyparts, click the Account tab (1) and choose Account Configuration (2) in the left hand sidebar menu.
- In the Nominated Workshop Management System field select Workshop Software and click Update (3).
Connect Burson to Workshop Software
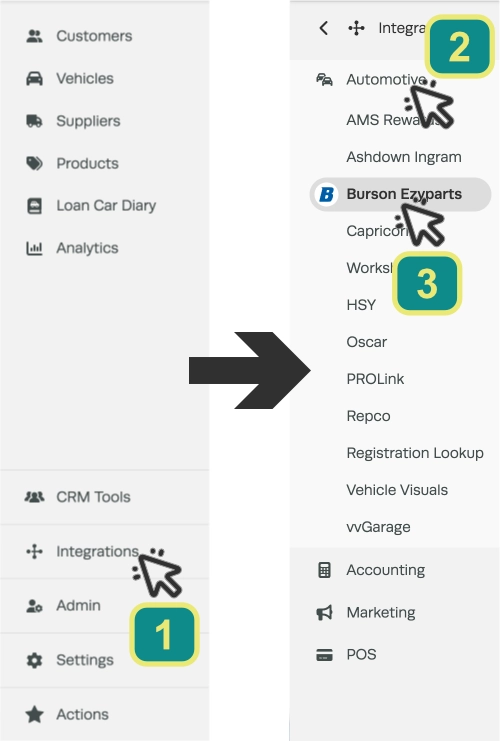
To access the Burson integration click Integrations (4), Automotive (5) then Burson Ezyparts (6) in the left hand sidebar menu.
You’ll see a prompt to activate Burson. Click the Activate EzyParts button to proceed.

Configure Burson
To configure your Burson Ezyparts integration you will need to choose a Workshop Software Supplier, enter your user credentials and choose how prices are updated when a Burson part is Ordered. You may also turn on a function that downloads Burson Invoices automatically.
Please Note: You must complete all fields in this card before Saving. If fields are not complete your Burson integration will not connect and may prevent other system settings from being updated.
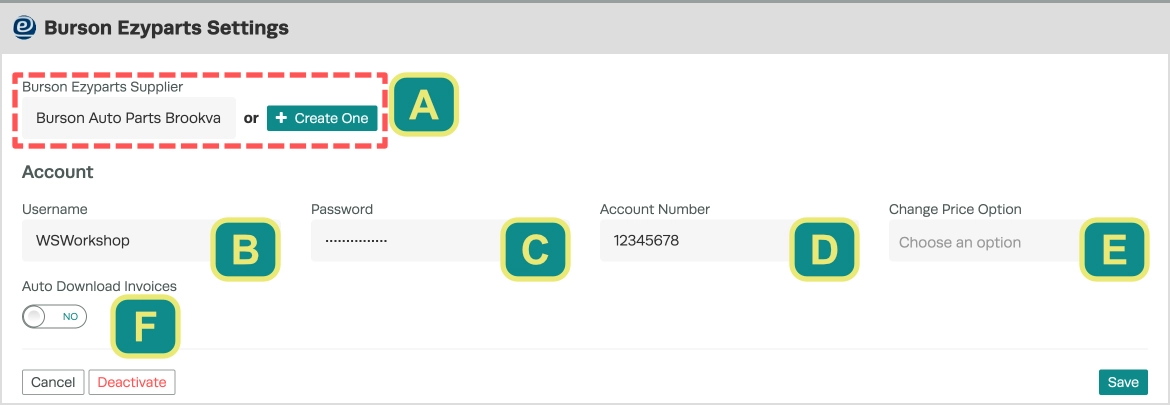
Burson Ezyparts Supplier (A): Choose an existing Burson Supplier record in Workshop Software or create a new one if necessary.
Username (B): Your Burson username.
Password (C): Your Burson password.
Account Number (D): Your Burson account number.
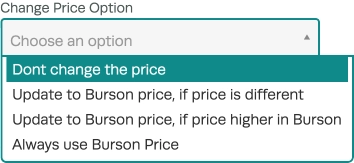
Change Price Option (E): When a Burson part is added to an Invoice or Ordered Workshop Software will compare the Workshop Software price to Burson's price. This drop down menu selects how your Workshop's pricing is updated from this comparison.
Auto Download Invoice (F): When this toggle is set to yes and Burson have been notified to enable "Electronic Invoicing for Workshop Software" Invoices will automatically be imported as Open invoices and ready for Processing in the designated Burson Ezyparts Supplier's list of Invoices.

Please Note: If Burson Invoices are downloaded automatically you MUST Process each invoice and log that payment has been made regularly, otherwise a large backlog of Open invoices will be collected on your assigned Burson Supplier record.
Once you have entered your information click the Save button.

Your Burson integration is now active in Workshop Software. This guide explains how to Order Parts with the Burson Integration.
For any additional support, please contact Burson Support at 1300 733 849.