 Skip to content
 This article explains how to edit a processed invoice by copying it in Workshop Software. Copying will create a new invoice with a different invoice number, allowing you to make changes while preserving the original record.
Please note: Copying a processed invoice will create a new invoice with a different invoice number. You will then need to apply a customer credit of the original invoice value or void the original invoice.
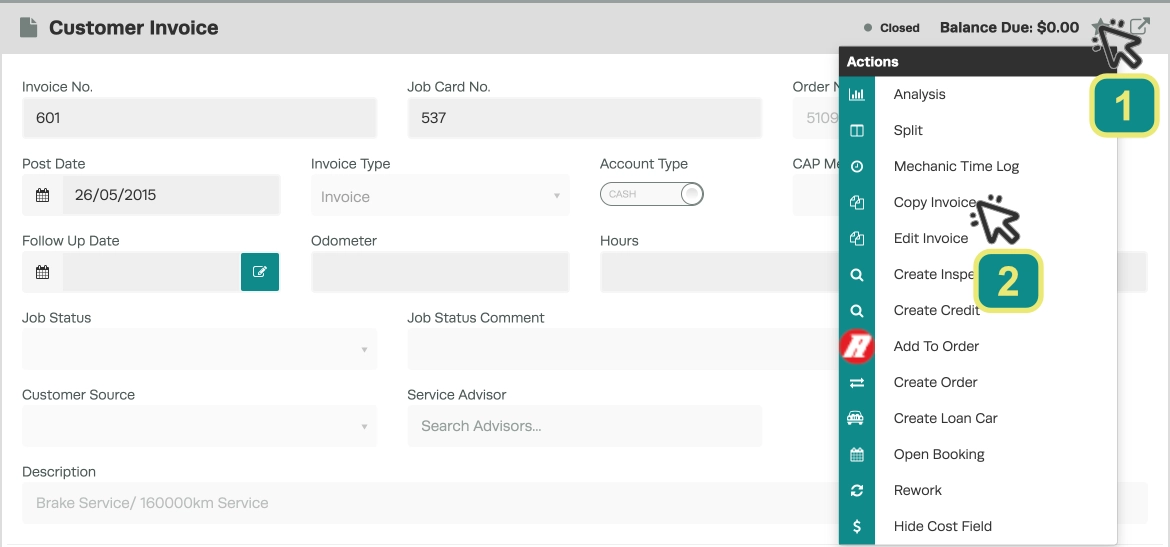
Step 1: Copy the Processed Invoice
- Open the processed invoice you want to edit.
- Click the Star button (1) on the right-hand side of the invoice, then click Copy Invoice (2).
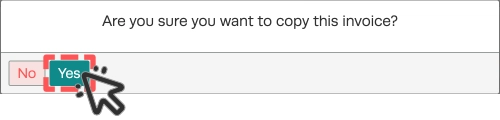
Step 2: Confirm and Save the Copy
- A pop-up box will appear asking “Are you sure you want to copy this invoice?” — press Yes.
- Your invoice title will now appear with a green dot and statement it is open
![]()
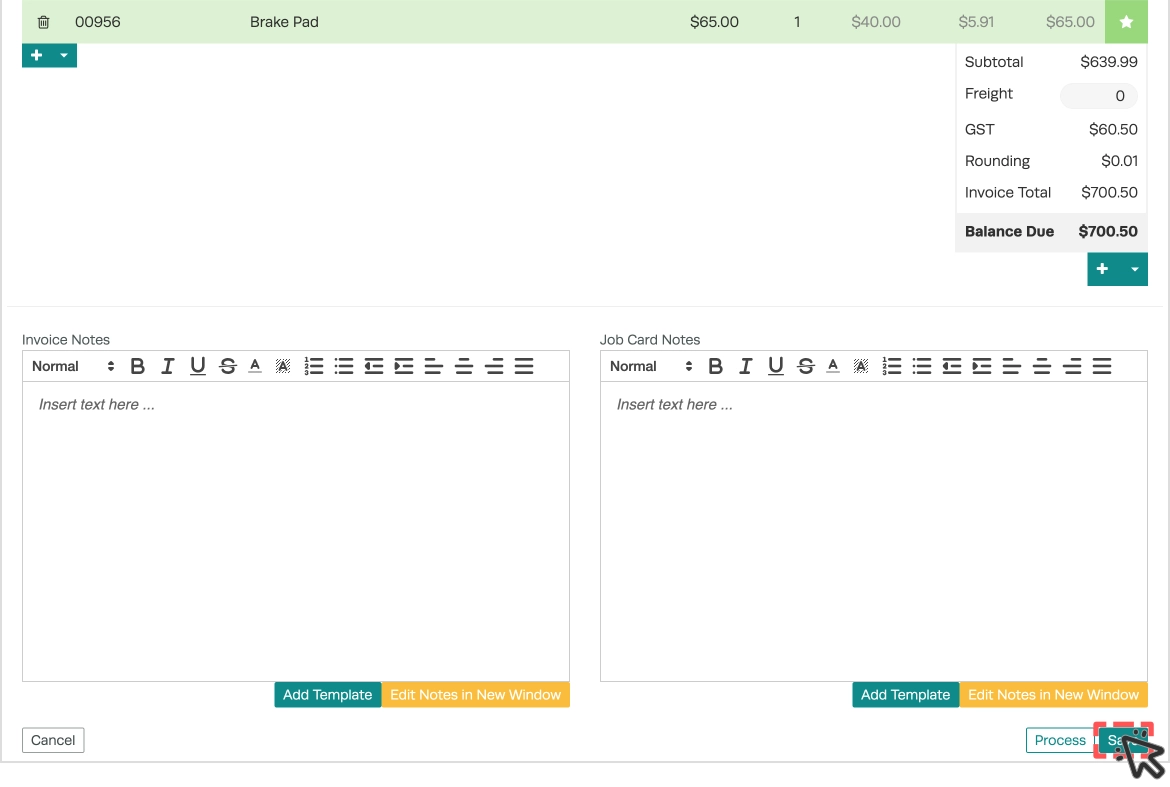
- Press Save on the bottom right of the invoice.
Step 3: Edit and Finalise
- Edit your desired fields on the new invoice.
- Press Save again.
- Go back to your original invoice and apply a Customer Credit matching its value or void it to ensure a correct customer balance is now recorded.
Good to Know
- The copied invoice will have a new invoice number — it is not a direct edit of the original.
- Always void or apply a customer credit at the value of the original invoice after copying to ensure accuracy in your records and accounting system.
