With this update, you now have the power to manage your entire workshop’s front-end operations right at your fingertips. The new booking diary feature includes a useful option to view bookings by individual mechanics, allowing technicians to efficiently manage their tasks.
You can view bookings in monthly, daily, or list formats, providing a clear overview of your schedule and making it easy to manage appointments. Additionally, the update allows you to add new bookings, modify existing ones, and the enhanced search functionality ensures finding specific bookings is quick and simple.
To enable these new features, follow these steps:
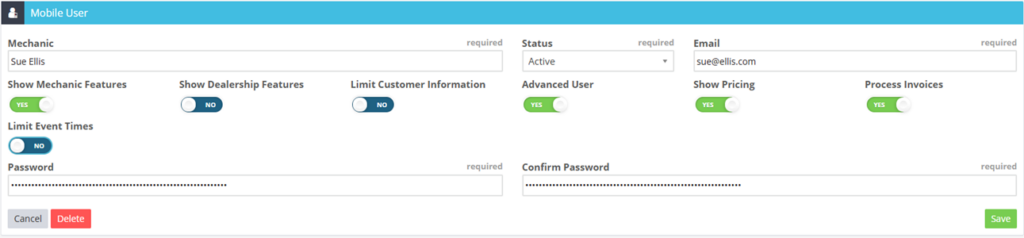
Navigate to Settings > User Setup/Maintenance > Mobile User.#
Booking Diary
Once you have turned these features on, log into the Mobile App. You will notice a Booking Icon bottom left hand corner
Select the date you would like to view bookings for.
Once a booking is assigned to a technician, you will see the technician’s initials displayed on the right side of the booking, along with the time the booking is assigned to them.
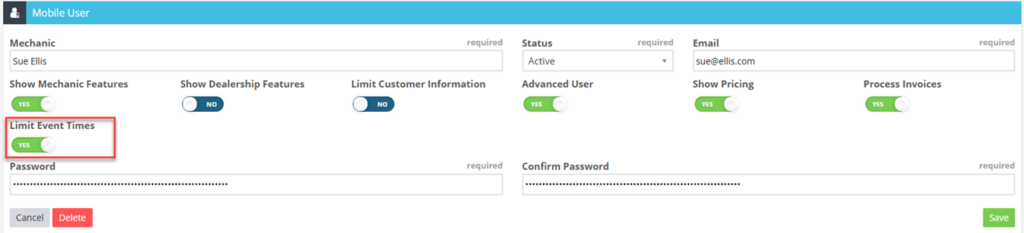
If "Limit Event Times" is set to "Yes," the technician will only be able to view the bookings that are specifically assigned to them.
To access a list view of bookings, press the three lines in the top right-hand corner. (Note: If "Limit Event Times" is set to "Yes," the list view will not be available.)
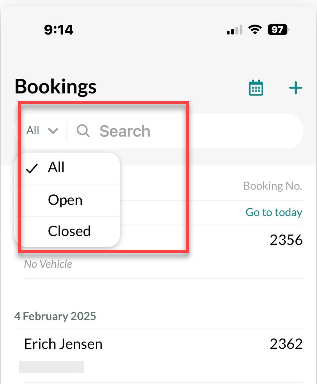
The list view displays past, current, and future bookings. You can press on the booking number to be taken directly to that specific booking.
By pressing "All" next to the search bar, you can access both open and closed bookings.
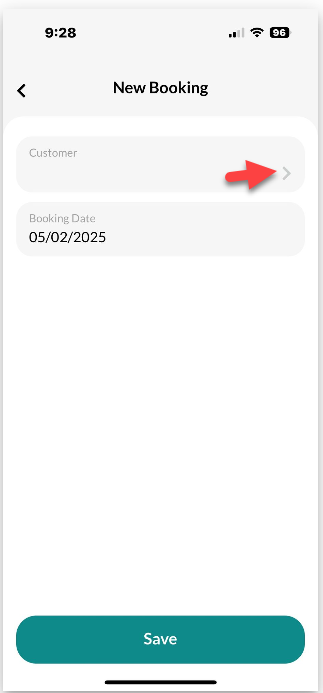
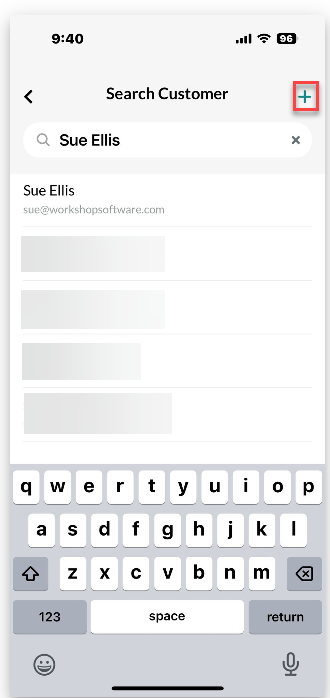
To create a new booking, press the "+" in the top right-hand corner. This will take you to a new screen where you can create the booking. (Note: If "Limit Event Times" is set to "Yes," Creating a new Booking will not be available.)
Selecting a Customer Vehicle and Date for the Booking#
Press the arrow in the Customer field to select an existing customer or, Press the "+" to create a new Customer. Then Press Confirm
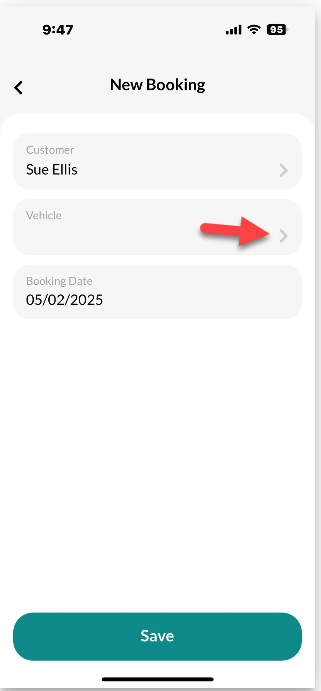
Once a customer is selected, the option to select a vehicle will become available. Press the arrow in the Vehicle field to choose a vehicle, or Press the "+" to create a new Vehicle.
Then press confirm
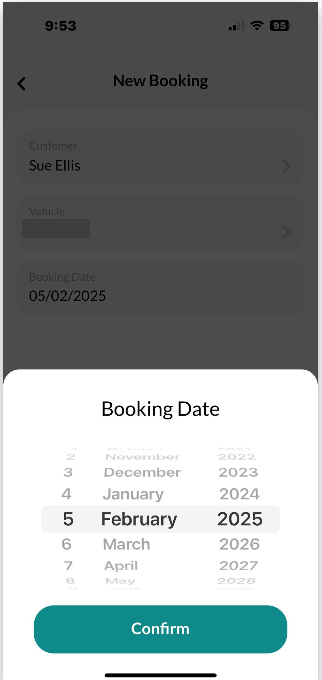
Next, select the booking date by pressing on the Booking Date field. Choose the desired date and confirm your selection.
Saving the Booking
Once the customer, vehicle, and booking date are selected, press "Save" to complete the booking.
Booking Overview
Once saved, you will be directed to the Booking Overview screen. From the Overview page, you can start the job, view the booking total, add products to the booking before the job starts, and see the booking date, customer details, and vehicle details.
In the Labour tab, you can select the mechanic to assign to the booking by pressing the arrow in the box.
Press on Edit top right hand corner
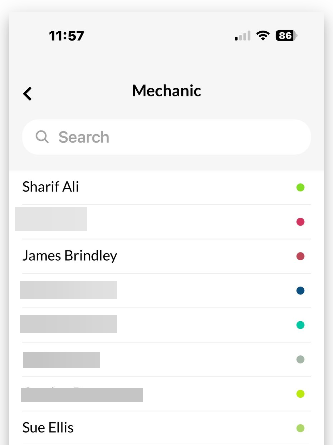
Press the arrow in the Mechanic field to bring up the list of mechanics
.
Search for your desired mechanic and press on their name to select them.
Once the mechanic is selected, you will be taken to the Labour details for the booking. You can:
Change the date by pressing on the Date field then confirm#
Change the time by pressing on the Time field then confirm
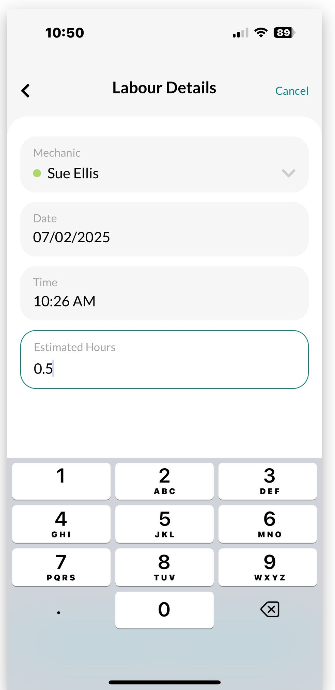
Adjust the estimated hours by pressing on the Estimated field
Then entering the Estimated Time required
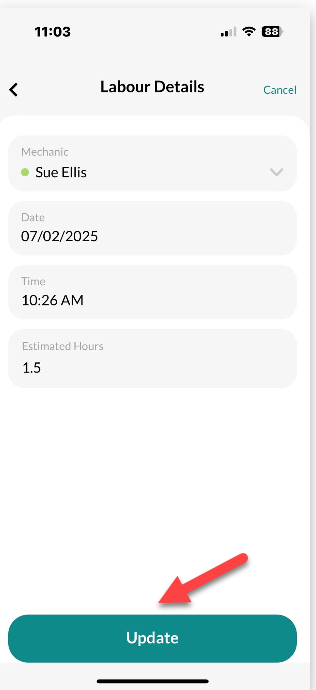
Once the changes have been made, press "Update" to save the changes.
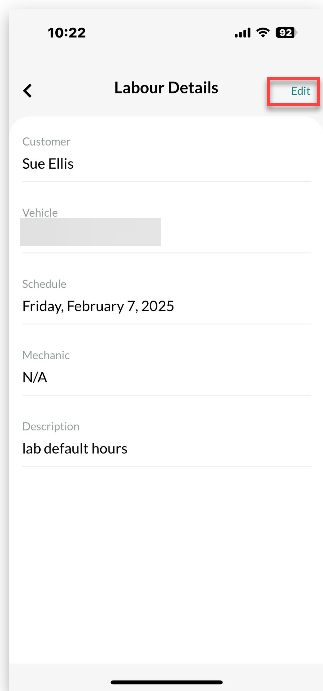
Once updated, you will see the customer name, vehicle, schedule, and a description of the labour hours. If this information is correct, press the arrow to go to the Booking Diary.
If you need to make further changes, Press Edit top right hand corner
When you select the arrow to return to the booking, you can add more labour lines to the booking by pressing the green "+" button in the bottom right-hand corner.
Once all fields are filled out and correct, press "Save" to save the new labour event.
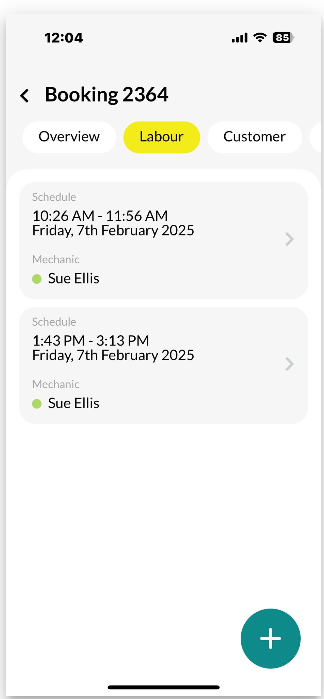
You will then be taken back to the booking's Labour field, where you can see both labour lines scheduled.
Press the arrow in the top right-hand corner to return to the Labour details.
Navigating to the Booking Diary or Starting the Job#
Either select the arrow in the top right-hand corner to go to the Booking Diary, or go to the booking to start the job.
When you select "Start Job"
The Booking will then be converted into a Job Card
Refer to the Invoice Function in the Mobile App for more details on how the mobile app handles invoice creation and management. For comprehensive guidance, please visit the following link: Invoice Functionality in the Mobile App.
 Skip to content
 Booking Diary
Once you have turned these features on, log into the Mobile App. You will notice a Booking Icon bottom left hand corner
Booking Diary
Once you have turned these features on, log into the Mobile App. You will notice a Booking Icon bottom left hand corner
 Select the date you would like to view bookings for.
 Once a booking is assigned to a technician, you will see the technician’s initials displayed on the right side of the booking, along with the time the booking is assigned to them.
 If "Limit Event Times" is set to "Yes," the technician will only be able to view the bookings that are specifically assigned to them.

 The list view displays past, current, and future bookings. You can press on the booking number to be taken directly to that specific booking.
 By pressing "All" next to the search bar, you can access both open and closed bookings.

 Then press confirm


 Booking Overview
Once saved, you will be directed to the Booking Overview screen. From the Overview page, you can start the job, view the booking total, add products to the booking before the job starts, and see the booking date, customer details, and vehicle details.
Booking Overview
Once saved, you will be directed to the Booking Overview screen. From the Overview page, you can start the job, view the booking total, add products to the booking before the job starts, and see the booking date, customer details, and vehicle details.

 Press on Edit top right hand corner
 Press the arrow in the Mechanic field to bring up the list of mechanics
.
Press the arrow in the Mechanic field to bring up the list of mechanics
.  Search for your desired mechanic and press on their name to select them.
 Once the mechanic is selected, you will be taken to the Labour details for the booking. You can:

 Change the time by pressing on the Time field then confirm

 Adjust the estimated hours by pressing on the Estimated field
 Then entering the Estimated Time required
 Once the changes have been made, press "Update" to save the changes.
 If you need to make further changes, Press Edit top right hand corner
 When you select the arrow to return to the booking, you can add more labour lines to the booking by pressing the green "+" button in the bottom right-hand corner.

 Then Select the Labour line you wish to add

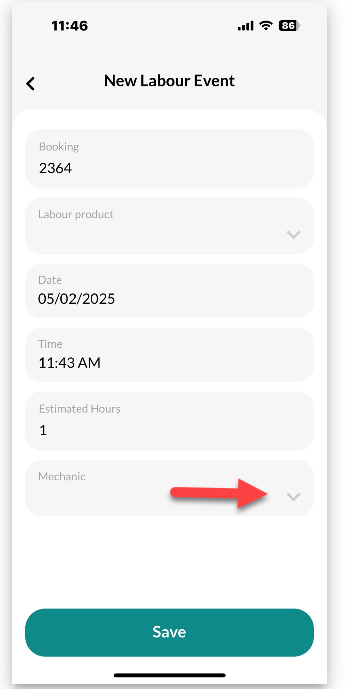 Select Mechanic from list
 You will then be taken back to the booking's Labour field, where you can see both labour lines scheduled.

 When you select "Start Job"
 The Booking will then be converted into a Job Card
 Refer to the Invoice Function in the Mobile App for more details on how the mobile app handles invoice creation and management. For comprehensive guidance, please visit the following link: Invoice Functionality in the Mobile App.