Skip to content

A Booking can be created without a Mechanic and assigned to one later. This article shows how to assign a Mechanic in the Booking Diary and how to do it from the full Booking details page. For an overview of the diary, see Using the Booking Diary.
Please note: Ensure your Mechanics are set up in Workshop Software. See this guide: How to Add a Mechanic
Assign a Mechanic in the Booking Diary
When Creating a Booking
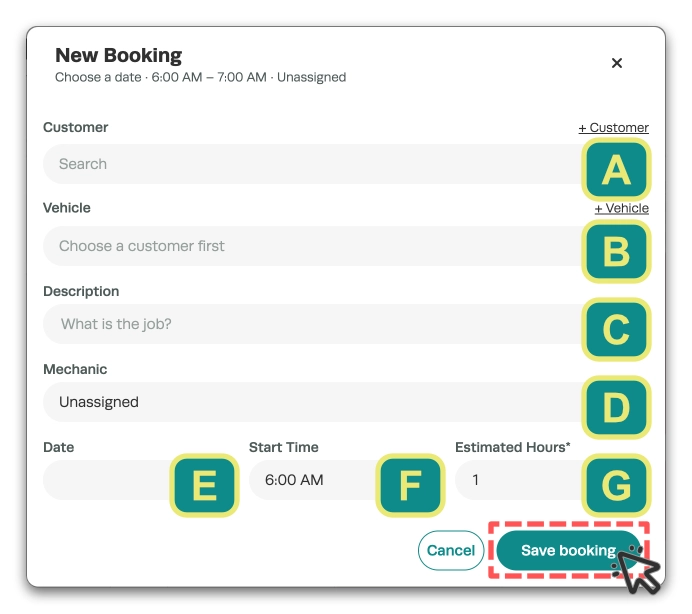
- Double-click an empty time in a Mechanic's column, or click + Booking.
- The New Booking window opens with the date, time and Mechanic filled in if you started from a Mechanic's column. Otherwise the Mechanic shows Unassigned.
- Choose the Mechanic (D) if needed, then click Save Booking.
Drag an Unassigned Booking onto a Mechanic
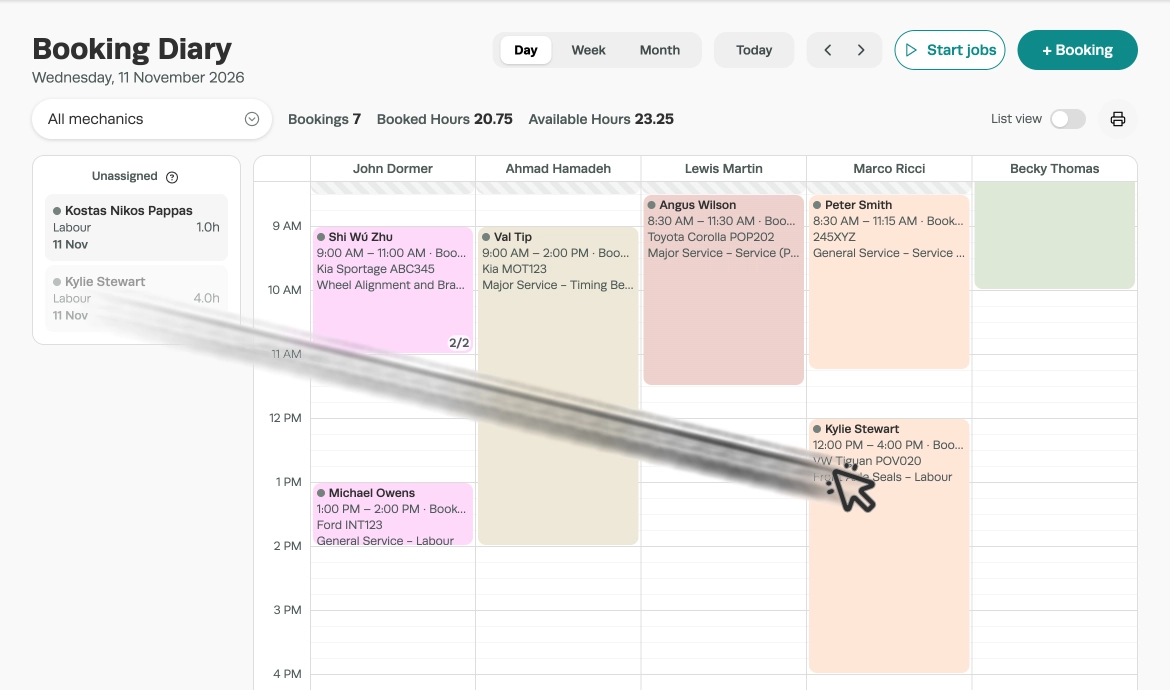
- Open the Booking Diary in the Day view.
- Unassigned Bookings for that day appear in the Unassigned column on the left, along with Bookings with no date and split parts.
- Drag the card onto the Mechanic's column at the time you want. It is booked there straight away.
Please note: You can't book a time that has passed, a message on screen tells you why a move was refused.
Change the Mechanic from the Booking's card
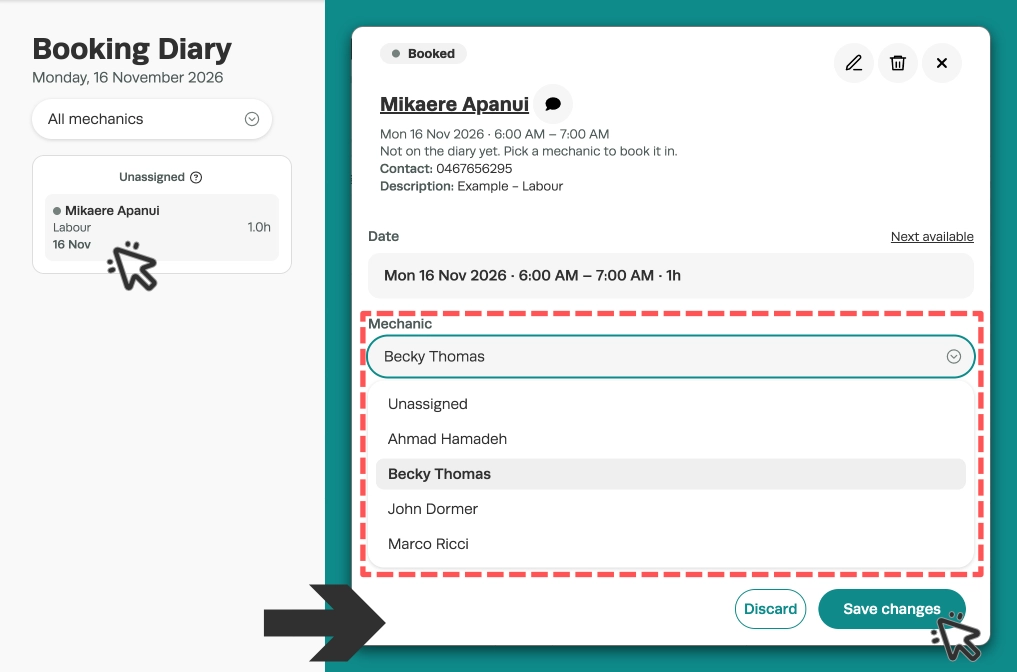
- In the Booking Diary's Day view click a box in the Unassigned column to open its card.
- Select the Mechanic field, choose a Mechanic, set the date and time if needed then click Save changes.
- You may also click Next available to see the next free time from your Mechanic team.
Find Unassigned Bookings in other views
The Unassigned column only shows in the Day view.
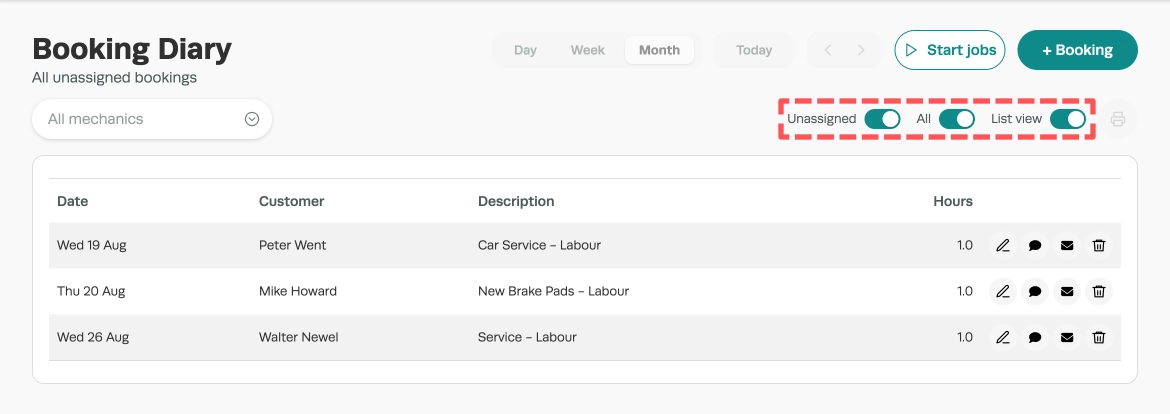
In the List view, switch on the Unassigned and All toggles to list every Booking with no Mechanic then click a Booking to open it and assign a Mechanic from its card.
Assign a Mechanic from the Booking Details Page
Some places in Workshop Software open a Booking to the full Booking Details page instead of the diary, you can also open it with the pencil on a Booking's card. A Mechanic is assigned here through the Event Time editor.
Please note: A Labour product line must be included in the Booking for it to appear in the Booking Diary
- Once you have added the Labour line and any other products to the Booking, click Save at the bottom-right corner of the screen.
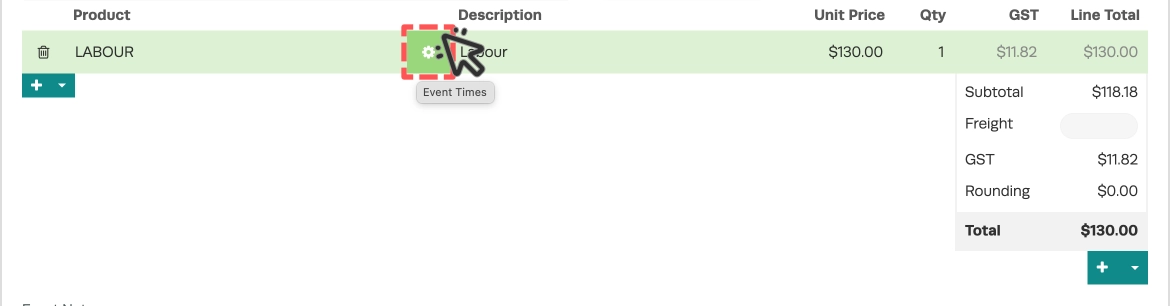
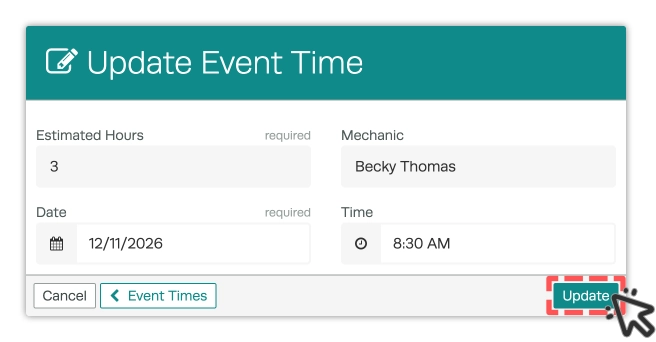
- Click on the Cog icon inside the Labour Product line to open the Event Time editor.
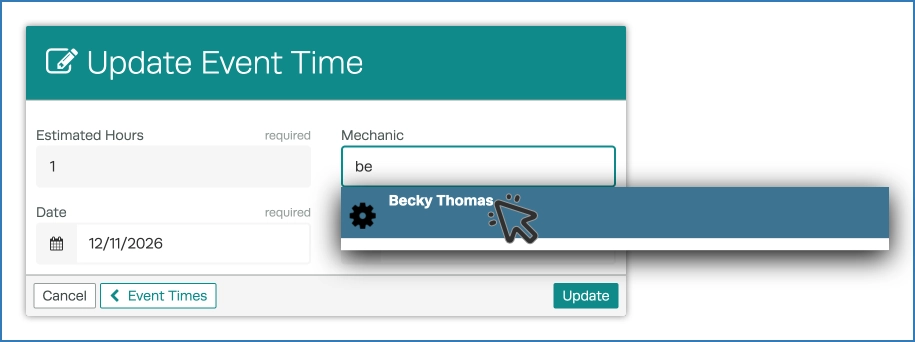
- In the pop up select the Mechanic field, then search for the Mechanic you wish to assign to this job and choose from the search results.
- If you know the start time for the job you may update the Time field and the Estimated Hours.
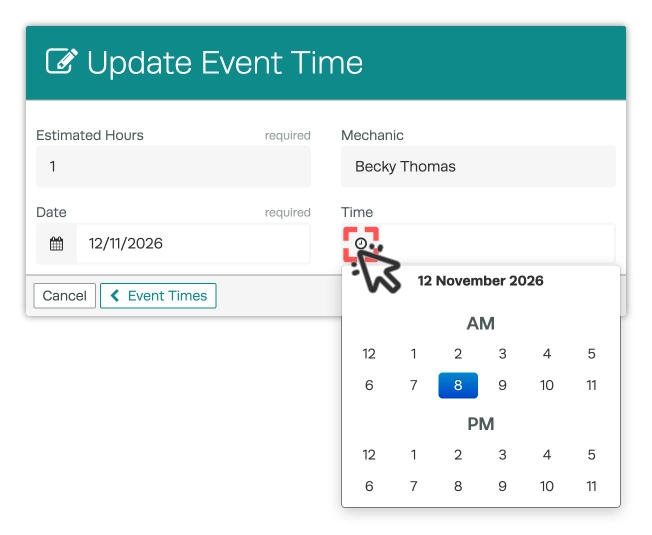
- After entering all the details, click Update.
- You may also Create multiple event times for a single job. See Create and Manage Event Times Across Multiple Days for more details.
- Open the Booking Diary and go to the date. You will see the Mechanic assigned to the job on their calendar.
Related Articles
- Using the Booking Diary
- How to Create a Booking in Workshop Software
- Create a Booking Across Multiple Days