 Skip to content
 This article explains how to print a job card for a single vehicle or bulk print all job cards for a specific day in Workshop Software. If you are running a paperless workshop using a tablet, you do not need to print job cards — the mechanic can view them on-screen.
Step 1: Print a Single Job Card
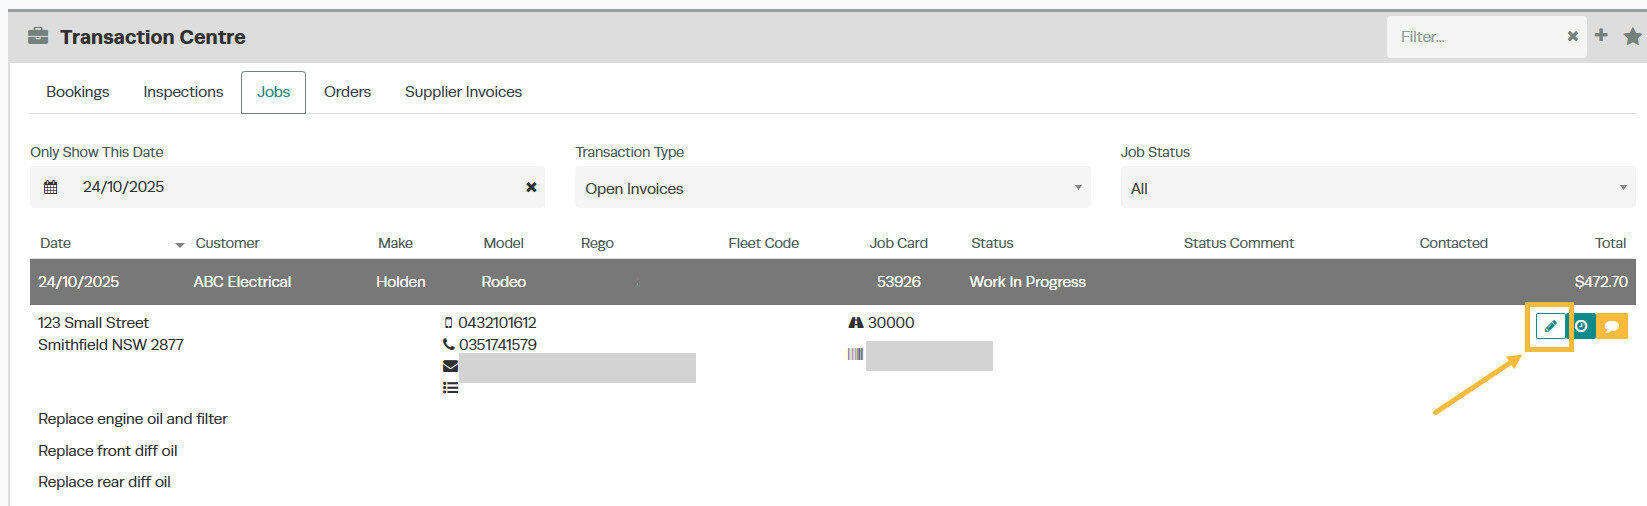
- Click on Transaction Centre.

- Click on the customer details for an existing job, then press the Pencil icon to open the invoice.
- Add any information or notes you want the mechanic to see in the Job Card Notes section at the bottom right-hand corner of the page. Notes entered here will only appear on a job card — they will not print on an invoice.
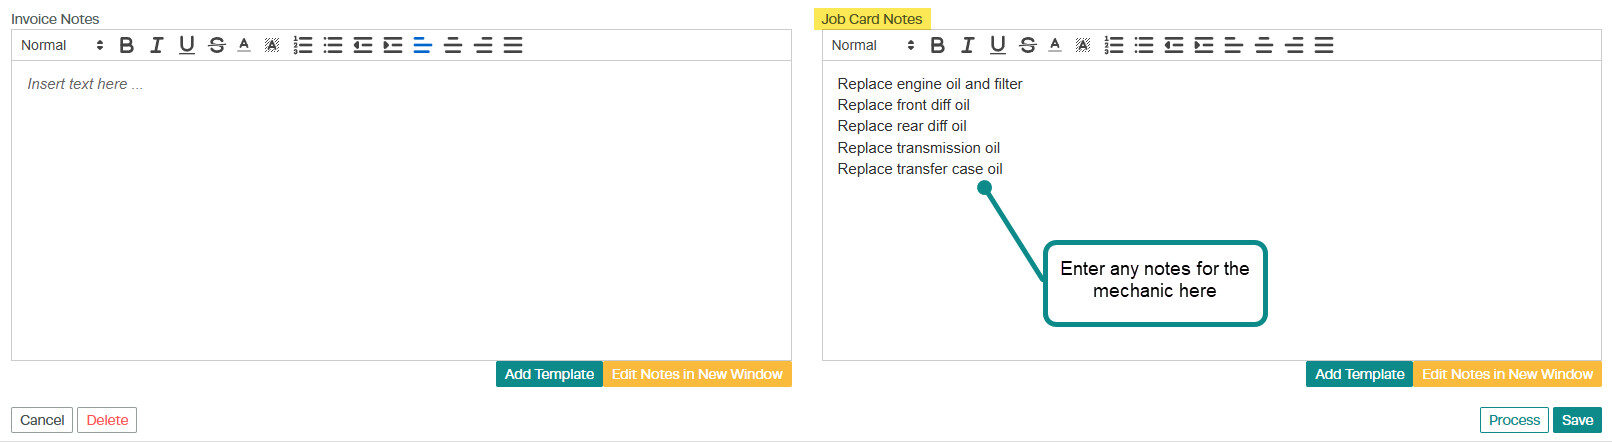
- Once you have saved any job notes, click on the pop-out icon next to the Star icon on the right-hand side and select Print Job Card from the drop-down menu.

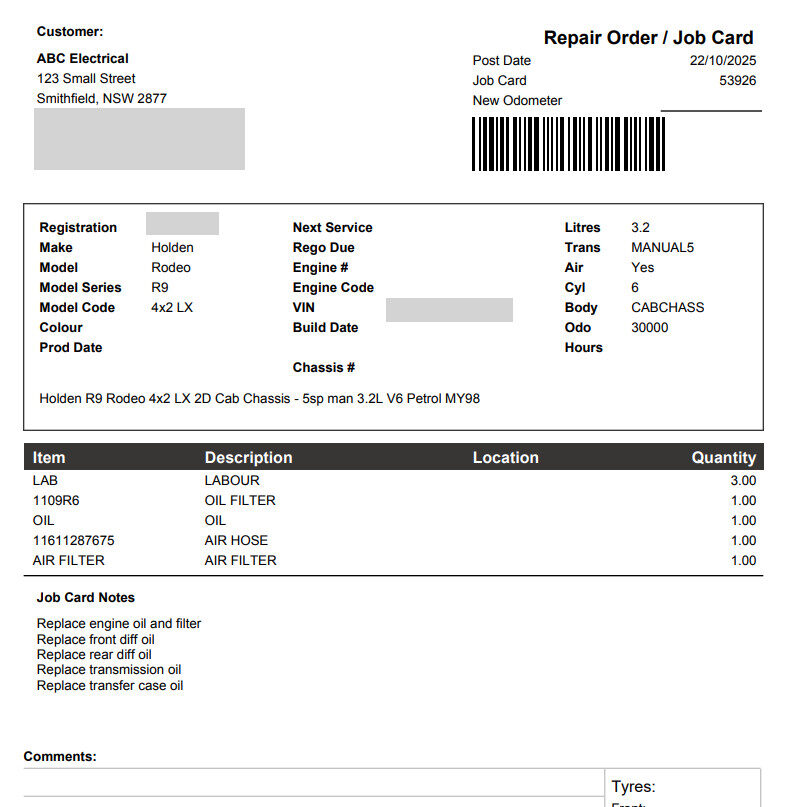
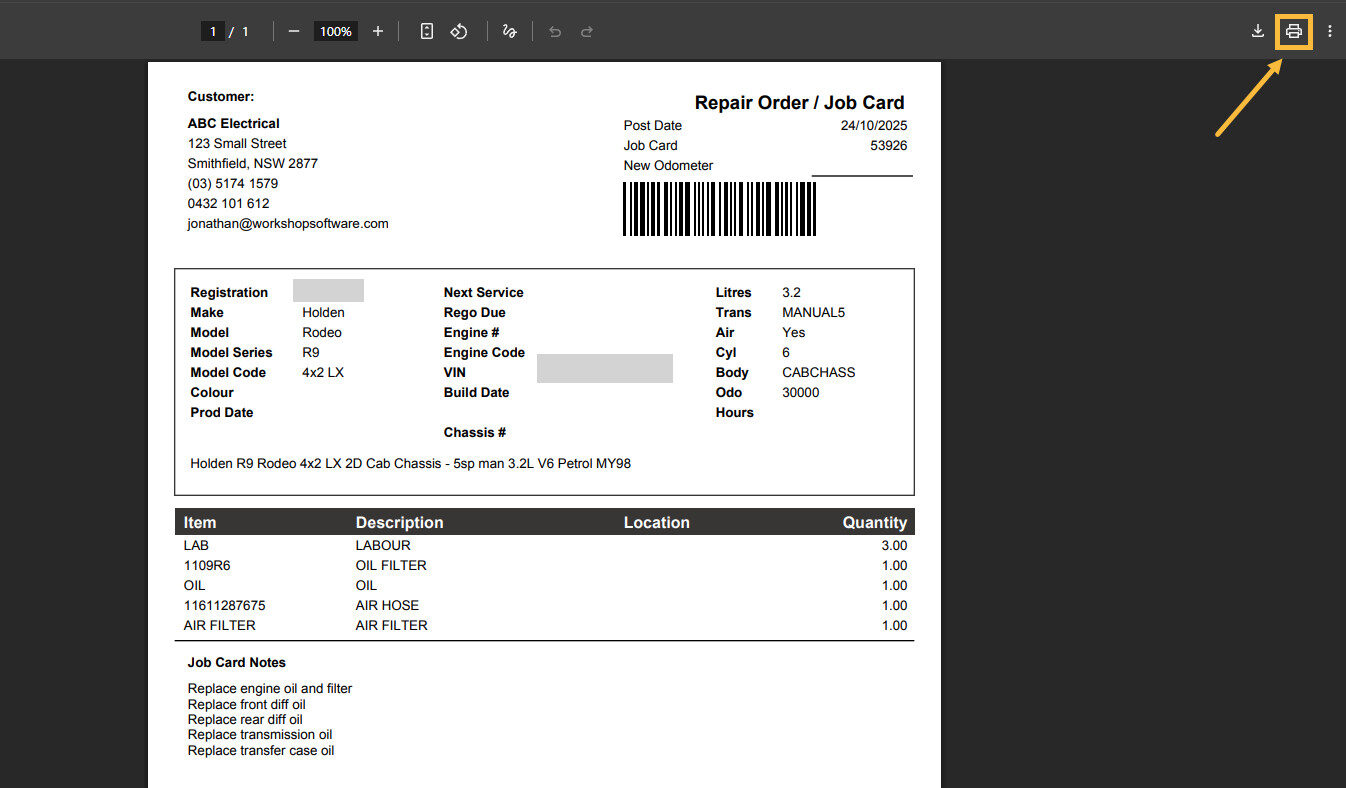
- The job card will open in a new tab for you to view and print. The mechanic can add notes by hand, which can then be entered into Workshop Software later.
Please note: Gold subscription users using the mobile app can have mechanics add or change job card notes directly via the app, which will automatically sync to Workshop Software.
Step 2: Bulk Print Job Cards for a Day (Gold Users)
Gold subscription users and above can bulk print all job cards for a specified date. There are two places to do this.
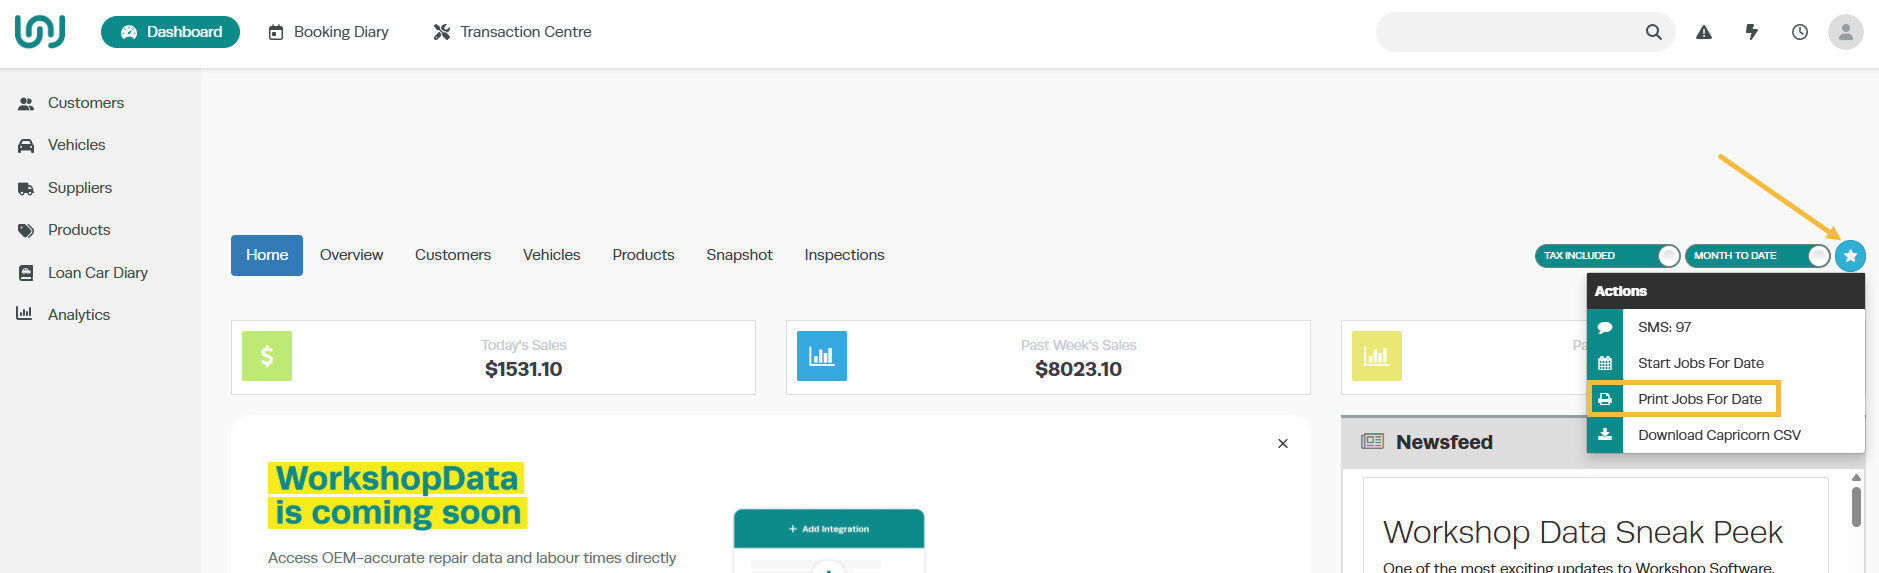
From the Dashboard
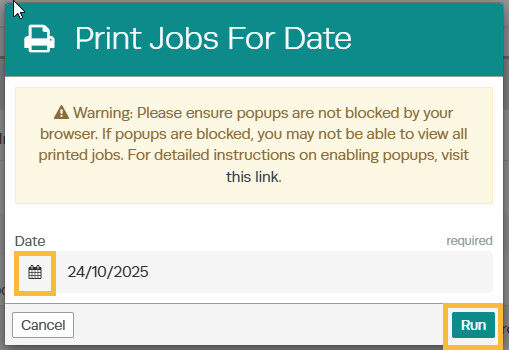
- On the Dashboard, click the Star icon in the top right-hand corner above the sales figures, then select Print Jobs for Date.

- Enter the date you want to print job cards for, then click the green Run button.

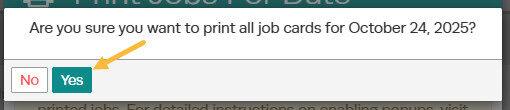
- A pop-up will ask if you are sure you want to proceed — click the green Yes button.
- All job cards for the specified day will open in a new tab. Hover over the top right-hand corner to access the print options.

From the Transaction Centre
- Click on the Star icon.

- Select Print Jobs For Date from the drop-down menu.
- Enter the date and click the green Run button.
- Confirm by clicking Yes, then the job cards will open in a new tab for printing.
Good to Know
- Job Card Notes only appear on the printed job card — they do not print on customer invoices.
- Bulk printing of job cards for a specific date is available for Gold subscription users and above.
- Gold users with the mobile app can have mechanics update job card notes digitally without needing to print.
