Skip to content
This article shows you how to connect Repco NavigatorPro to Workshop Software, including where to find your Site Code, Account Number and Account Suffix in NavigatorPro.
Before you start: Please make sure you have your Repco account and login information.
Repco Account Information
You can get your Repco account information from Repco Navigator Pro as follows.
- Go to the top left hand corner of your Repco Navigator Pro, you can obtain the following:
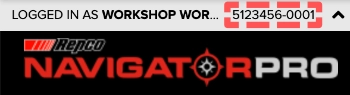
Account Number: The first seven digits of the number before the -.
Account Suffix: The four digits after the -.
- You can obtain your Site Code by clicking on Admin in the top right hand corner, then selecting Site Settings.

- The Site Code will be listed.

Integrate with Workshop Software
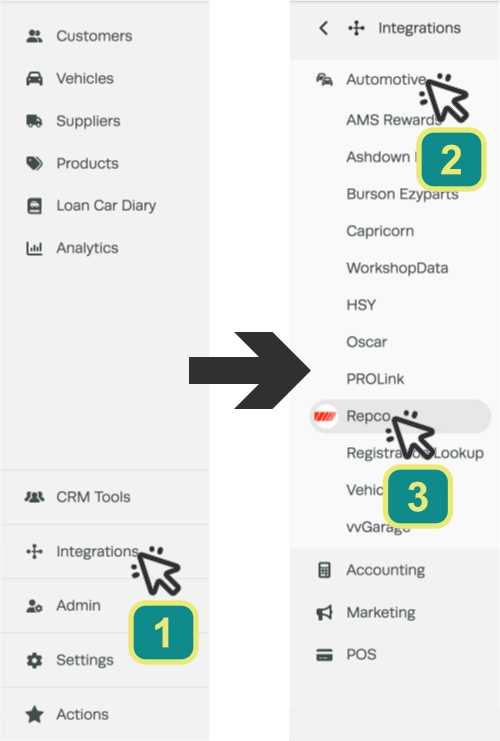
- In the left hand side bar menu, click Integrations then Automotive.
- In the additional menu list that appears, please select Repco.
Please note: If you have not already setup Repco as a supplier, please do so now by following Add or edit a supplier, or follow the steps below.
- You will be asked if you want to Activate Repco. Please select the green Activate Repco button to continue, then select Yes when prompted.

Please Note: While the pop up window will ask if you "want to purchase Repco" you will not be charged, there is not cost to enable Repco.
- In the Repco Supplier field (A) search for and click on your Repco supplier, or use the green + Create One button to create a new supplier.
PLEASE NOTE: If you are integrated with an accounting application and you have a Repco Supplier record already, please use that supplier record for your integration, this will ensure all future Supplier Invoices will sync to the same Supplier.
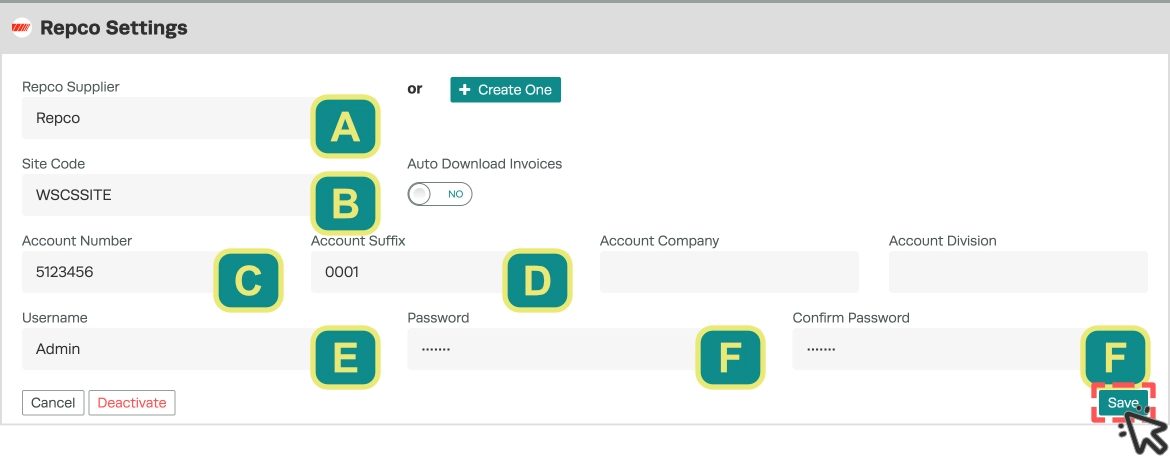
- Enter your Site Code (B), Account Number (C), Account Suffix (D), Username (E) and Password (F) in the fields provided.
Please Note: The Company and Division field are not commonly used, but may be required if you are part of a larger network of companies.
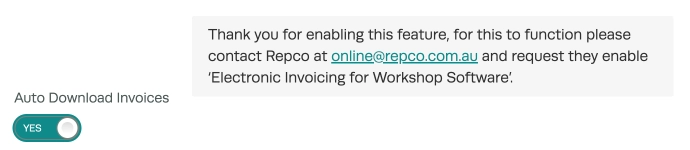
Auto Download Invoices: When this toggle is set to Yes and Repco have been notified to enable "Electronic Invoicing for Workshop Software" Invoices will automatically be imported as Open invoices and ready for Processing in the designated REPCO Supplier's list of Invoices.
- Click the green Save button, your Repco Integration is now configured.
You may now follow the instructions in this article to add Repco Products to an Invoice and to order them.