Skip to content
This guide will explain Workshop Software's online Public Booking feature where your customers are able to request a Booking themselves, any time, any place.
Please note: This is a feature for gold subscriptions, click on your dashboard and press upgrade to get access to this awesome feature!
Configuring your Public Booking Page
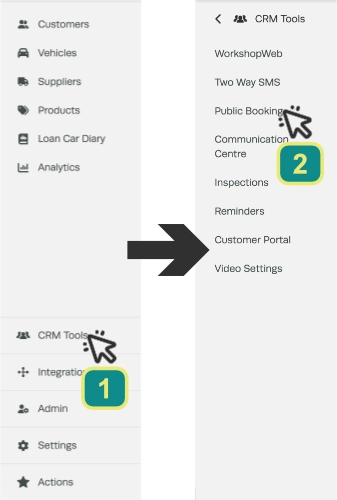
- To access and update your Public Booking settings first select CRM Tools (1) in the left hand sidebar menu, then click Public Booking (2).
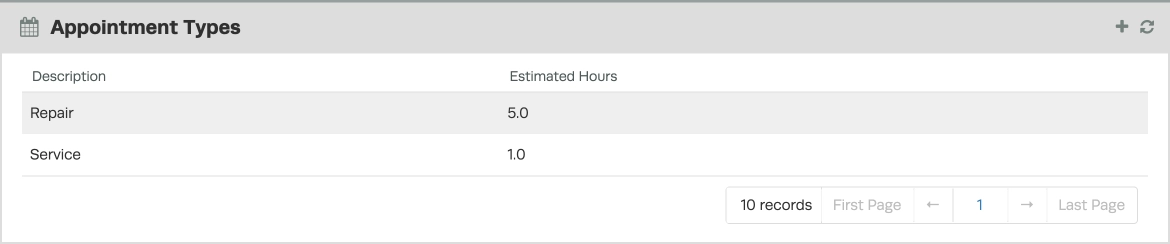
- In the Appointment Types card you are able to configure Booking types tailored to your business, we have a separate guide on How to set up your Appointment Types
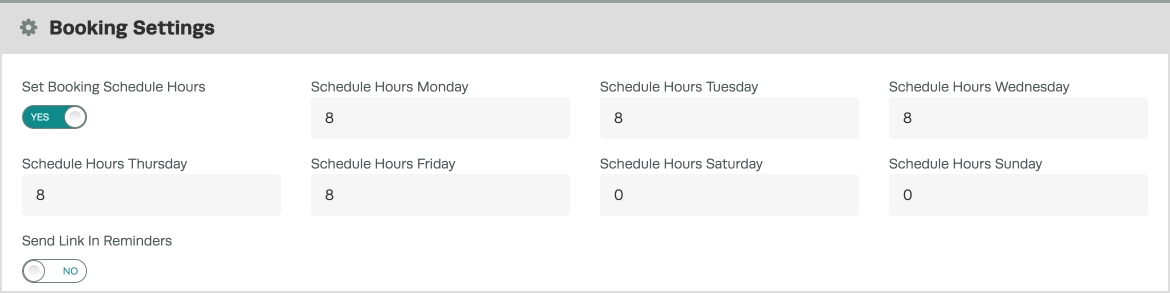
- In the Booking Settings card you may define your available Booking hours and select if reminders include a link to access the Public Booking page.
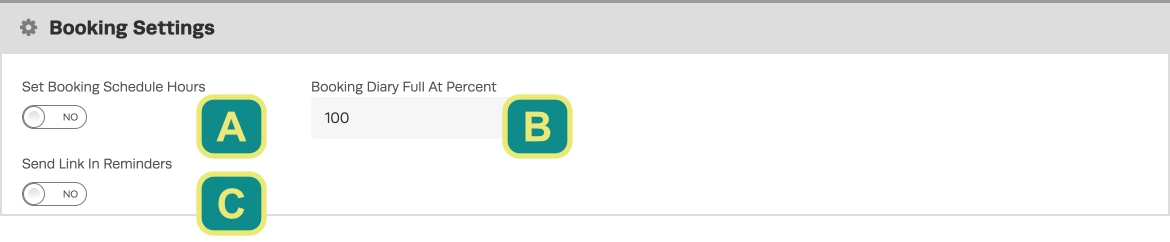
Set Booking Schedule Hours (A) - When this toggle is enabled users may select the number of bookable hours for each day of the week, otherwise availability is based upon the combined number of hours available each day in your Mechanics' schedules.
Booking Diary Full at Percent (B) - This field is used as a multiplier for your available Mechanic time, for example if set to 50 % Booking requests will be available until half the total mechanic hours are allocated for each day.
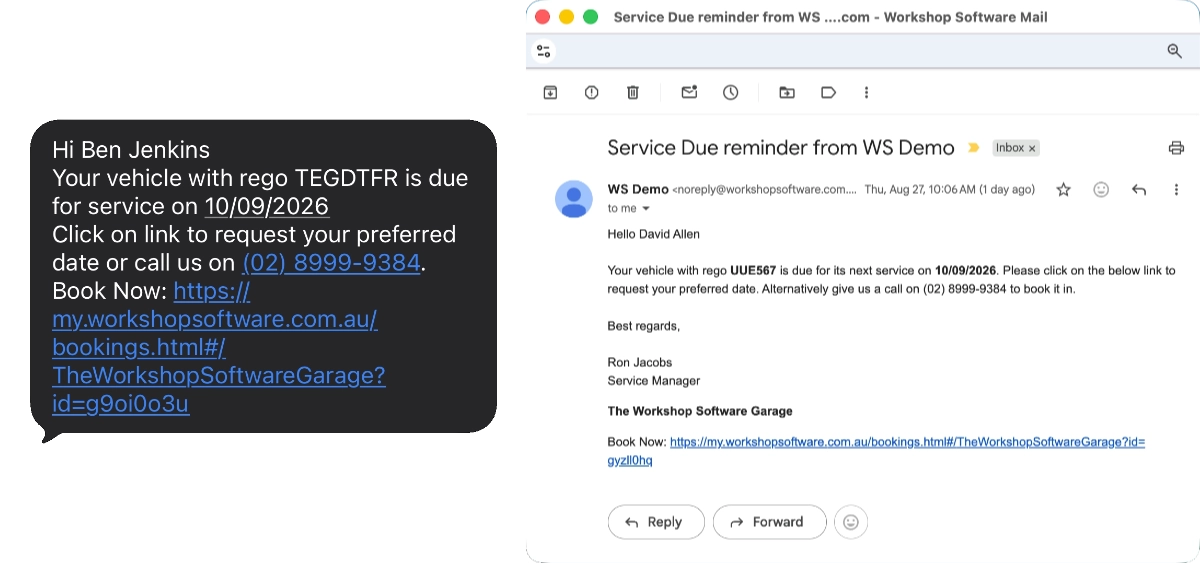
Send Link in Reminders (C) - When enabled automatic Service and Rego reminders will include the Public Booking link, allowing your clients to immediately open the Public Booking page.
- In the Branding card you may upload your company logo and select the colour scheme of the Public Booking page.
- Once you are happy please click the Save button to finalise and record your choices.

Your Public Booking Portal
In the Public URL card you will find a link, the Booking Portal available at this link allows your customers to request Bookings with your workshop and can be copied to provide in emails or embed as a link on your website or social media pages.

If you copy the link and paste it into a new browser window you will be able to view the page your customers will go to.
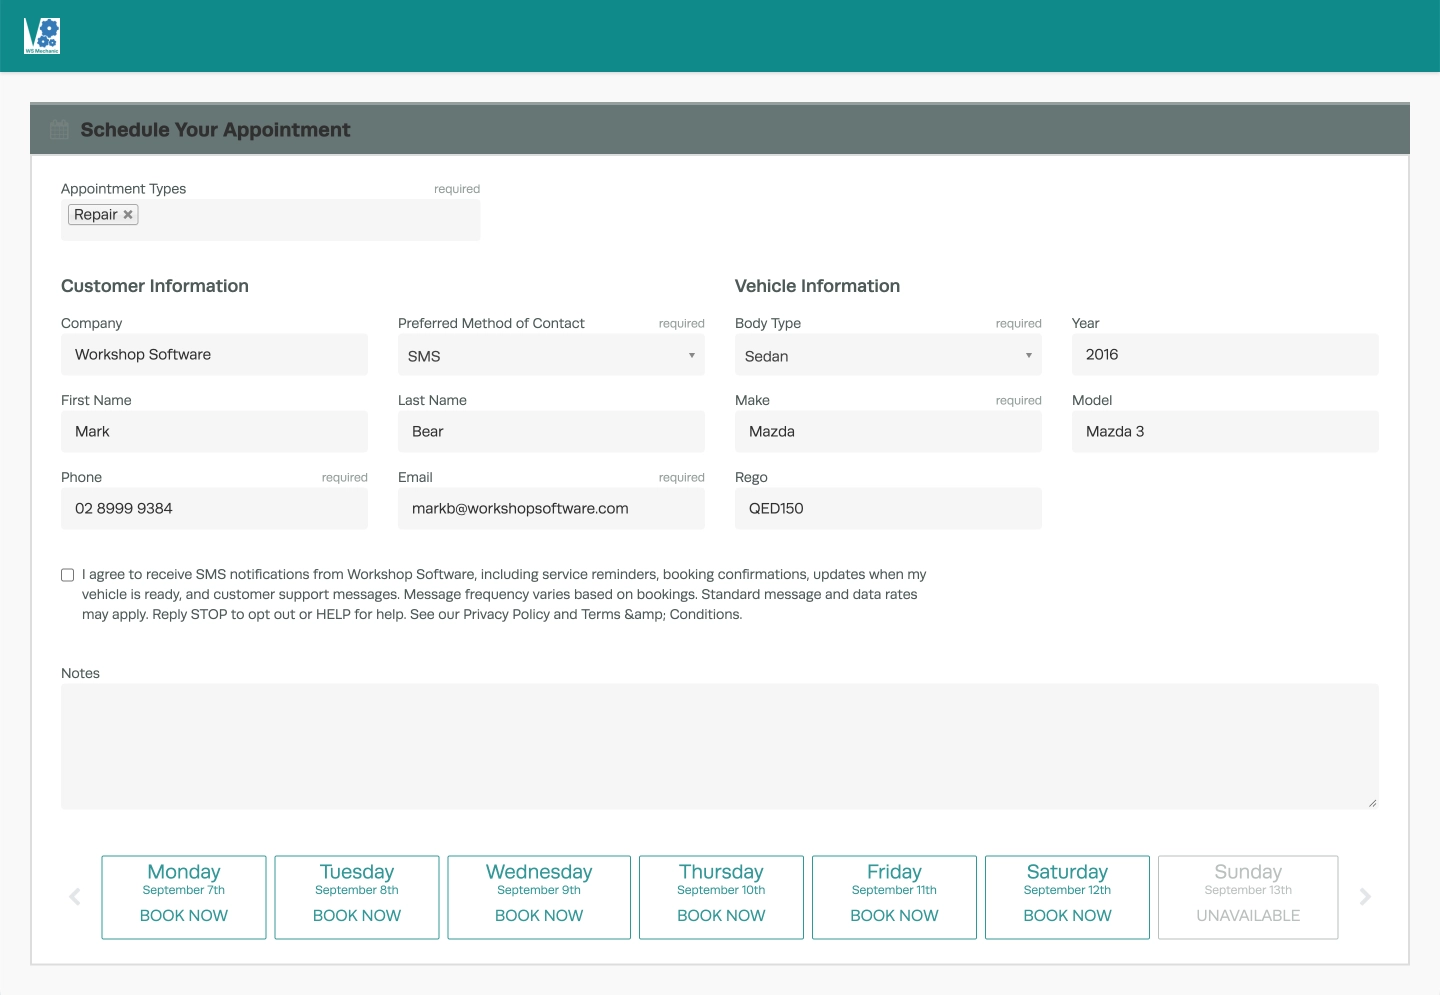
Once a customer fills in their details and chooses a desired Booking time, they will get notified that a Booking request has been sent.

Accepting a Booking Request
When a customer requests a Booking you will receive a notification on your Dashboard and Booking Diary pages where you can accept or change the Booking details.
Please Note: If your Mobile App account also has Admin Notifications enabled you will also receive a phone notification.
- To access a list of pending Booking requests click the yellow notification bar.
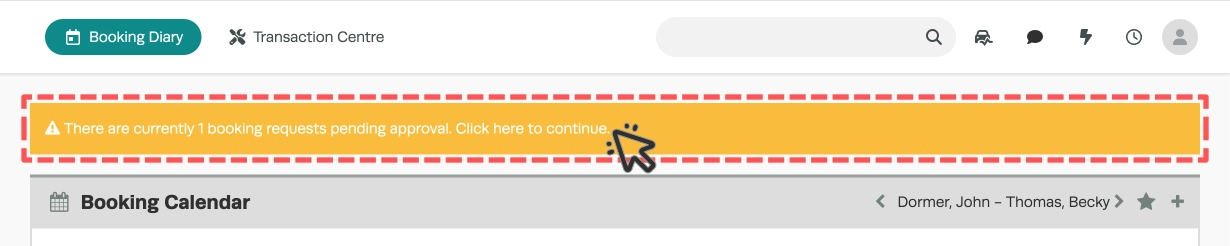
- You will see all the Booking requests, from here you can view, approve or delete them by clicking the Magnifying Glass icon or the red Delete icon.

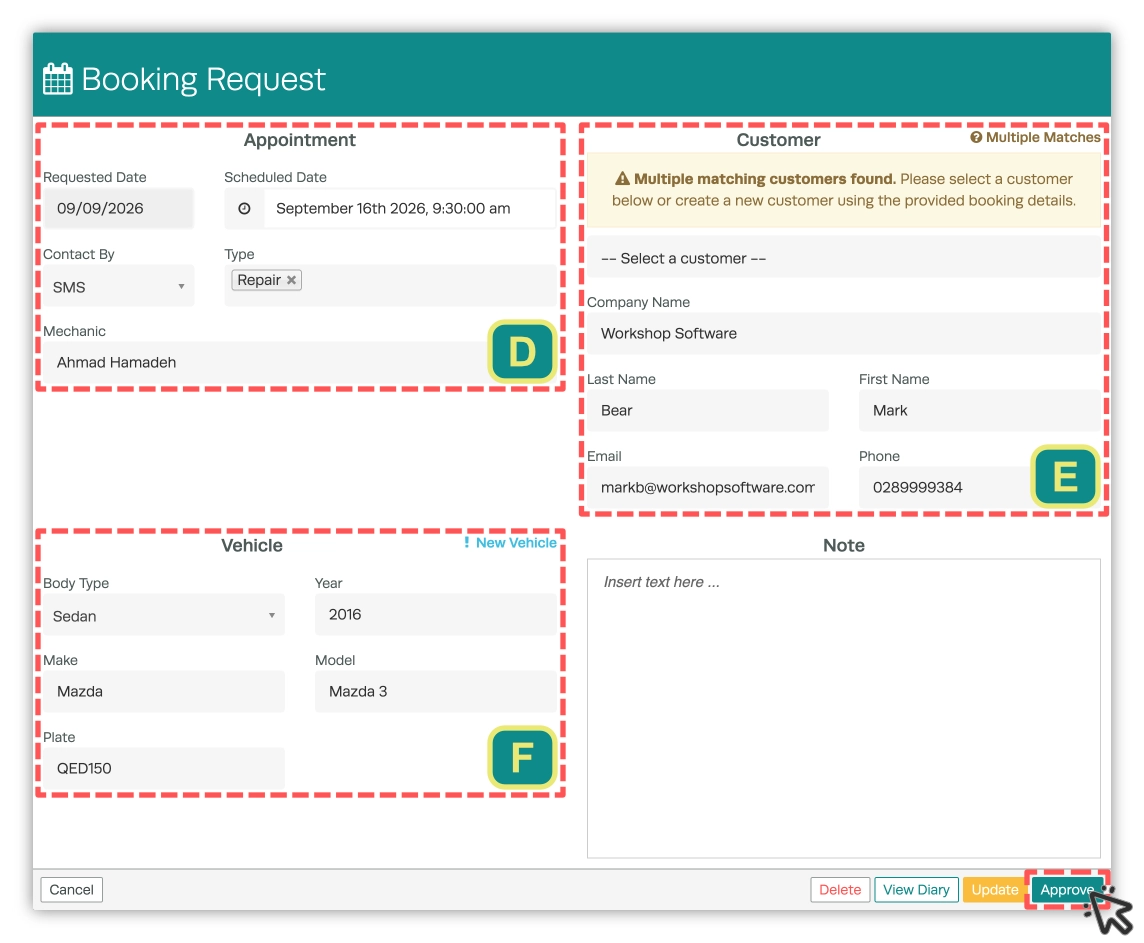
- When you click on the magnifying glass to you will be shown a summary of the Booking Request, Customer and Vehicle.
- For the Appointment (D) you may modify the Scheduled date, choose SMS or Email as the contact method, assign a Mechanic and modify the Booking Types.
- In the Customer (E) information Workshop Software will attempt to match your client's submitted details to your existing Customer List, you may select the matching Customer or use the submitted information to create a new Customer.
- Vehicle (F) information will also look to match the Plate number to your Customer's Vehicle list, or a new Vehicle entry may be created.
Please Note: If you change the date of the Booking from the one the customer originally selected you can notify the customer once approved.
- Select the green Approve button to generate an SMS or Email message, Update to save the changes you have made or View Diary to open your Booking Diary in a second Tab to check your shops' availability.
- To Approve the booking and send your message click the green Send button (H), otherwise you may click the yellow Approve Without Send (G) button to place the booking in your Diary without notifying your customer.
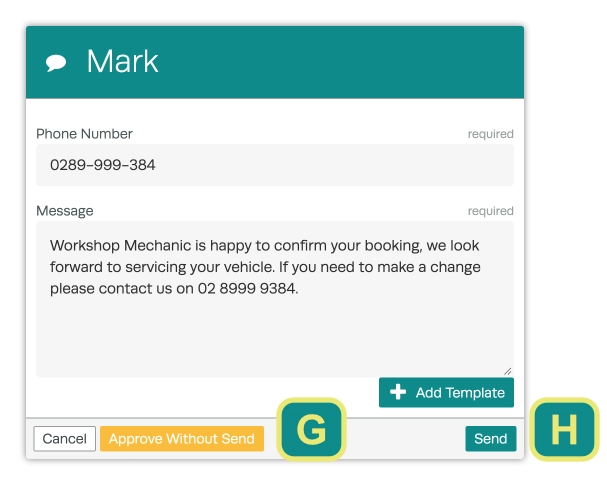
Please Note: You may use Email or SMS templates created in Settings > Company Lists as a quick response.