Skip to content
Inspection Groups let you bundle related Inspection Checklist Items (for example a Safety Check and a Brake Inspection) so technicians can run them together.
This article explains how to create or edit one. Inspection Groups are available on the Gold and Platinum plans.

Warning: Please DO NOT change an Inspection Group Code (A) once it has been used to create an Inspection Template. This will cause issues when you try to open your Templates in the future.
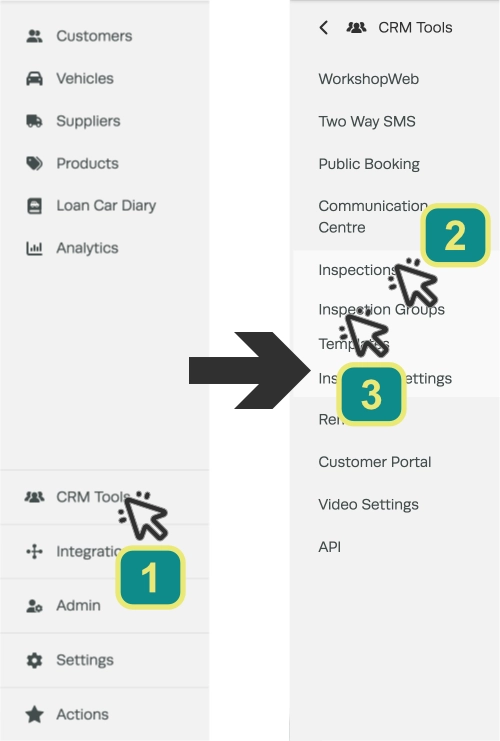
- To create an Inspection Group click CRM Tools (1) in the left hand sidebar menu, then Inspections (2) and Inspection Groups.
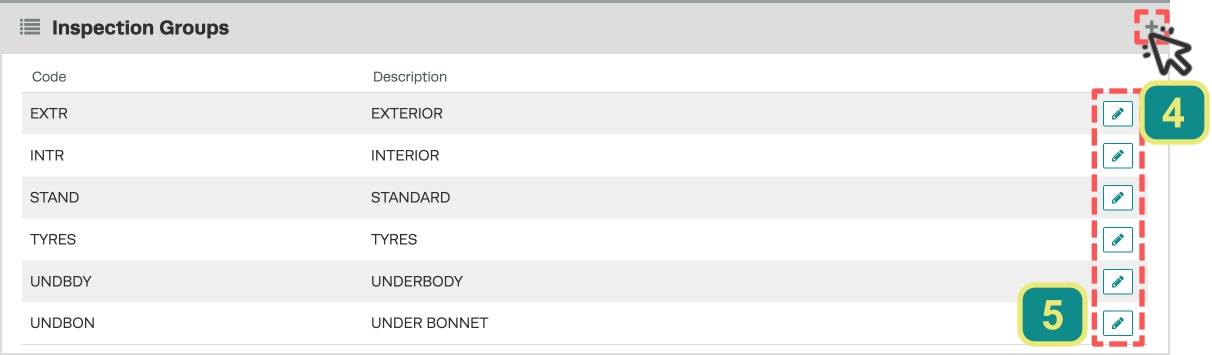
- Then press the + icon (4) in the top right hand corner to create a Group or one of the Pencil icons (5) to edit the Description of an existing Group.
- Select a Code for a new Group and update the Description.
- Then click the green Save button to record your changes.

Now you can create an Inspection template.