Skip to content
This guide walks you through how to create an Inspection Template. You can then use these Templates when creating an Inspection to bring up a list of items to be checked off instantly.
Please note: Inspections is a feature of our Gold level subscription. If you would like to upgrade you can do so on your dashboard.

Warning: Please DO NOT change an Inspection Group Name once it has been used to create an Inspection Template. This will cause issues when you try to open your Templates in the future.
Create a New Inspection
You may create a new Inspection after you have completed your Inspection system details in Inspection Settings and prepared your Inspection Groups in the page of the same name.
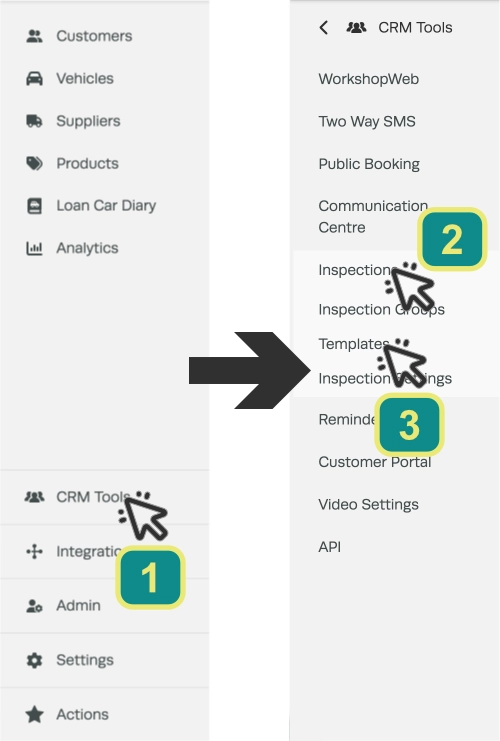
- In the left hand sidebar menu select CRM Tools, Inspections then Templates.
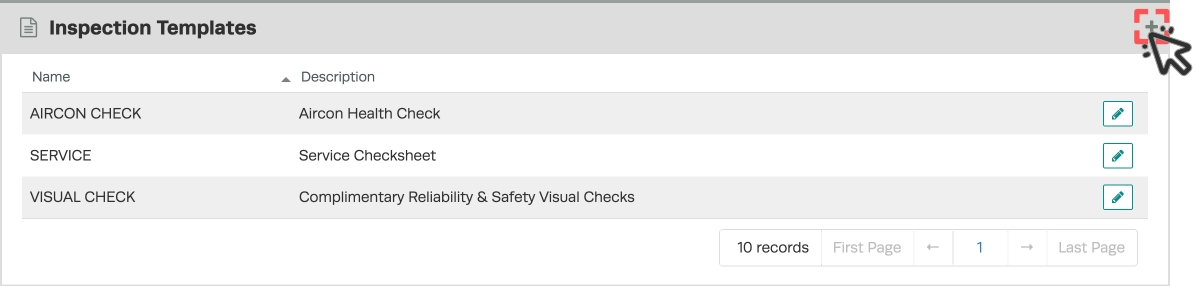
- Click the + icon on the right hand side of the Inspection Templates card to create a New Template.
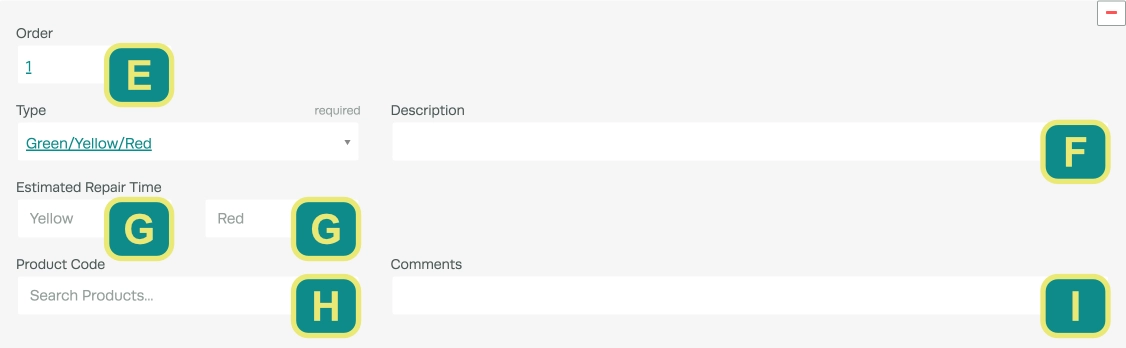
- Fill in the Name field (A). This is required, however the Comment fields (B & C) and Description (D) are optional.
- Select an Inspection Group from the Select a Group drop down menu (4) that you would like your first checklist section to be related to.
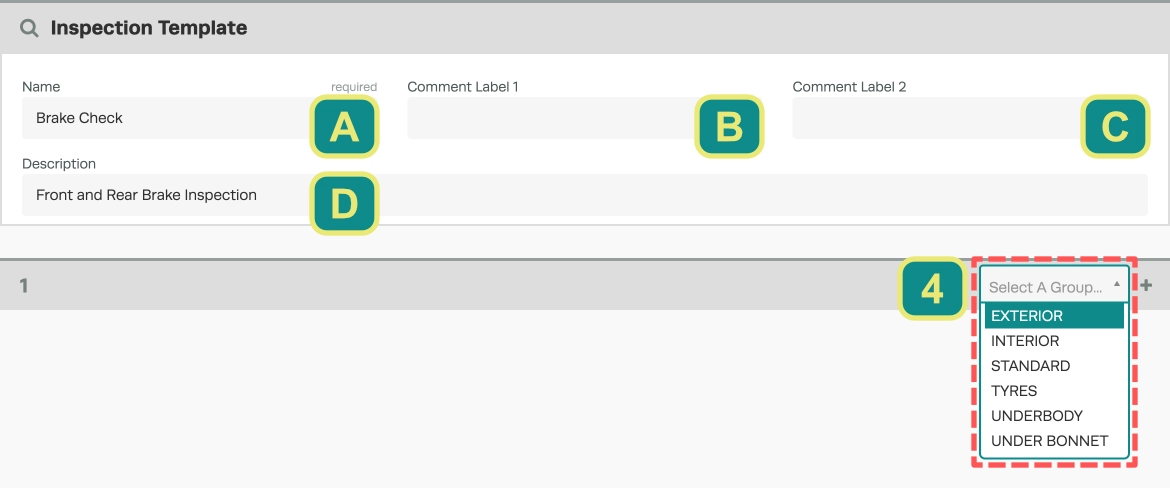
- Once you have chosen your group click the + icon on the right hand side of the same header to add a checklist item.

- In the Type drop down menu select an option this will control how the checklist item will be presented to the mechanic
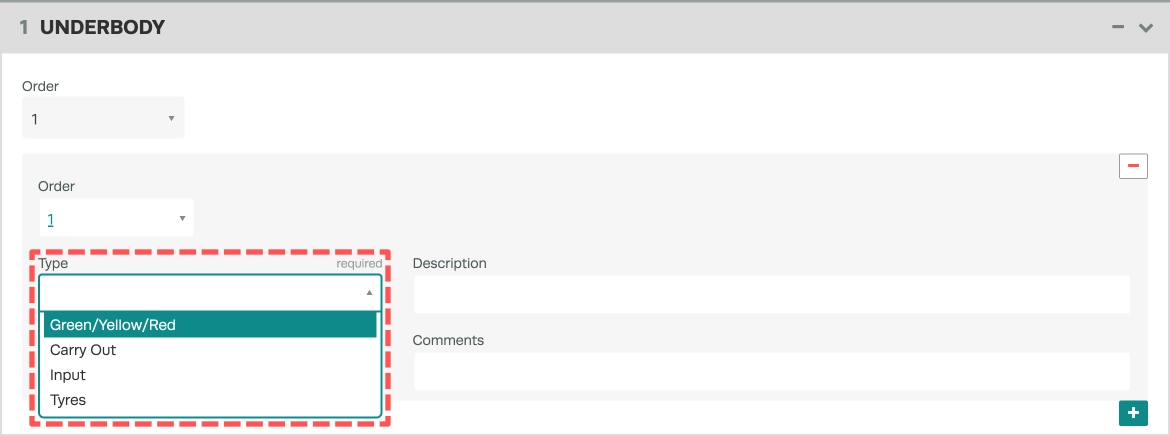
Green/Yellow/Red: – An instruction to check a vehicle component, helpful for finding required repairs and marking their level of urgency.
Carry Out: – A Yes/No requirement used where a technician should complete a specific task or action.
Input: – Provides a field to record information as part of a check.
Tyres: – Provides fields for Tyre pressure in 2 axle vehicles.
- You can also select a Product Code (H) to be linked to this item, add a Description (F) and a Comment (I).
- If the Type is a Green/Yellow/Read item you can also select an Estimated Repair Time (G) for rectifying the identified issue, this will then be included as the QTY of a new Labour Product in Bookings or Invoices you create from a Finalised inspection.
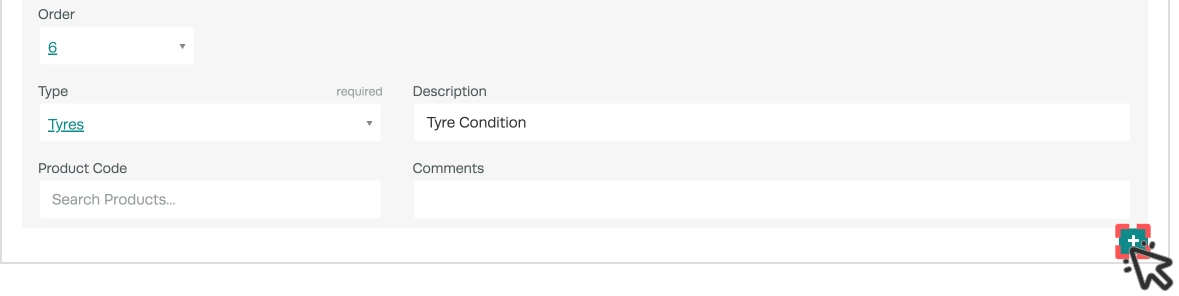
- To add a new Checklist Item in the same group click the green + button on the bottom right hand side of the card.
- For a new Group, scroll down to the next Group Heading and repeat the steps above for selecting an Inspection Group and adding Checklist Items.

- When complete please make sure to click the green Save button on the bottom right hand corner of the page so that your Template is saved to be used on future inspections.

Checklist Items Explained
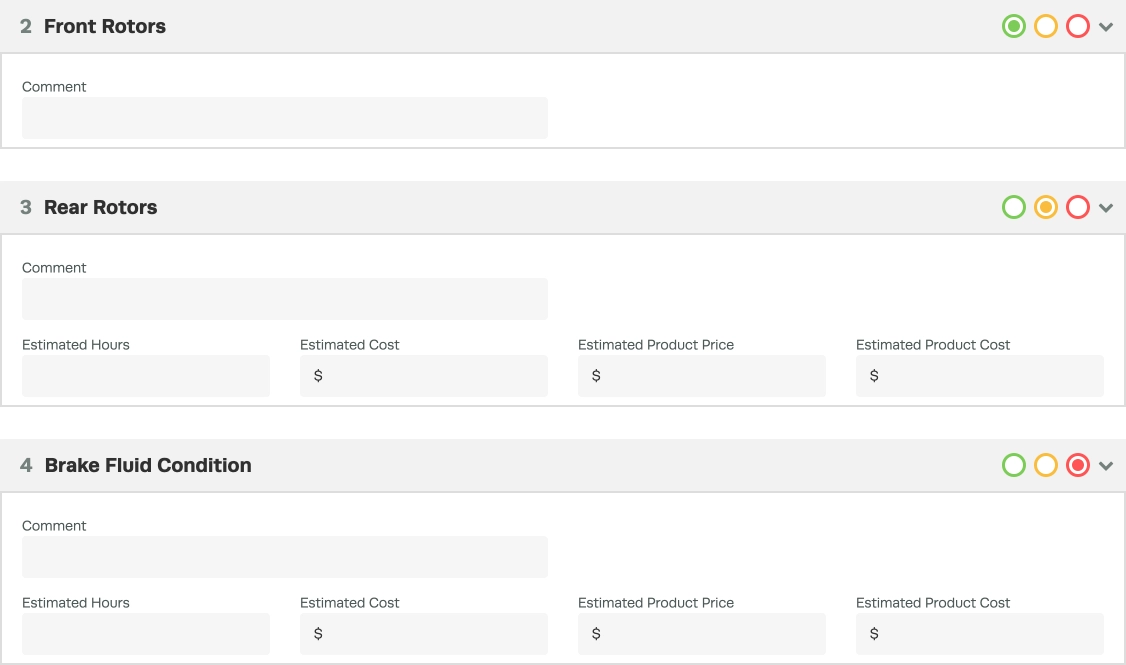
Each Inspection Item type is pictured below as they will appear in an Inspection.
Please Note: While Green/Yellow/Red items are the primary tool for checking and suggesting fixes for vehicle components any Item can be used to suggest a fix by selecting the Fix Urgently or Fix Soon check box when completing an inspection, you may then choose Labour Hours and Estimated Cost and/or Product Price and Product Cost.
Green/Yellow/Red Item
Green/Yellow/Read items are intended for where you want to check the condition of a vehicle component and if in poor condition suggest how it should be fixed and the price and/or labour time required to do so.
Carry Out Item
When an Inspection includes actions like topping up fluids, photographing vehicle condition or preparing the Vehicle for the next technician a Carry Out Item may be used to record each task is complete.

Input Item
An Input Item is used to record information during an inspection, such as odometer readings, brake pad wear, tyre tread wear and other details.
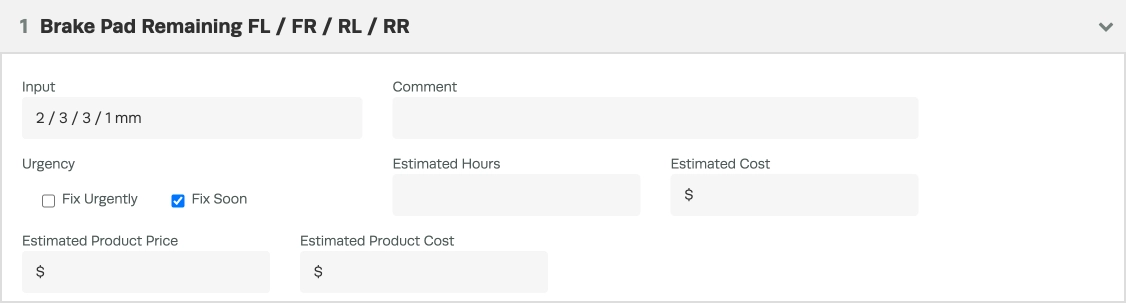
Tyres Item
A Tyres Item is specifically intended to record the Tyre Pressures of a 2 axle Vehicle.
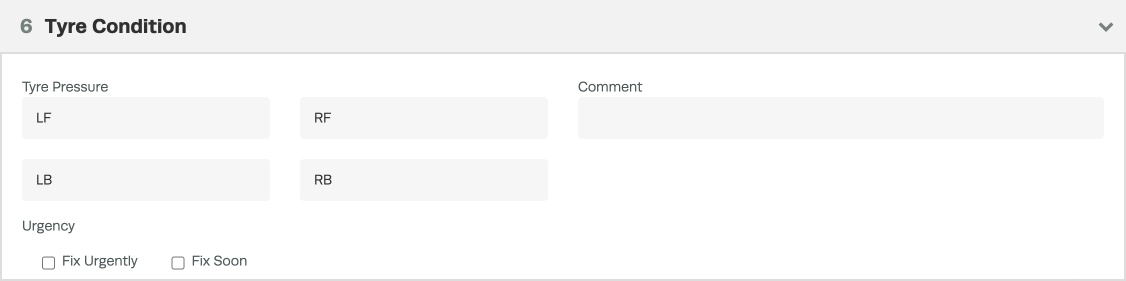
Good to Know
- If you would like to make major changes to an Inspection Template that has been used it may be more practical to create a copy of the Template.
- Once you have used an Inspection Template to create an Inspection you will not be able to delete Checklist Items on that Template, you may only add new Items.
Related Articles
- Create an Inspection
- How do I copy an existing Inspection Template?
- Create an inspection group (Gold Subscription )