 Skip to content
 Follow-up notes allow you to attach reminders to a vehicle so that important information is recalled the next time that customer visits your workshop. This article explains how to add, view, and dismiss follow-up notes.
Step 1: Create the Invoice and Set a Follow-Up Date
- Create an invoice for a customer and select a vehicle. See How to Create a Customer Invoice for details.
- Fill out the invoice as normal and press Save.
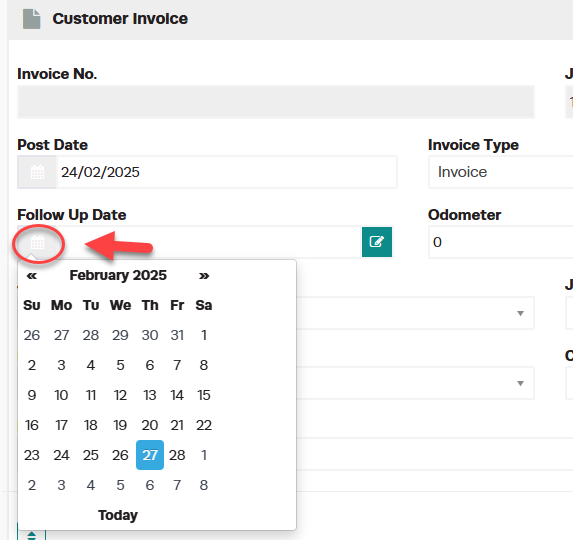
- Choose a follow-up date by pressing the Calendar button next to the Follow Up Date field.
Step 2: Add Follow-Up Notes
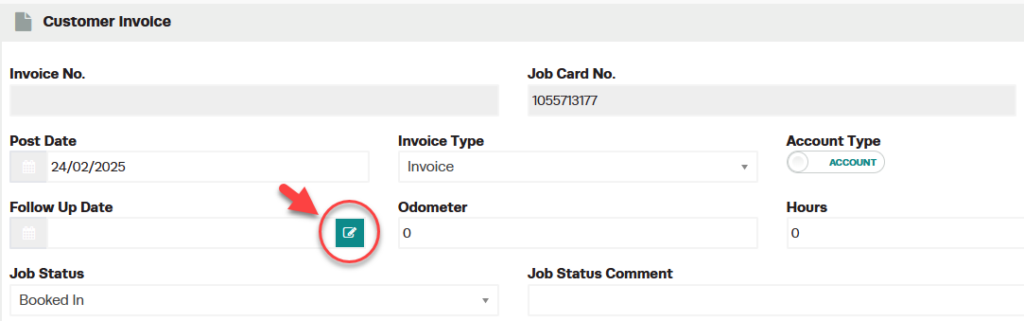
- Next to the Follow Up Date, press the green Pencil button.
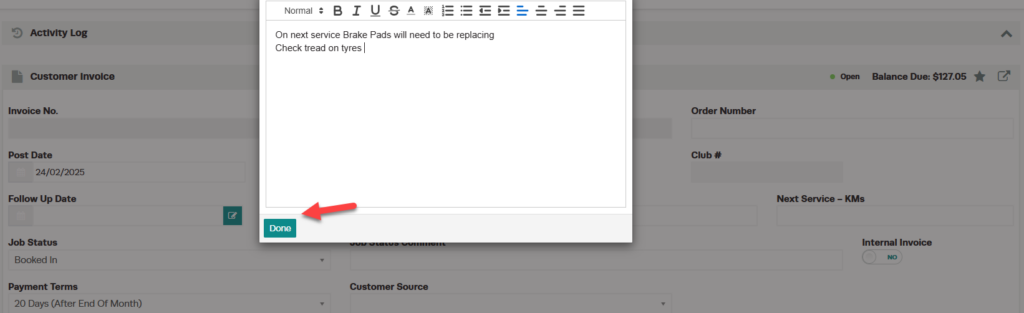
- A text box will appear where you can type your follow-up notes.
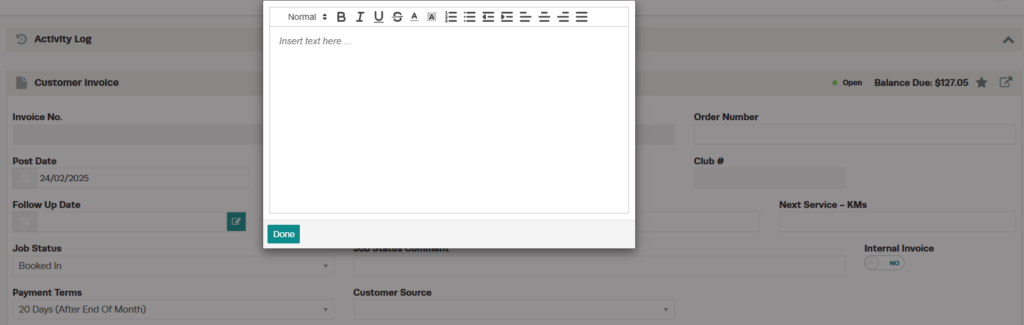
- Press Done.
- Save and process your invoice.
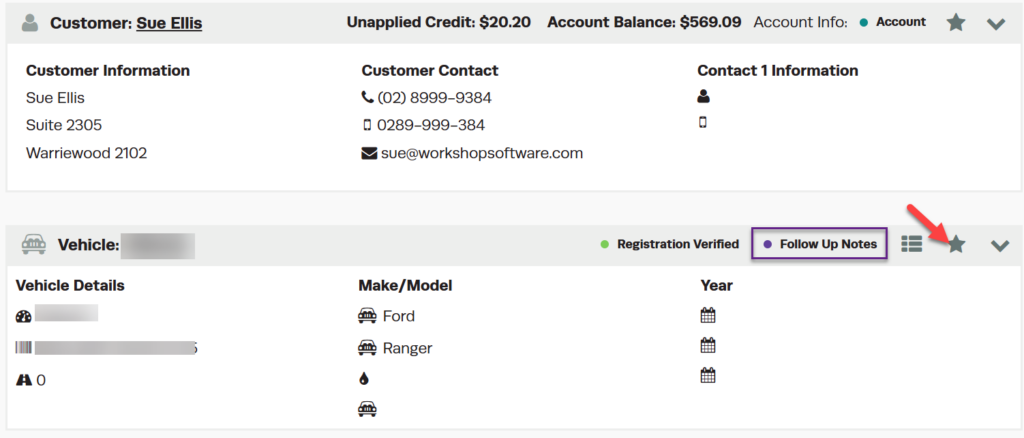
You will now see a purple tag on the vehicle that says FOLLOW UP NOTES, indicating that follow-up notes are attached to this vehicle.

Step 3: View Follow-Up Notes on a Return Visit
- When the customer comes back with this vehicle, create a new invoice as normal — making sure both the customer and vehicle are selected — and press Save.
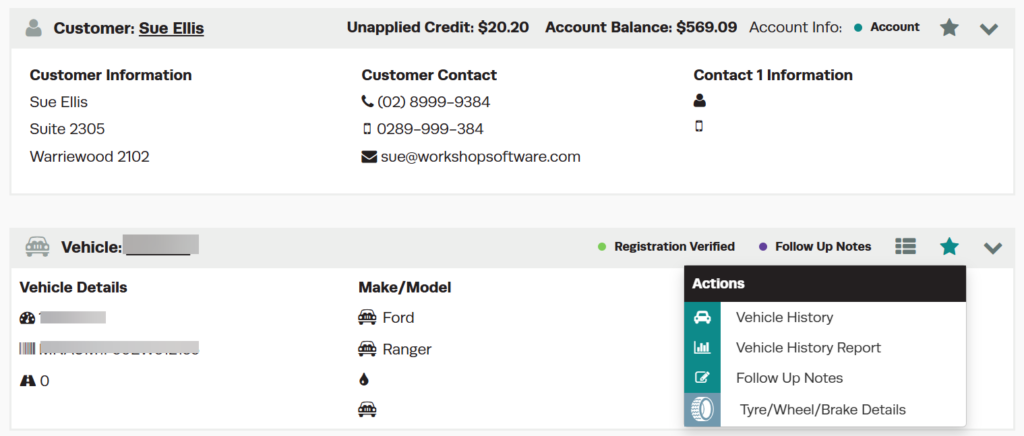
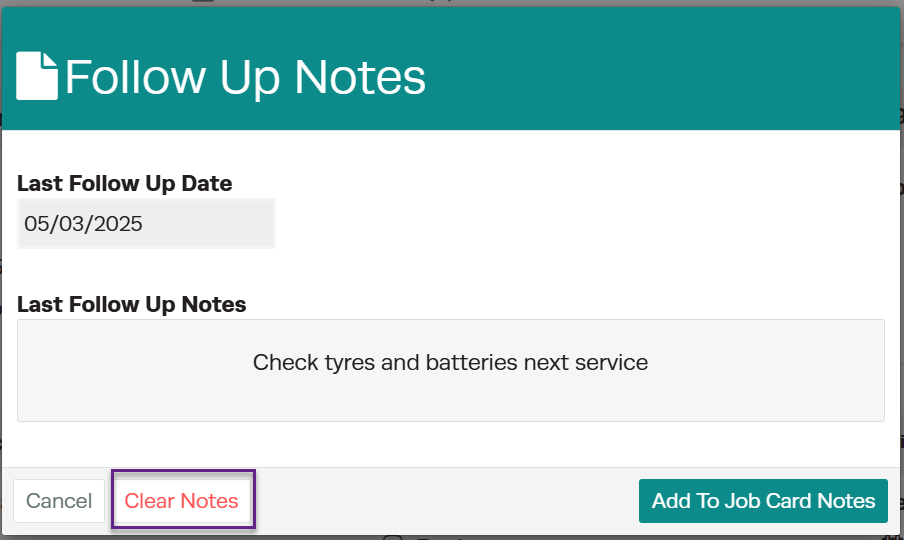
- You will see the purple FOLLOW UP NOTES tag attached to the vehicle. Press the Star button to the right of the tag, then select Follow Up Notes.
Important: The invoice must be saved before proceeding. If the invoice is not saved, the Follow-Up Notes option will not appear.
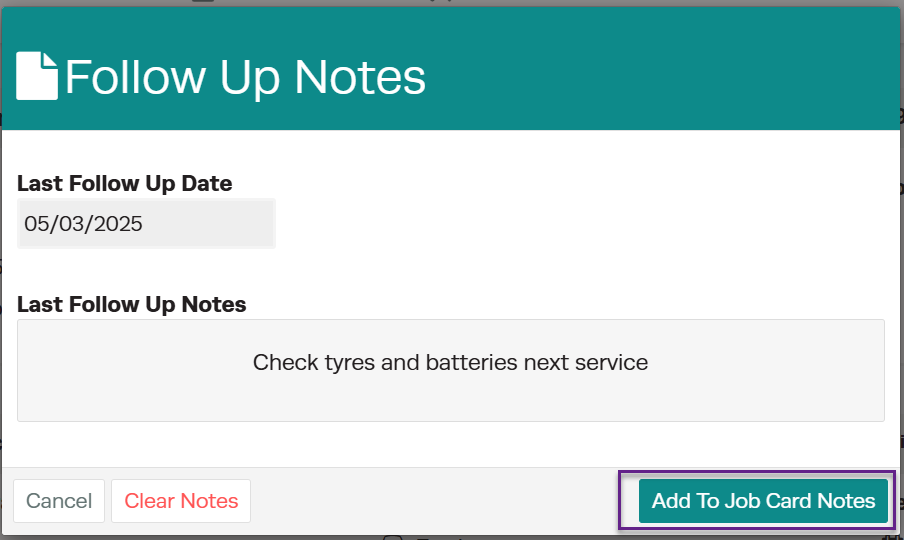
- The follow-up notes will appear in a text box.
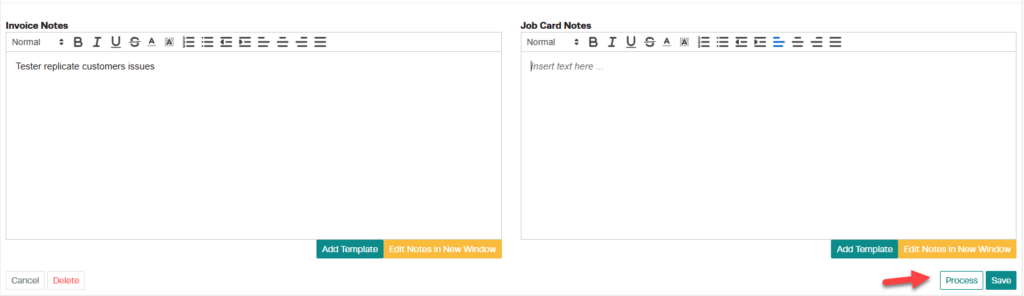
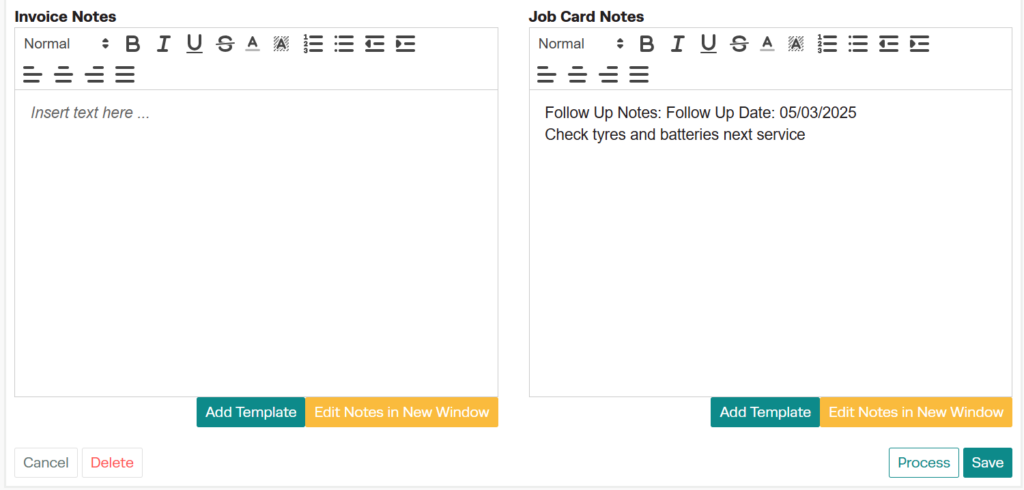
Step 4: Add Follow-Up Notes to Job Card
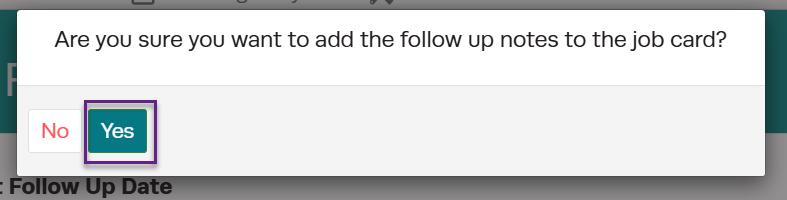
- Press Add To Job Card Notes to copy the follow-up notes into the Job Card Notes section of the invoice.
- Confirm that you want to proceed when prompted.
Step 5: Dismiss Follow-Up Notes
If the follow-up item will be handled on this visit, you can dismiss the follow-up note:
- Click on the Star icon in the Vehicle Details banner.
- Select Follow Up Notes from the menu.
- Click Dismiss to remove the follow-up note from the vehicle.
Good to Know
- Follow-up notes are attached to the vehicle, not the customer — they will appear whenever that vehicle is added to a new invoice.
- The purple FOLLOW UP NOTES tag provides a visual indicator that notes exist for the vehicle.
- You must save the invoice before the Follow-Up Notes option becomes available.
- Dismissing a follow-up note removes it permanently from the vehicle.
