 Skip to content
 This guide walks you through creating a customer invoice in Workshop Software, from selecting the customer through to saving the completed invoice.
Step 1: Start the Customer Invoice
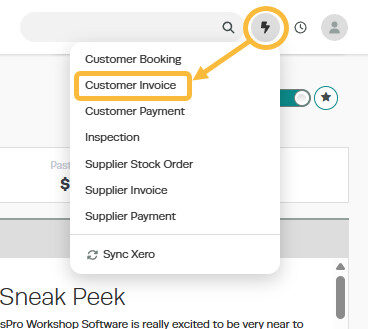
Click on the lightning bolt icon in the top right-hand corner of the page and select Customer Invoice from the dropdown menu.
Step 2: Add the Customer
Follow the steps below to add the customer to the invoice.
For an Existing Customer
- Click on the Search Customers search bar and type the customer’s name.
- Click on their details to select the customer.
- Select the vehicle from the list if it already exists in the system.

For a New Customer
- Click the + icon on the far right of the Select A Customer bar.
- Enter the new customer details in the fields that appear:
- Select Individual or Company
- Select Cash or Account
- Enter First Name and Last Name (required)
- Phone numbers
- Email address
- Click Save when all details are entered.

Step 3: Add a Vehicle
- Click the + icon at the top right of the page, next to Select A Vehicle.
- Enter the vehicle details:
- Rego
- VIN
- Make
- Model
- Body Type (required)
- Colour
- Speedo
- Production Date
- Click Save when all details are entered.
Tip: The only required field is Body Type. Your mechanic can collect the remaining vehicle details while working on the vehicle, and the file can be updated later.


Step 4: Enter the Invoice Details
- Fill in the invoice fields:
- Order Number (PO or Purchase Number) — if applicable
- Invoice Type — select the invoice type
- Date of Booking
- Payment Method — can be left blank and updated before processing
- Odometer
- Description — brief description of the job being carried out
- Product — enter service type and any parts (can be added or changed later)
- Invoice Notes — notes that appear on the invoice
- Job Card Notes — notes that appear only on the job card
- Click Save at the bottom right of the page.
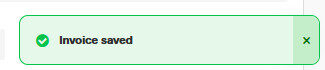
If the invoice saves successfully, a green confirmation popup will appear in the bottom right corner of the screen.

Step 5: Edit or Finalise the Invoice
The invoice will now appear under the Jobs section in your Transaction Centre. To make any changes or to finalise the invoice, double-click on the line to reopen it.

Good to Know
- You can print, email, or SMS the invoice to your customer once it is ready.
- Double-check the details on your invoice before finalising to ensure accuracy.
- If you need to change the invoice type (e.g. to a Quote), you can do so before processing.
Related Articles
- Create an account invoice for a cash customer
- Create a cash invoice for an account customer
- How to Create an Overpayment or Deposit for a Customer
