Skip to content
This article explains how to mark up a single Product line on a Job Card or Invoice, so you charge a set percentage or dollar amount above what the part cost you. Only that one line changes. Your product list and every other Job stay exactly as they are.
Applying a Markup
You may apply a markup to any Product in a Job's Products list priced above $0 that is not a Labour Product.
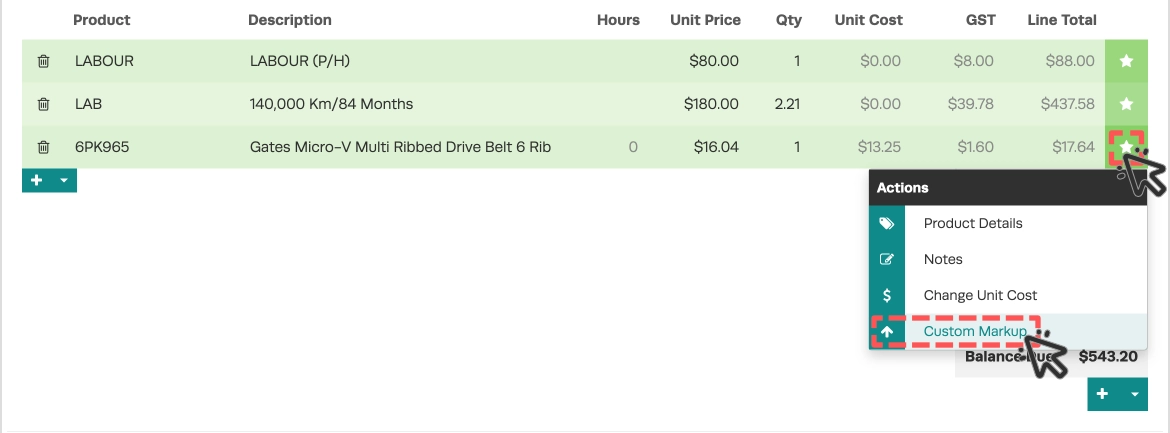
- Open a Job and click the Star star icon at the end of the product line you want to mark up to open the Action Menu, then choose Custom Markup.
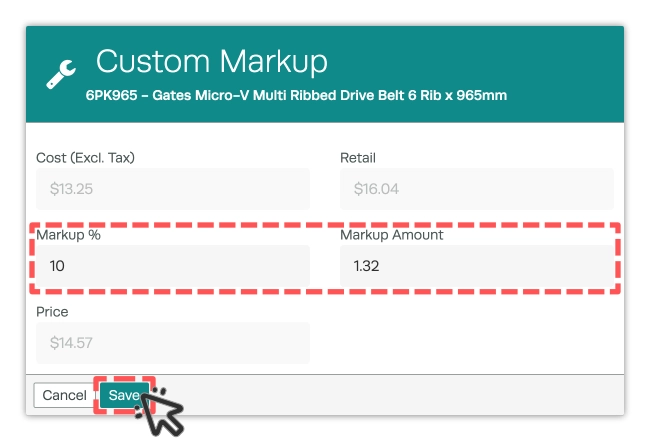
- The Custom Markup window shows the Product's Cost and its Retail price for reference. Type in either the Markup % or Markup Amount field, the other field fills in for you and the new Unit Price appears underneath.
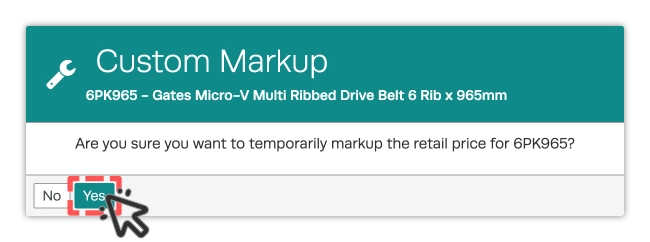
- Click the green Save button then in the prompt which opens confirm with Yes.
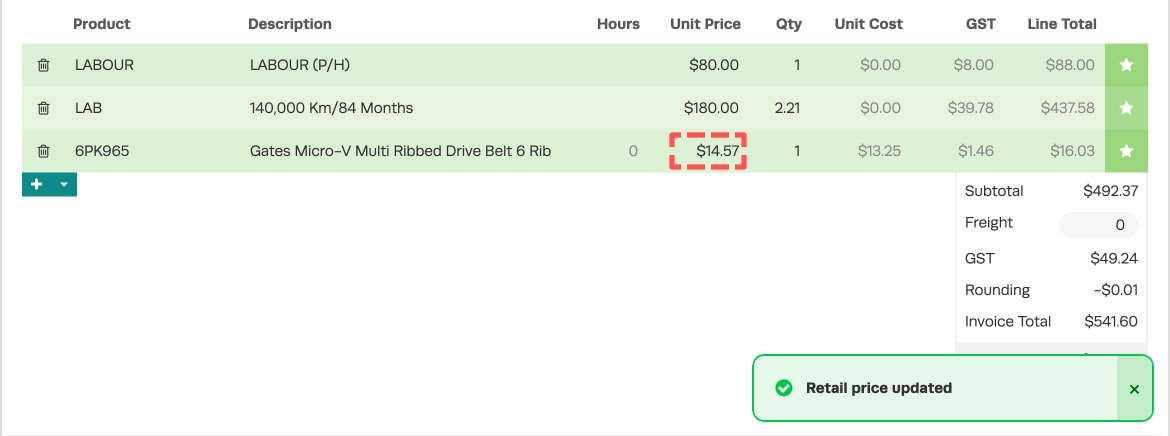
- The line's Unit Price updates and a "Retail price updated" message appears.
- Click Save on the Job Card to keep the new price.
How the New Price is Calculated
The markup is always added to a Product's Unit Cost, a part that cost you $50.00 with a 10% markup gives a new price of $55.00.
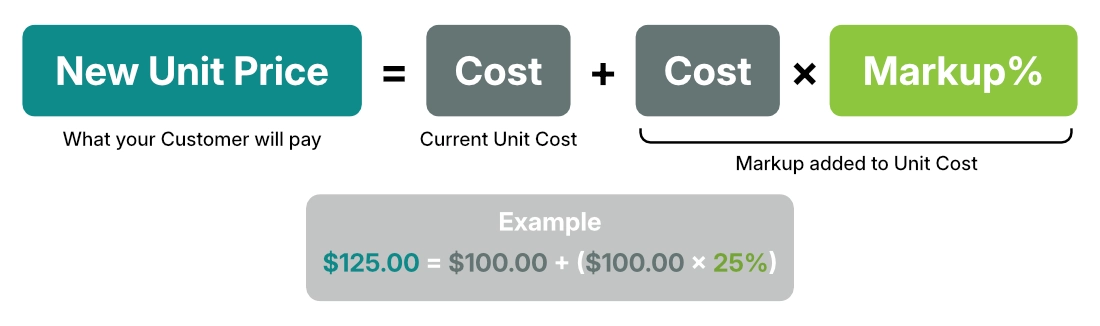
- If your prices include tax, the window shows Cost (Incl. Tax) and marks up that figure. If they exclude tax, it shows Cost (Excl. Tax). This follows the Prices Include Tax setting from your Company Settings.
- The markup applies to each unit. A quantity of 3 at a new price of $55.00 gives a line total of $165.00.
- The price is calculated from the Product's Cost even if you have already changed the line's Unit Price, so the new price can be lower than the original.
Good to Know
- The confirmation says "temporarily markup the retail price" and the message says "Retail Price Updated", but only this line changes. The price in your product list is not touched, and the next time you add the product to a Job it uses its normal retail price.
- Applying a second markup to the same line replaces the first. It does not stack. A 10% markup followed by 20% on a $50.00 cost gives $60.00, not $66.00.
- Other lines on the Job are not affected.
Frequently Asked Questions
Why can't I see Custom Markup on a line?
It is only offered on Product lines priced above $0.00 on a Job you can still edit. Labour lines, the heading line of a bundle, and processed Invoices do not show it.
Why does the Price stay blank when I enter a markup?
The product has no cost in your product list, so there is nothing to mark up from and Save stays greyed out. Add a cost to the product, then open Custom Markup again.
Why is the Retail figure different from the price on my line?
Retail shows the product's normal price from your product list, for reference only. It is not used to work out the new price.
When I reopen Custom Markup the boxes are empty. Did my markup save?
Yes. The window always opens empty. Check the Unit Price on the line to see the price currently charged.
How do I remove a markup?
There is no separate undo button. Type the line's original unit price back in, apply a different markup or remove the product from your Job and add it again.
Can I enter a negative markup to discount a line?
No. A negative Markup % or Markup Amount stops the window from saving. To charge less, change the line's Unit Price instead.
Does a markup change my product's cost or stock value?
No. Only the selling price on that line of the Job changes.