Skip to content
Workshop Software's Repco Integration may be used to add Products available on Repco Navigator to an Invoice, to import Repco Smartquote notes and to purchase Repco products that have previously been added to an Invoice.
This guide explains how to add, order and purchase parts through the Repco Integration.
Please note: The Repco Integration must be correctly configured before you may add parts from Repco, to Integrate please follow this guide.
Purchase Repco Parts
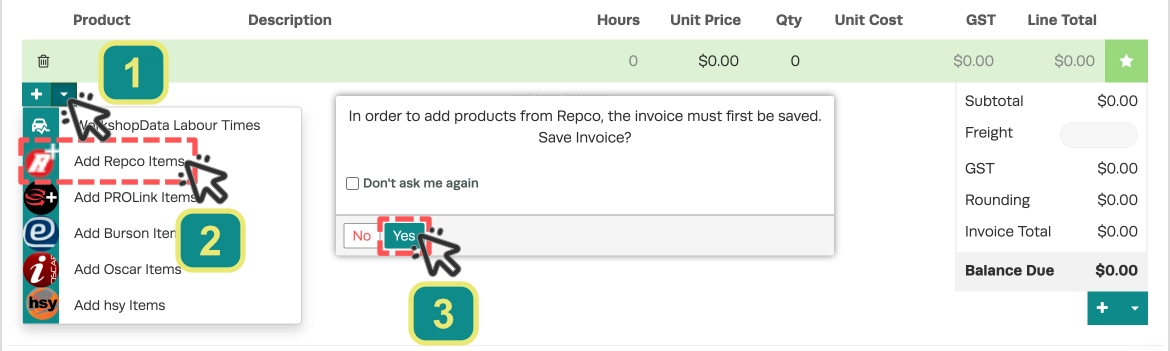
- Select an open job that you wish to add parts to and scroll down to the product section. Click the Down Arrow (1) beneath the parts list, select Add Repco Items (2) and then click Yes (3) when asked to save.
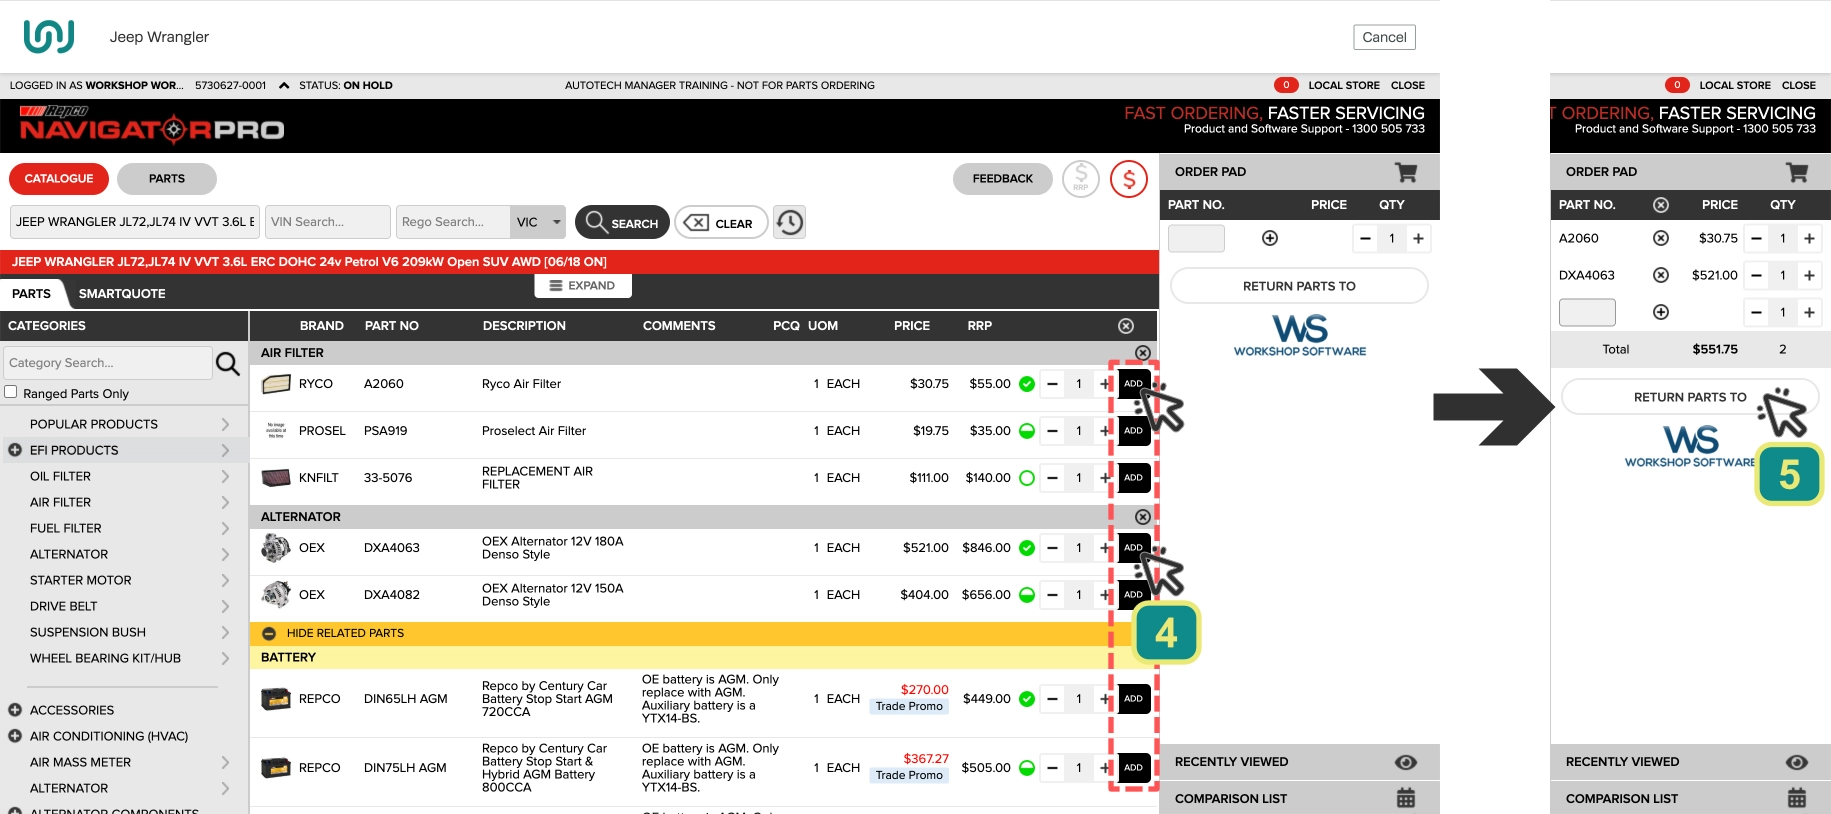
- You will now open Navigator inside Workshop Software. Find the parts you need and Add (4) each part to your Order Pad. When your order is complete click Return Parts to WS (5)
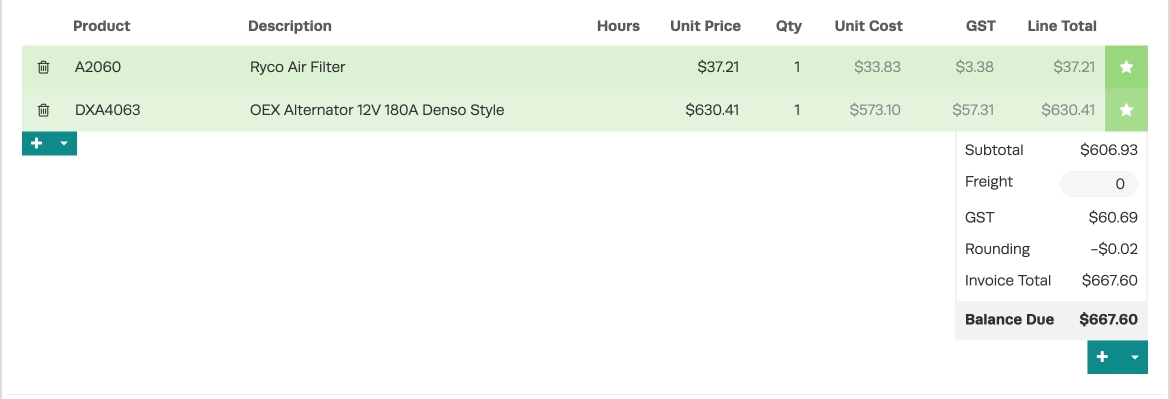
- You will be returned to Workshop Software and see the parts have been added to the invoice/job.
Please Note: Parts added to an Invoice from Repco Navigator will also be added to your system wide Products list.
- To order parts first click the Star (6) icon and then Create Order (7).
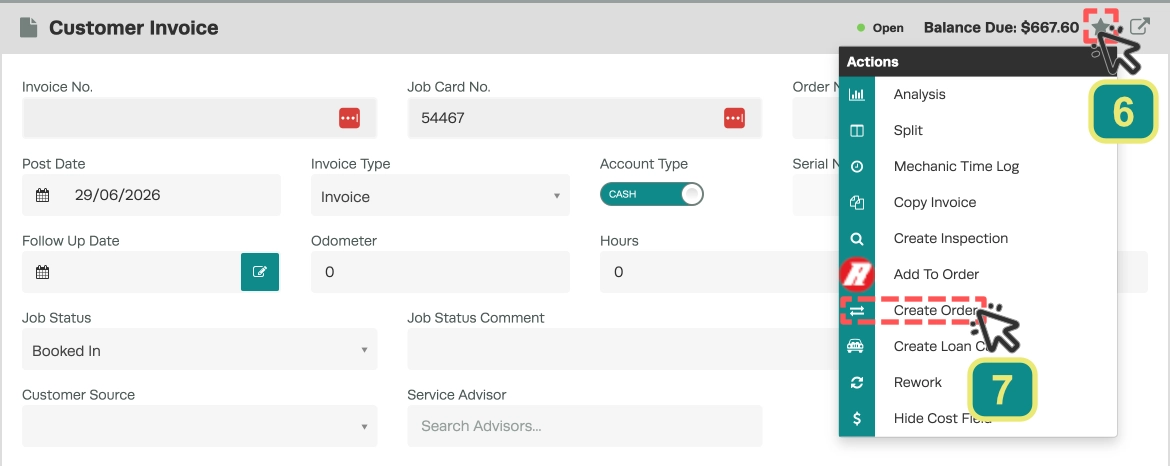
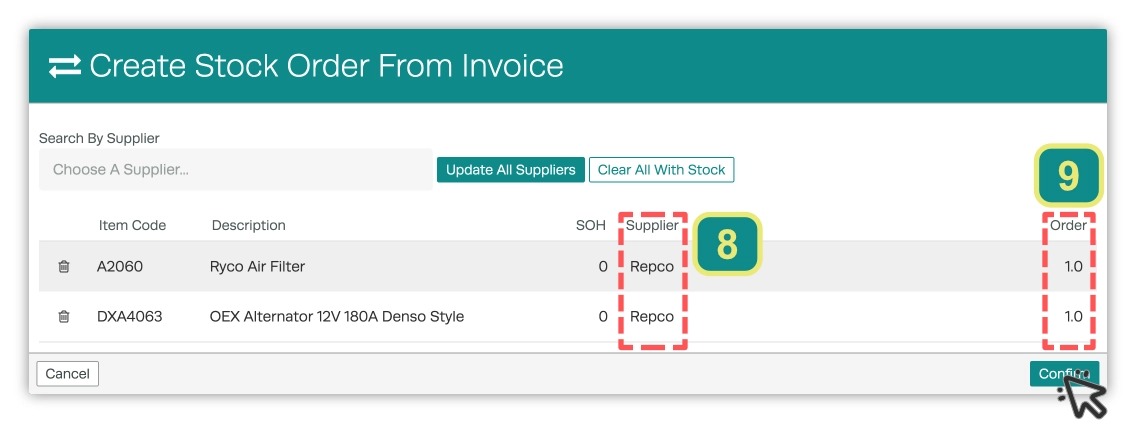
- In the pop up parts imported from Repco Navigator will have their supplier set as Repco (8), you may update the number you wish to order here (9) or in the next screen inside the suggested Stock Order.
- Click Confirm which will create a new suggested Stock Order or if one exists add the new parts to an unprocessed Repco Stock Order.
- To view your Stock Order and return the parts to Repco's checkout screen first open the Attached Orders header inside your Invoice and open the Order Number with Repco as the supplier.

- Before finalising your Stock Order you may modify quantities and add additional items. To order the parts from Repco Navigator click the Star icon (10) and choose Send Order (11) from the drop down menu.
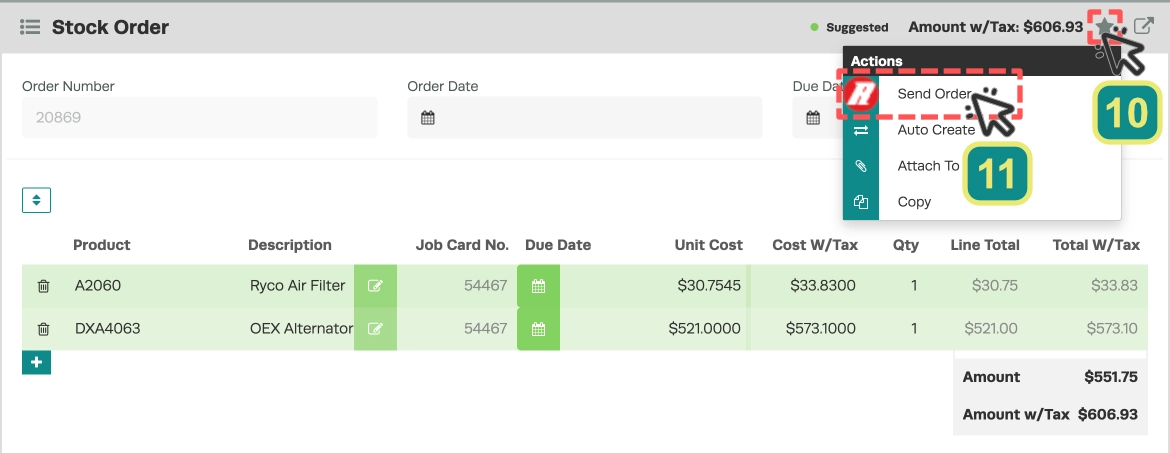
- Choose yes when asked if you would like to save and send this order.
- You will then be taken back into Repco, where you may complete check out
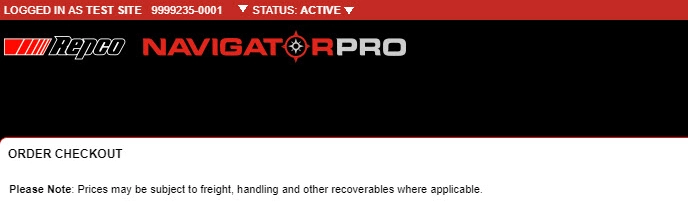
- Once this is done, your parts are on their way and your Stock Order is updated to the Waiting for Parts status.
Attach a Repco Smartquote to an Invoice
- To access Repco Smartquote begin by accessing Repco Navigator as before, Down Arrow (1), Add Repco Items (2) then Yes (3) in the pop up.
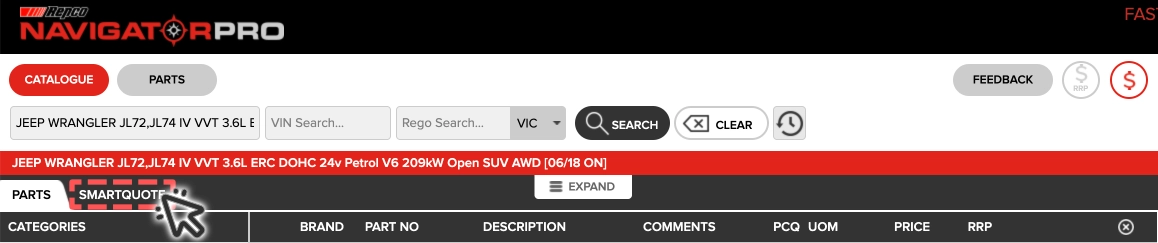
- Inside Navigator click into the Smartquote tab.
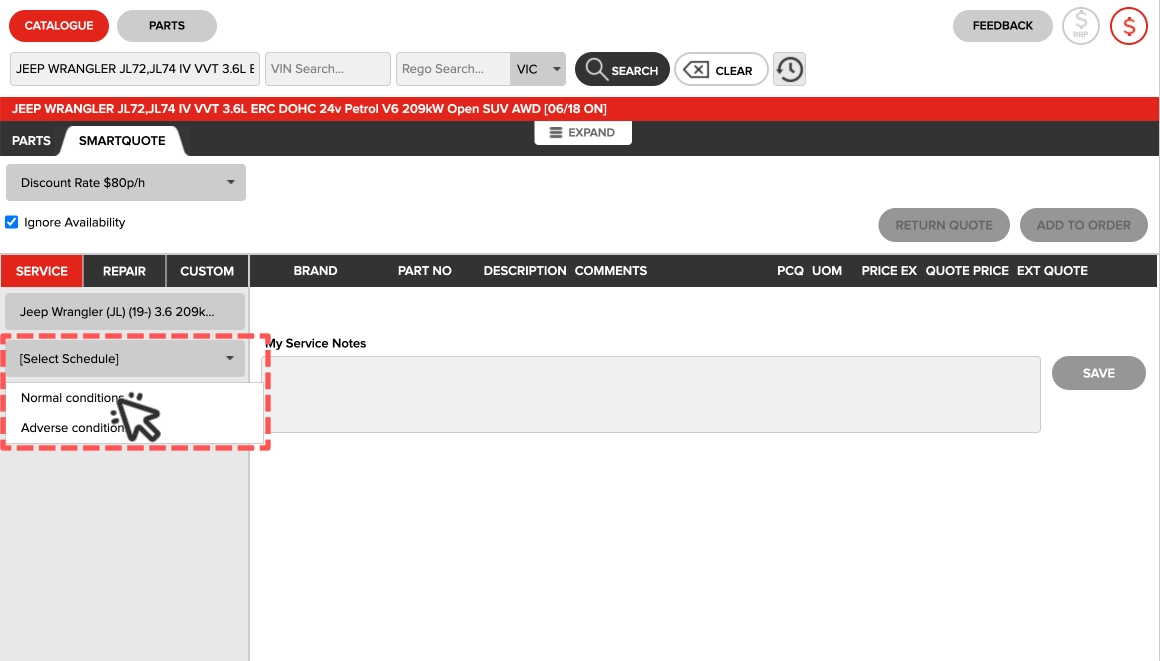
- If there are multiple service schedules, select the desired schedule at the left of the screen.
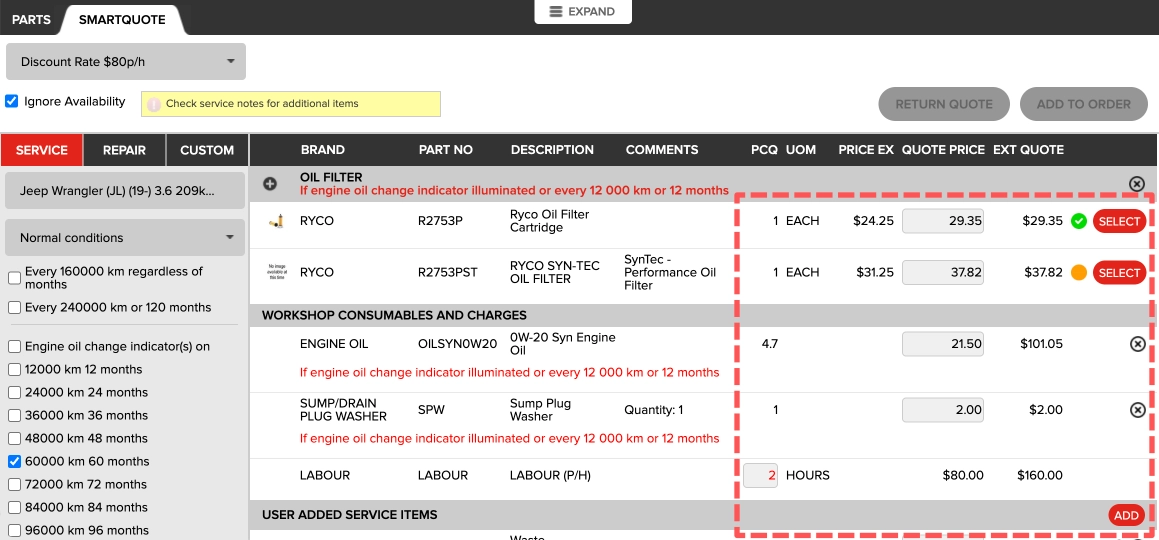
- You may now select the desired parts from the Smartquote options, adjust the cost for Consumables and Labour and add any User Service items desired.
- Once all required parts are chosen click the Return Quote button to bring the parts, service items and Repco's notes back to Workshop Software.

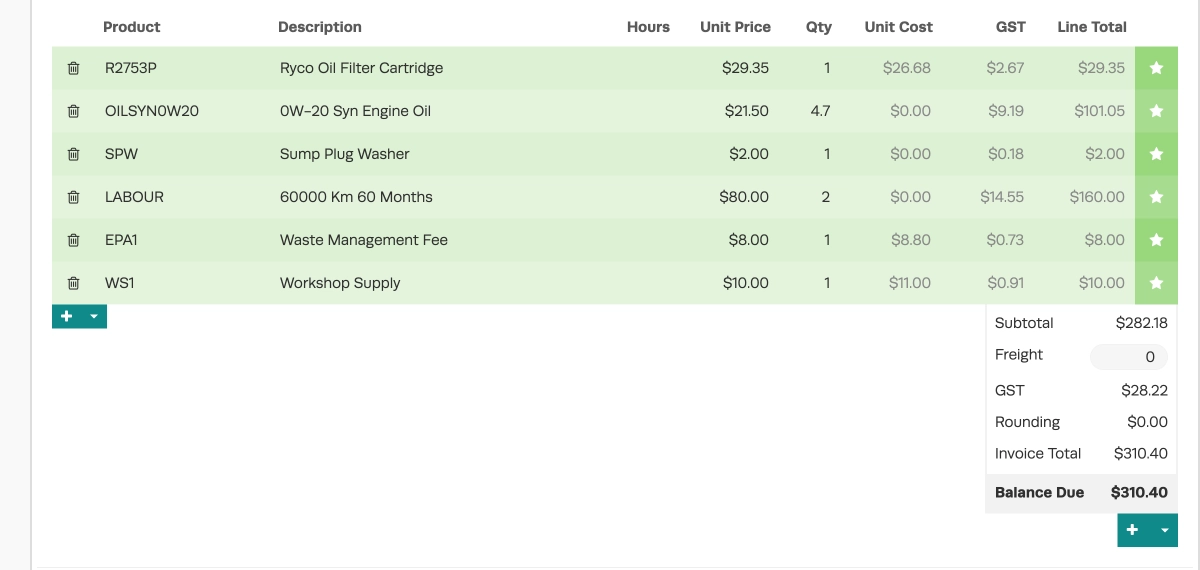
- The parts and service items will be added to the Invoice's product list.
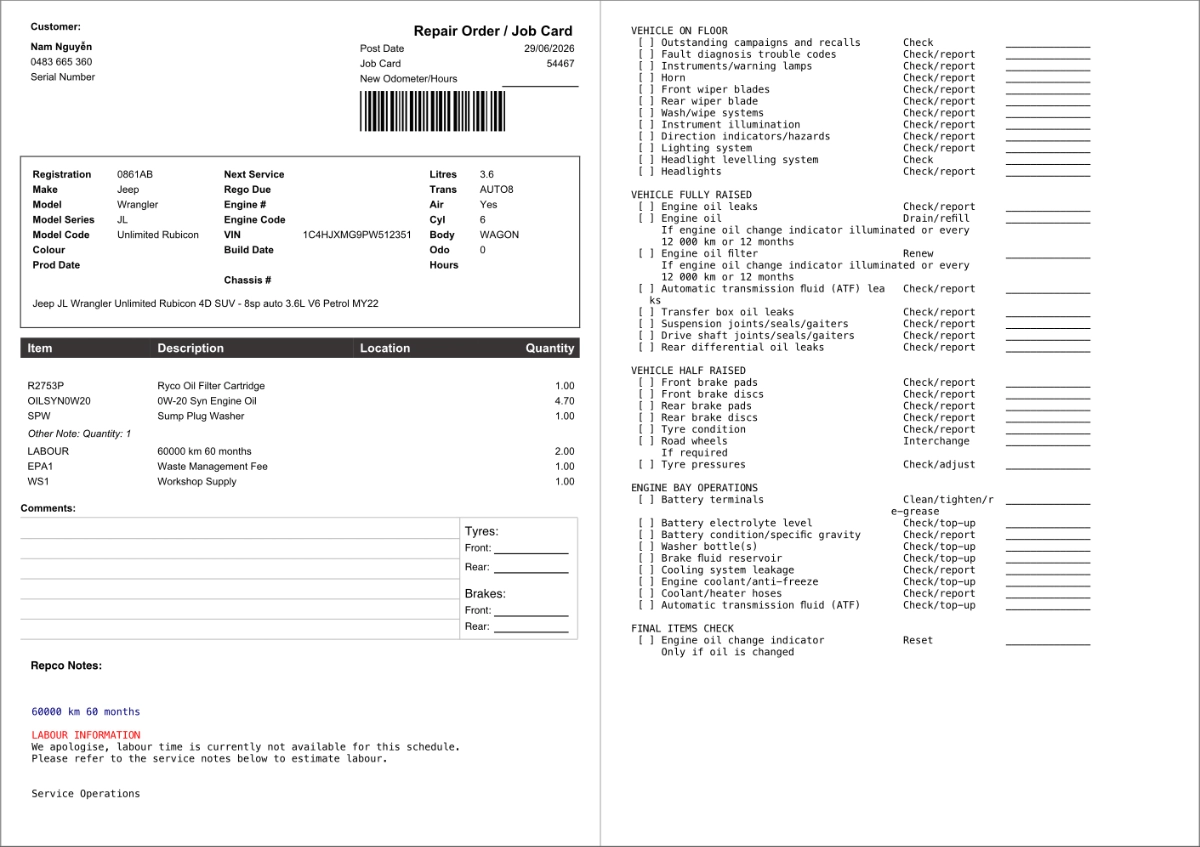
- Repco Notes are stored with the Job, when you Print a Job Card they are visible beneath the Comments section of the Job Card.