 Skip to content
 When preparing quotes and discussing repairs with customers, having access to detailed vehicle information can make a significant difference. WorkshopData inside Workshop Software provides valuable insights that help workshops quote more accurately, identify required parts, and clearly explain the work involved.
This article highlights five key WorkshopData features that can improve your workflow and help you deliver a better customer experience.

- Timing Belt Schedules
Timing belt replacements are a critical part of vehicle maintenance, and WorkshopData makes it easy to access manufacturer-recommended replacement intervals while preparing a quote.
How to Access Timing Belt Schedules
- Open an existing customer invoice or create a new one.
- Under the product line, click the drop-down arrow and select WorkshopData Labour Times.
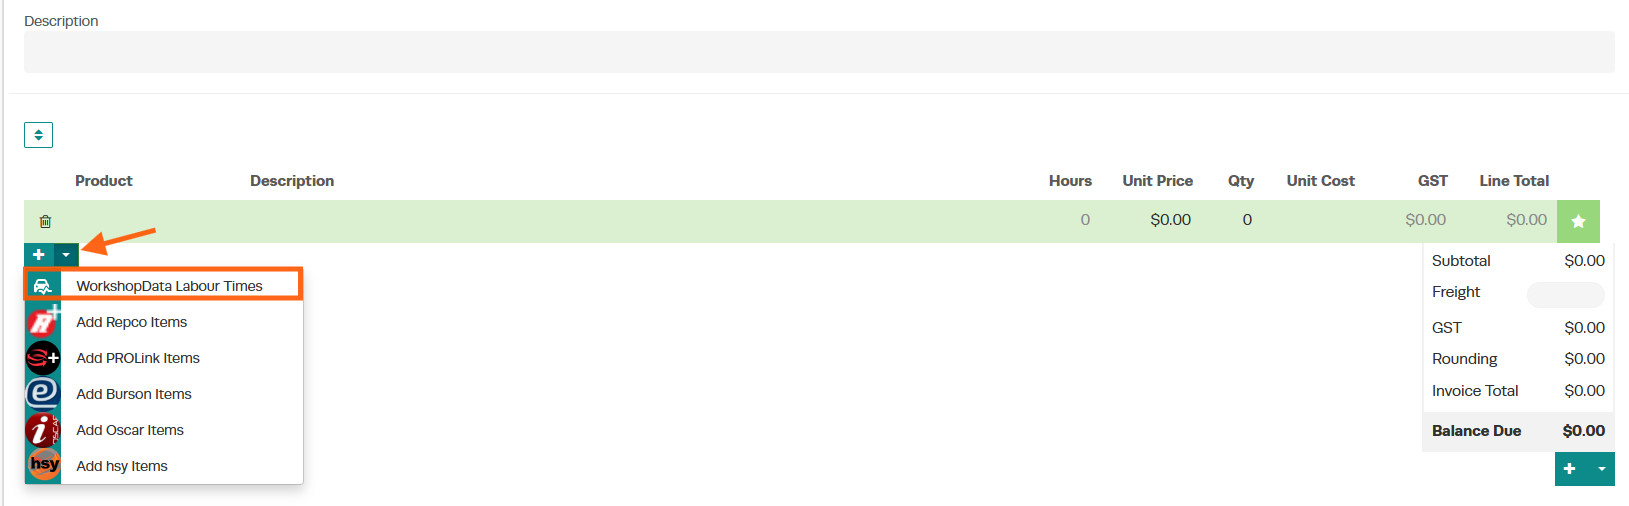
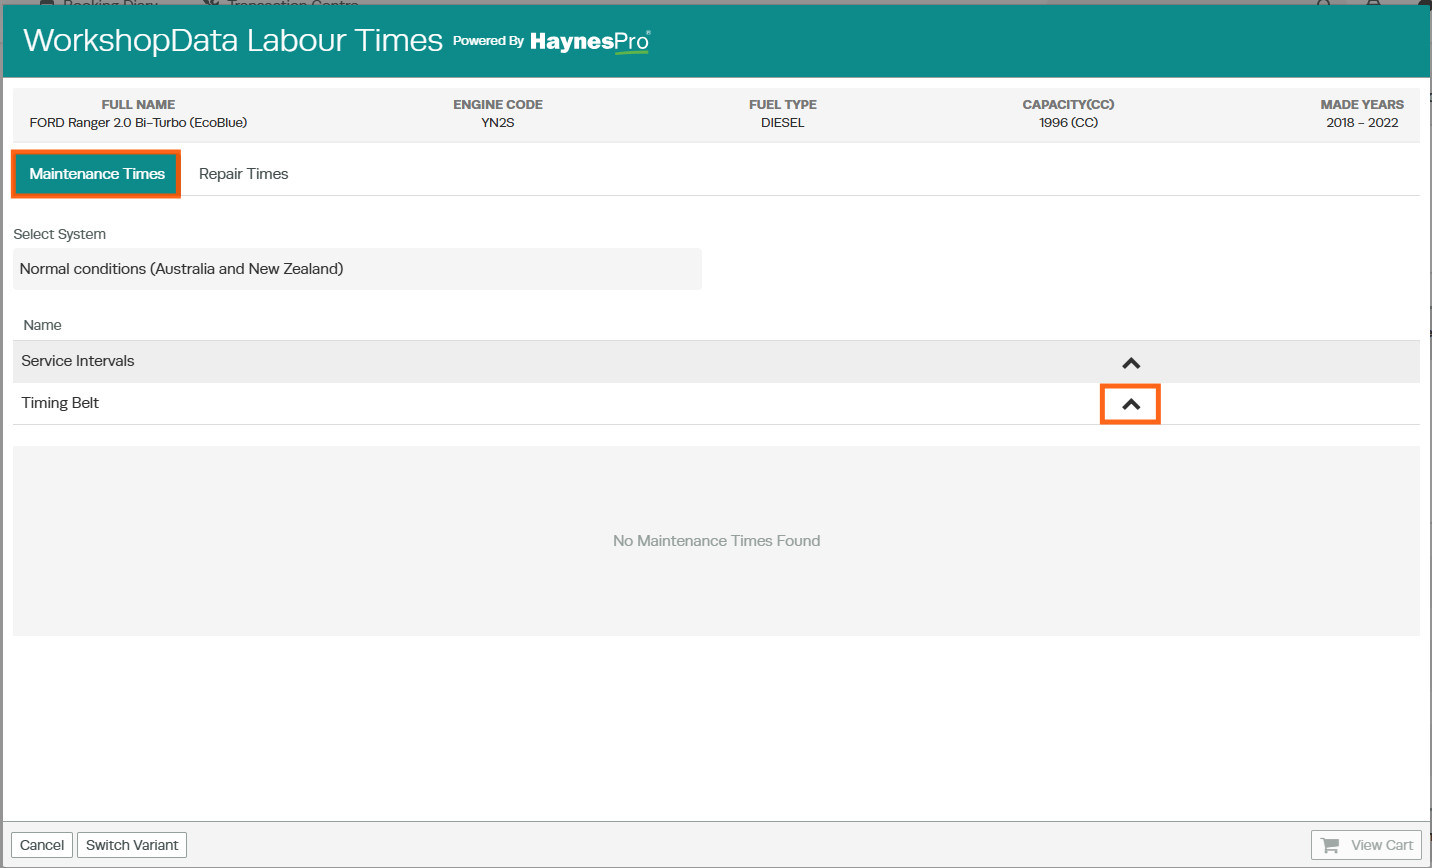
- Select Maintenance Times.
- Click the arrow next to the System drop-down menu and expand the relevant row.
- Locate the Timing Belt section.
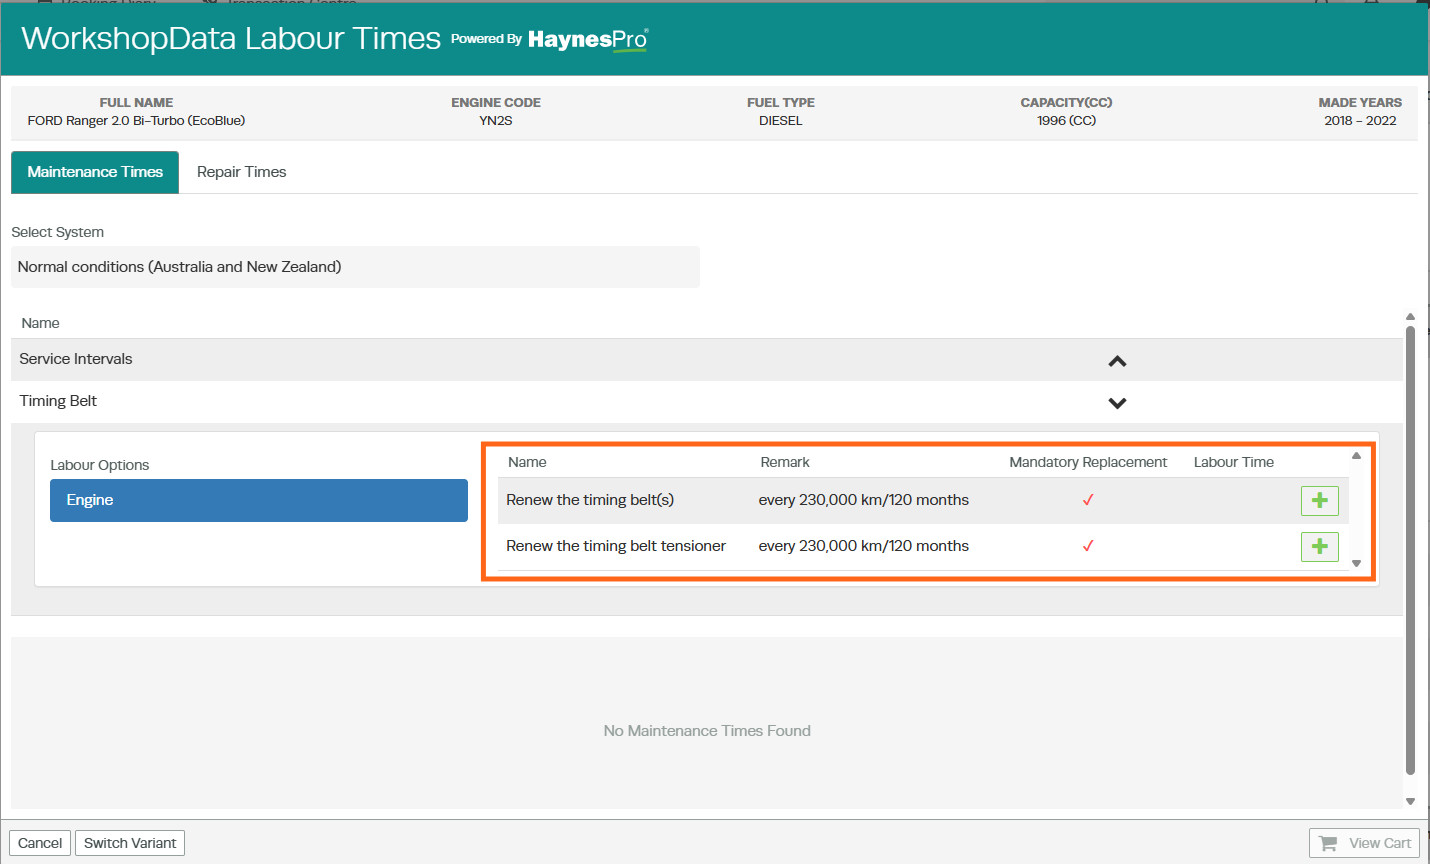
You will see a detailed table containing:
- Remark – Displays the manufacturer’s recommended replacement interval, such as every 210,000 km.
- Mandatory Replacement – A red ✔ indicates the manufacturer has flagged the replacement as mandatory at that interval. If the field is blank, the replacement is optional.
- Labour Time – Shows the recommended labour time for completing the task.
Adding Timing Belt Labour to the Invoice
Once you have identified the required timing belt tasks:
- Click the green + icon next to the labour times you want to include.
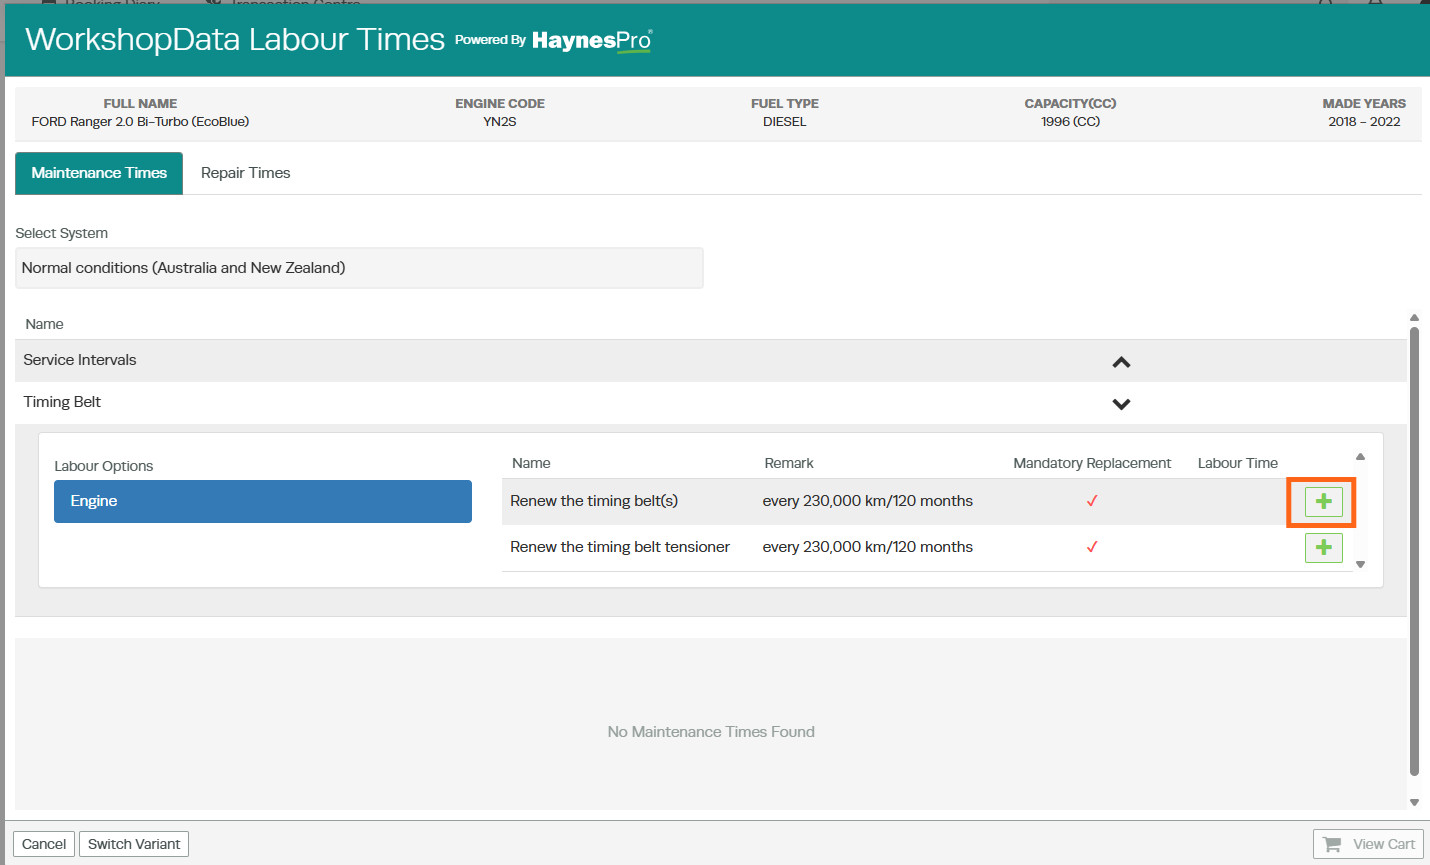
- Select View Cart
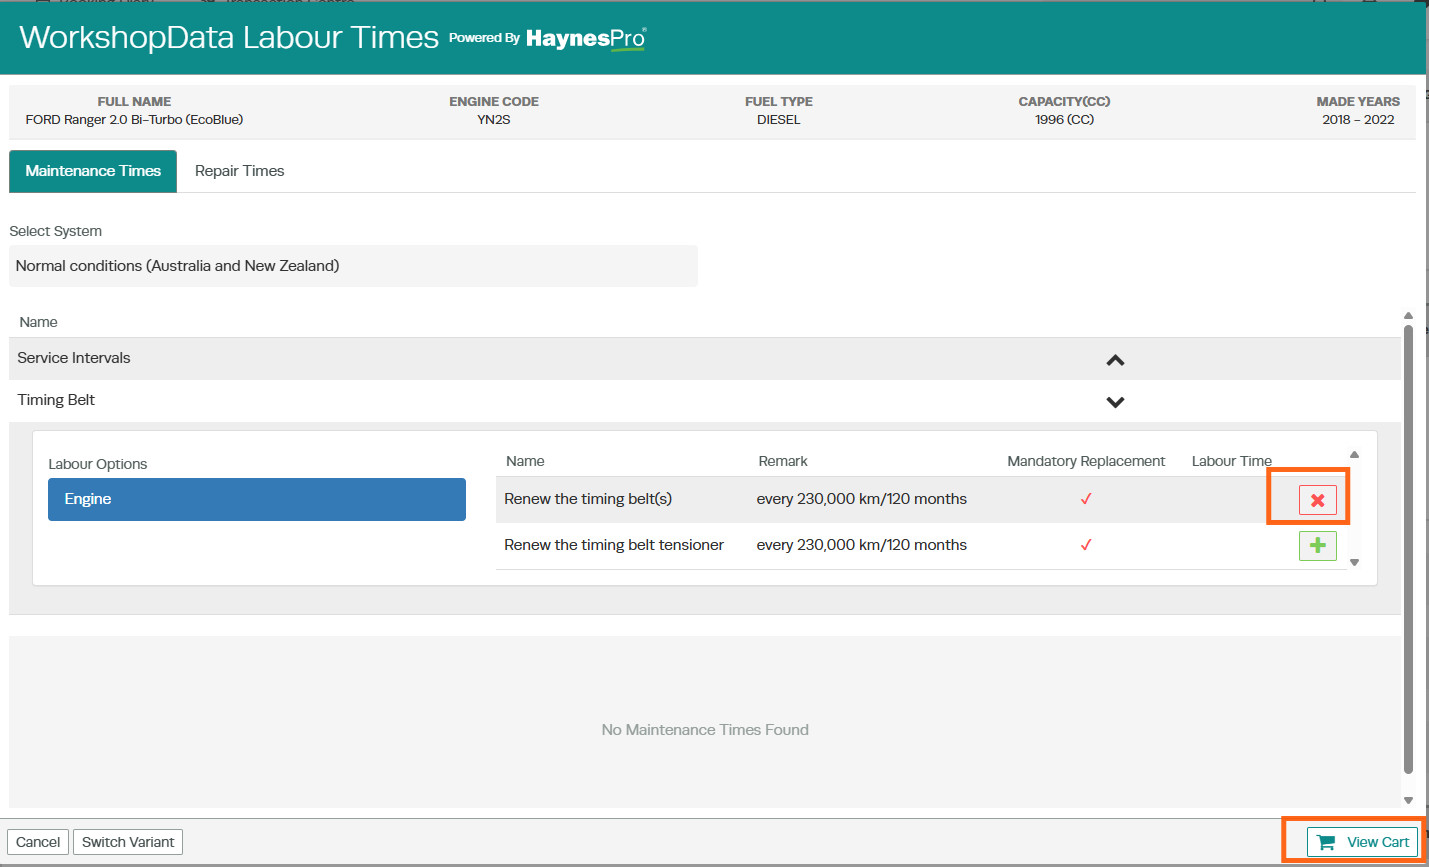
- Checkout.

- The selected labour items will be added to your invoice, helping you create an accurate and comprehensive quote.
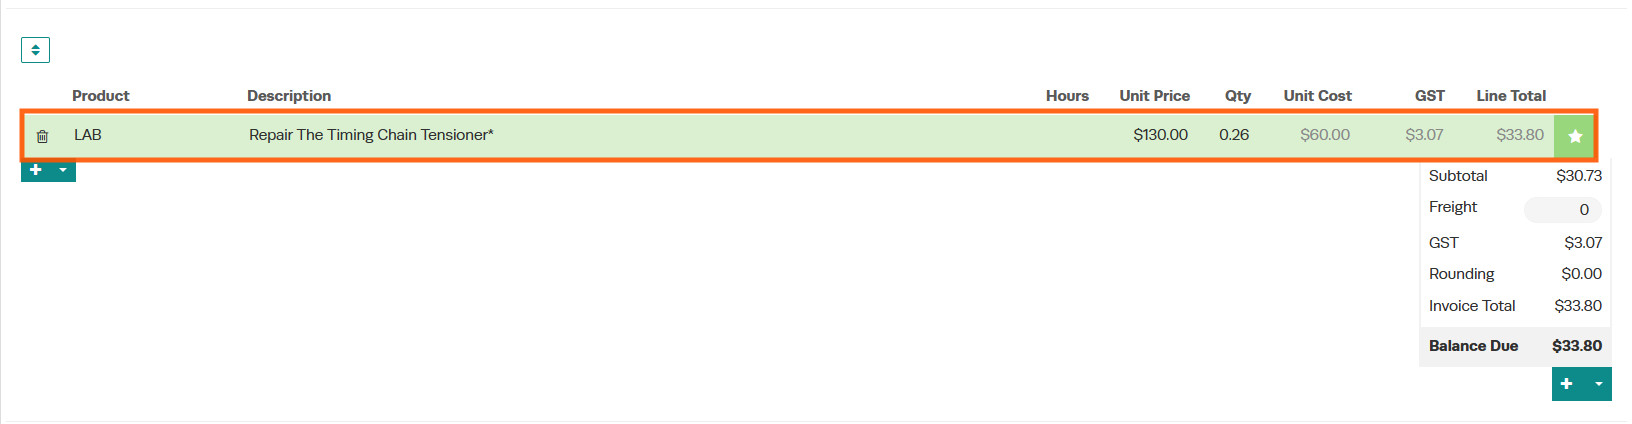
Timing Chain Labour Times
For vehicles equipped with a timing chain rather than a timing belt, WorkshopData provides access to manufacturer labour times through the Repair Times section.
How to Access Timing Chain Labour Times
- Open an existing customer invoice or create a new one.
- Under the product line, click the drop-down arrow and select WorkshopData Labour Times.
- Select Repair Times.
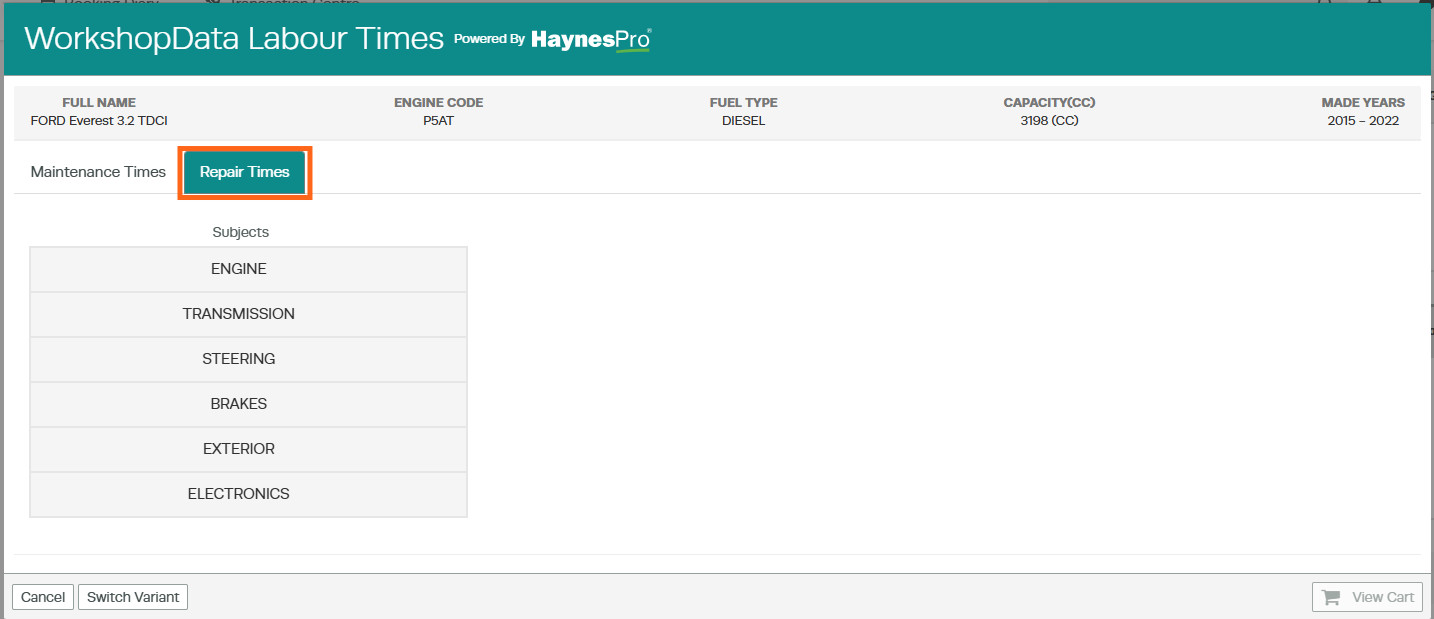
- Navigate to Engine > Engine Assembly > Timing.
- Review the available timing chain labour operations and recommended labour times.
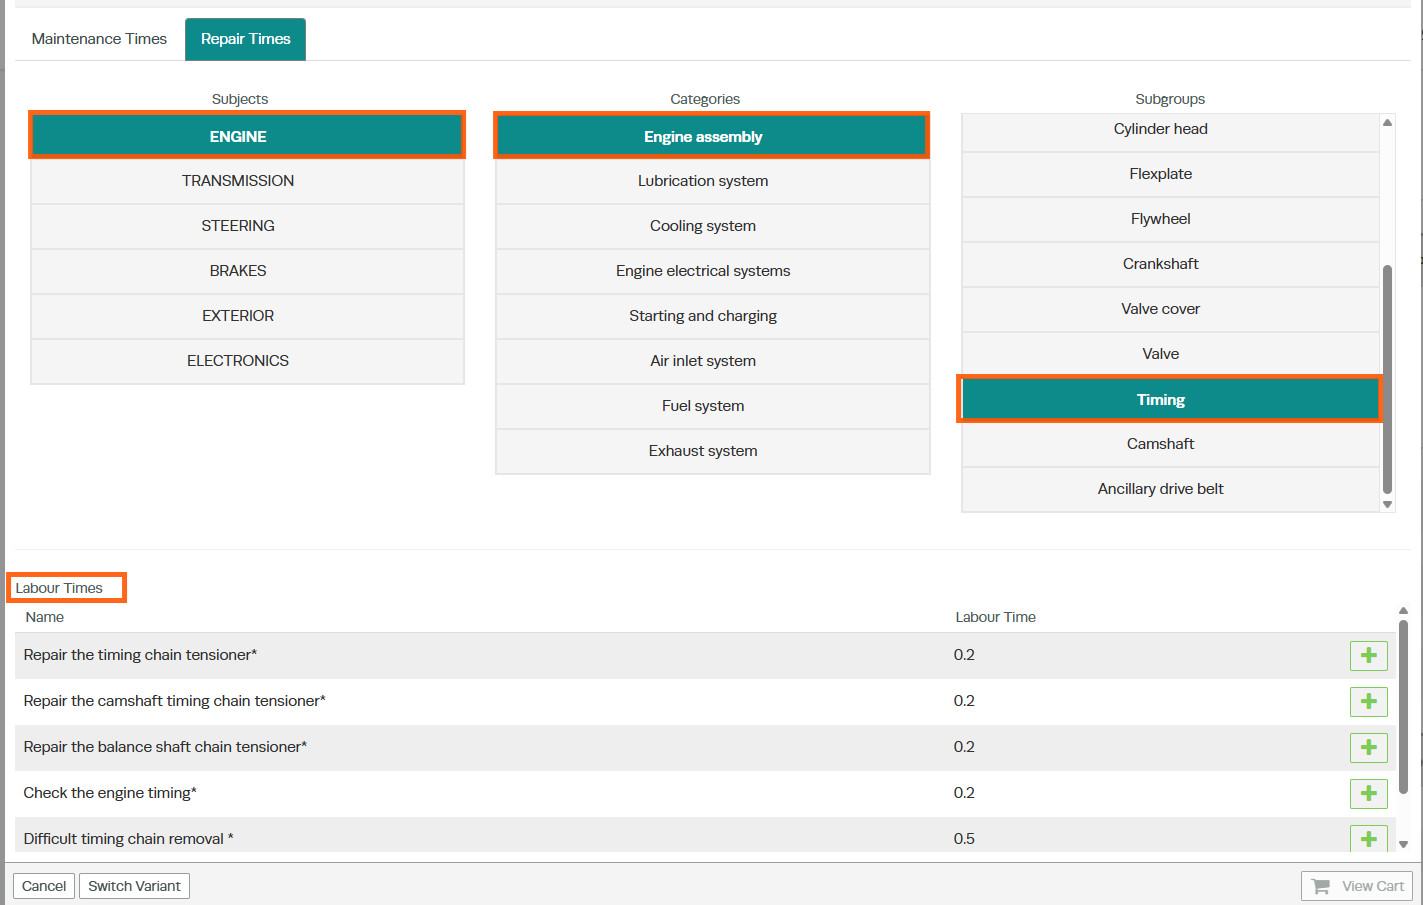
Adding Timing Chain Labour to the Invoice
Once you have identified the required timing chain tasks:
- Click the green + icon next to the labour times you want to include.
- Select View Cart
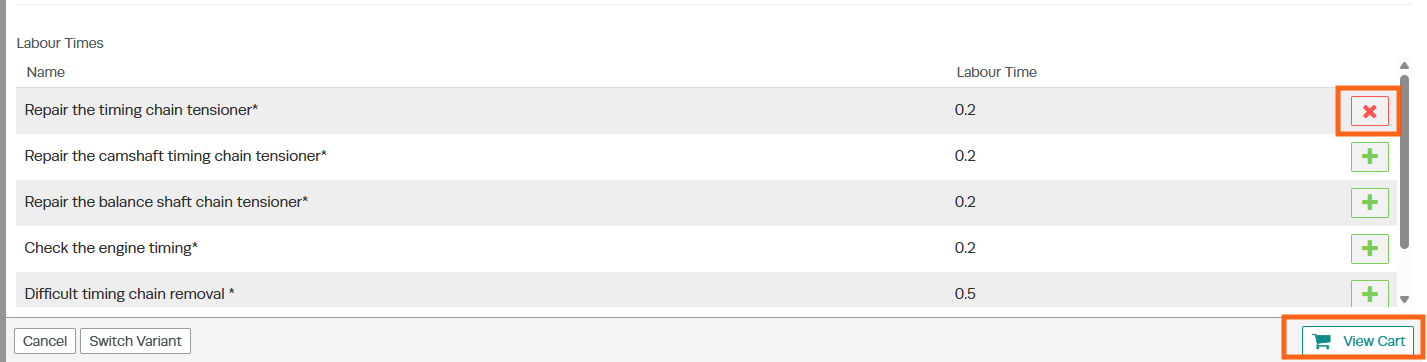
- Checkout.

- The selected labour items will be added to your invoice, helping you create an accurate and comprehensive quote.
Service Item Intervals
The Service Item Intervals section helps you identify manufacturer-recommended maintenance items and their replacement intervals. Common service items include:
- Engine oil
- Oil filter
- Air filter
- Cabin filter
- Brake fluid
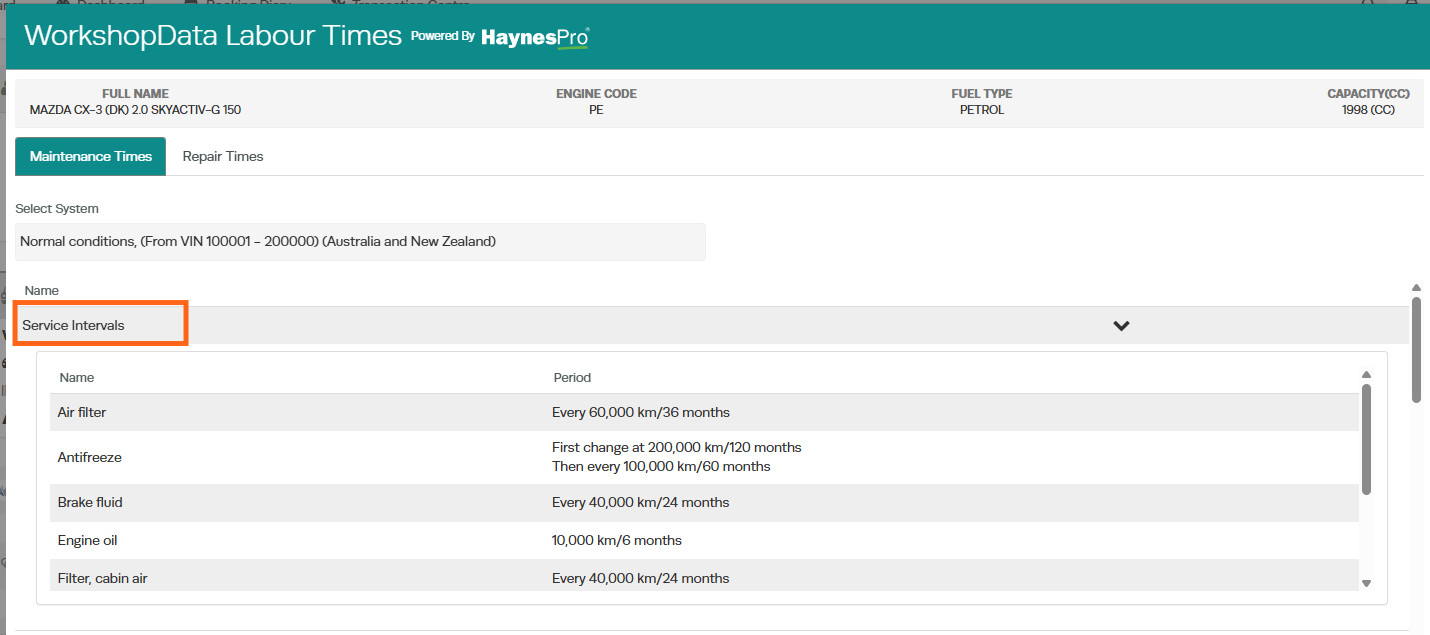
Each item displays its recommended service interval in the Period column, for example:
12,500 km / 12 months
Items are listed alphabetically, making it easy to locate specific maintenance requirements. Each service item is linked to the relevant repair operations, allowing you to manually add the required labour to a job card or invoice.
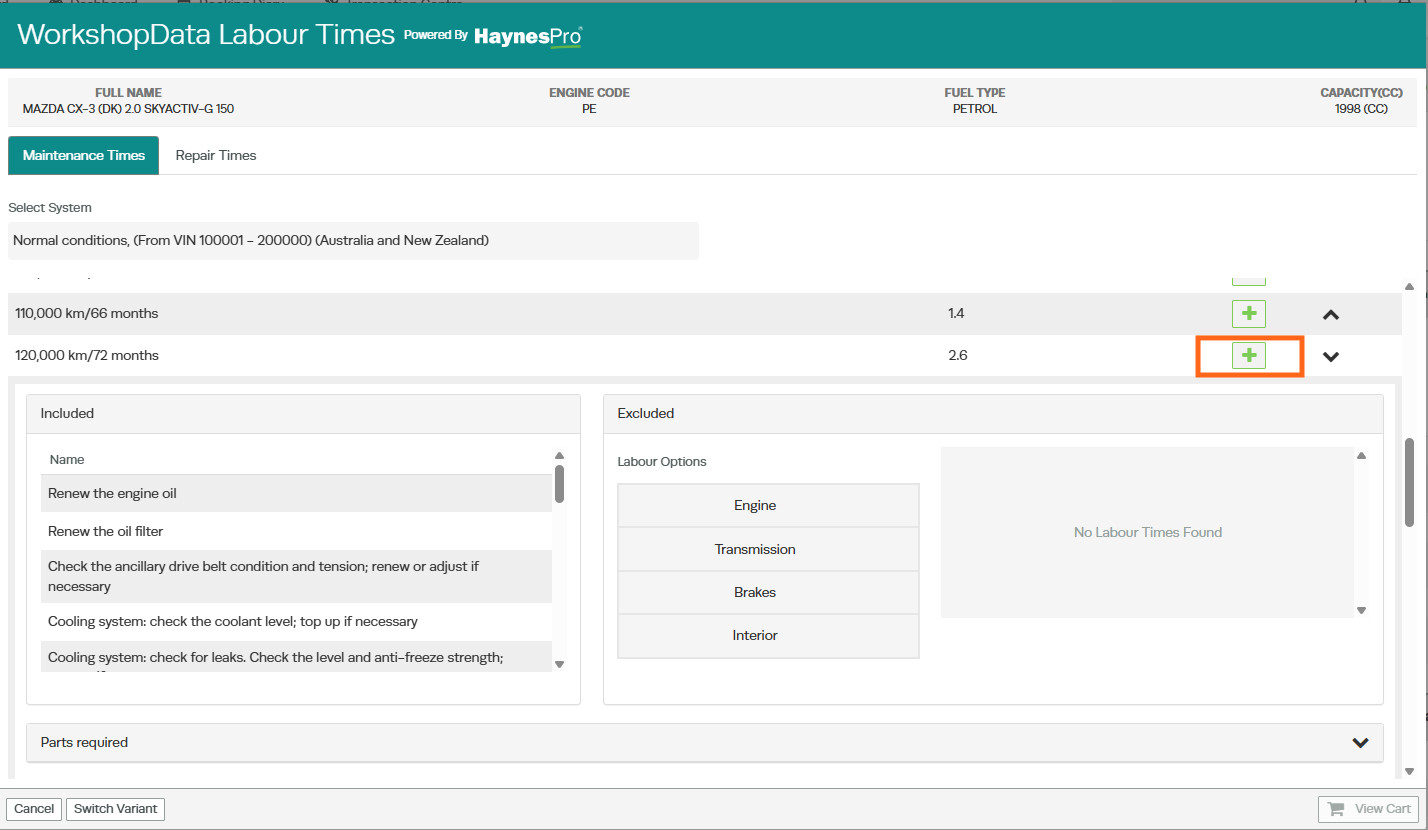
How to Access Service Item Intervals
- Open an existing customer invoice or create a new one.
- Under the product line, click the drop-down arrow and select WorkshopData Labour Times.
- Select Maintenance Times.
- Expand the relevant maintenance interval.
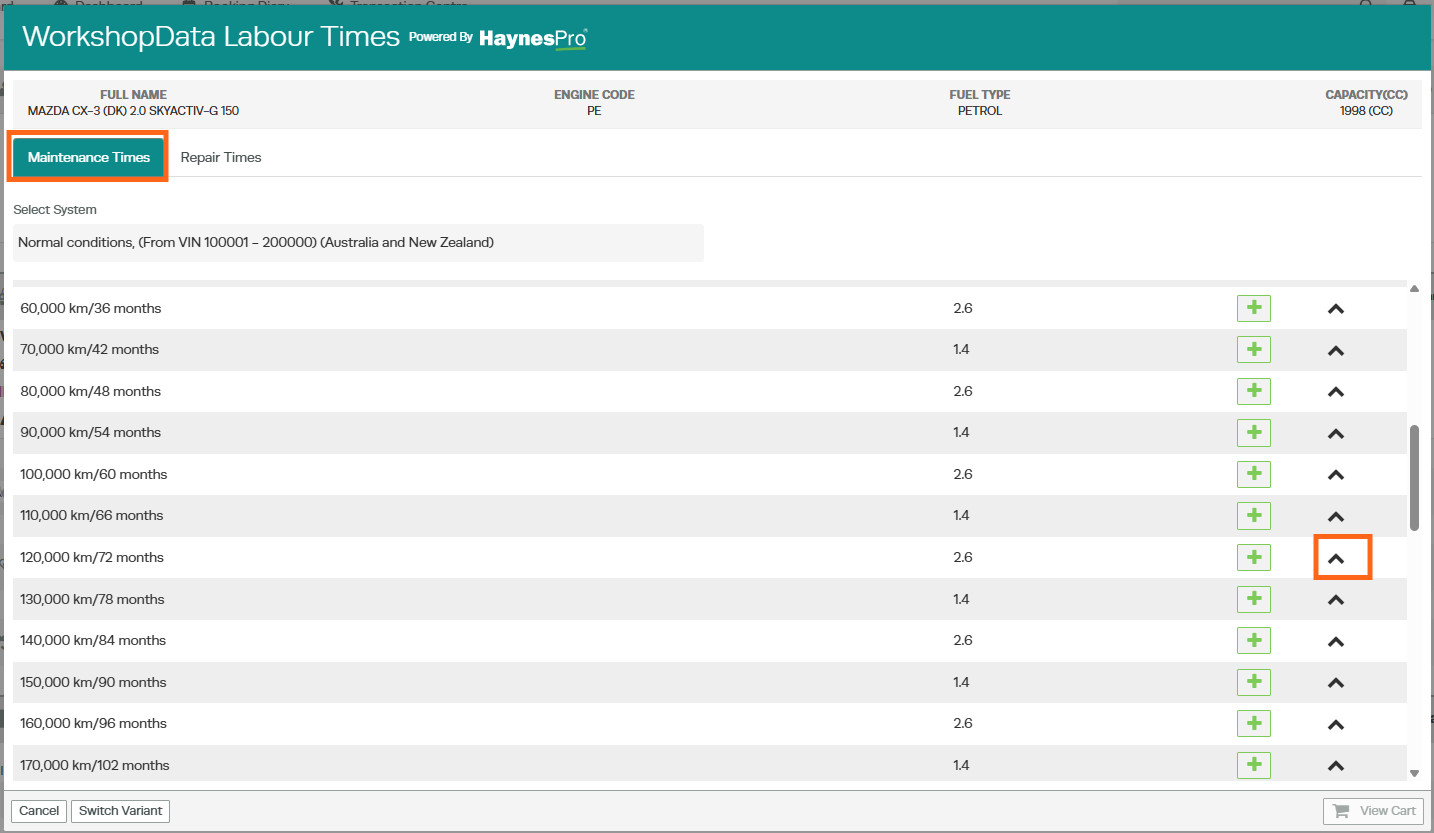
For example, if you are performing a 120,000 km / 72 Months Service, click the arrow at the end of the service line to expand the available maintenance information.
You will be able to view additional maintenance items that may be recommended as part of that service interval.
Adding Service Labour to an Invoice
- Locate the required service interval.
- Click the green + icon next to the service line.
- Select View Cart
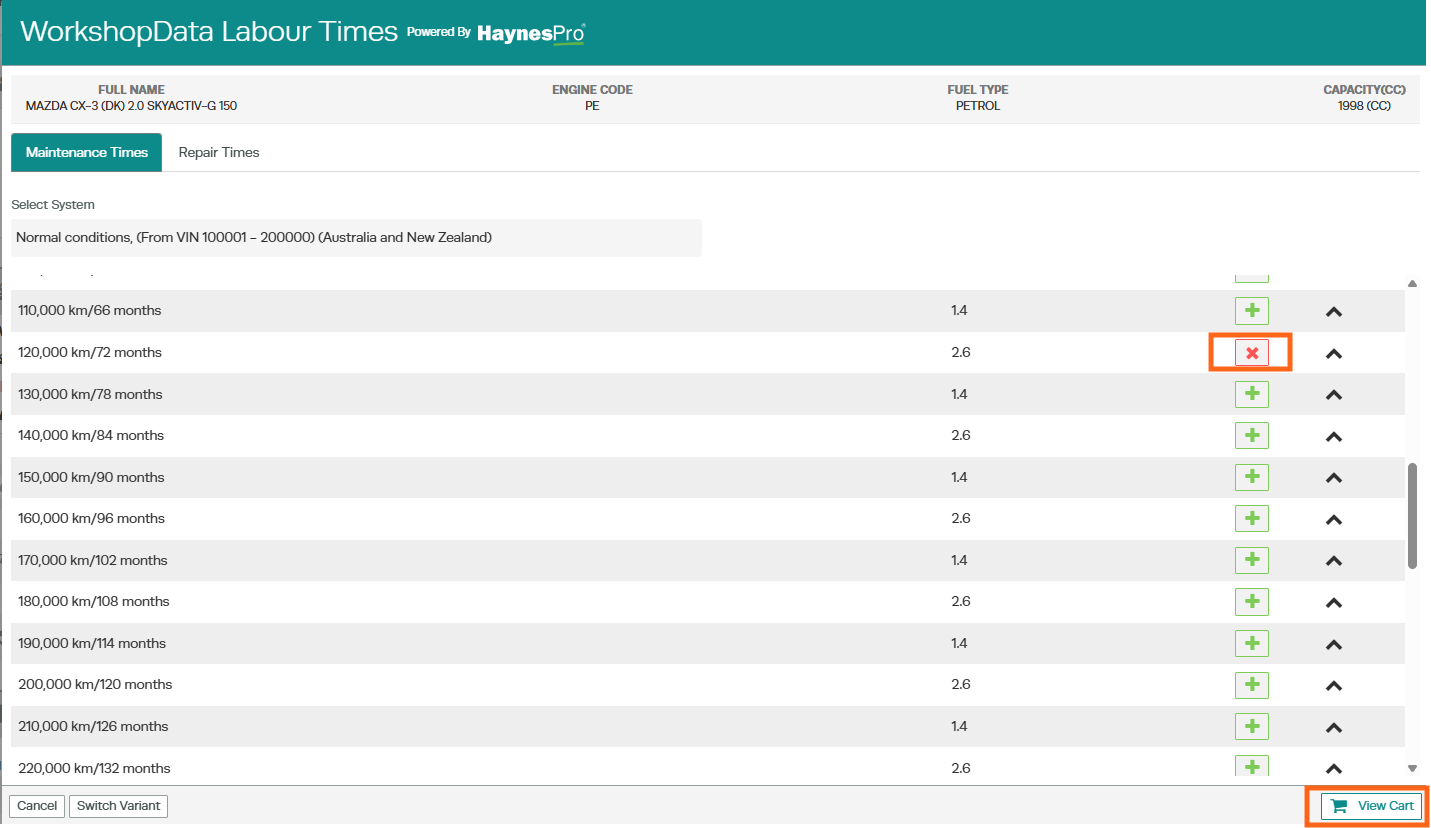
- Checkout.

- The labour operation will be added to the invoice.

This ensures the service labour is included in your quote and accurately reflects the manufacturer’s recommended maintenance schedule.
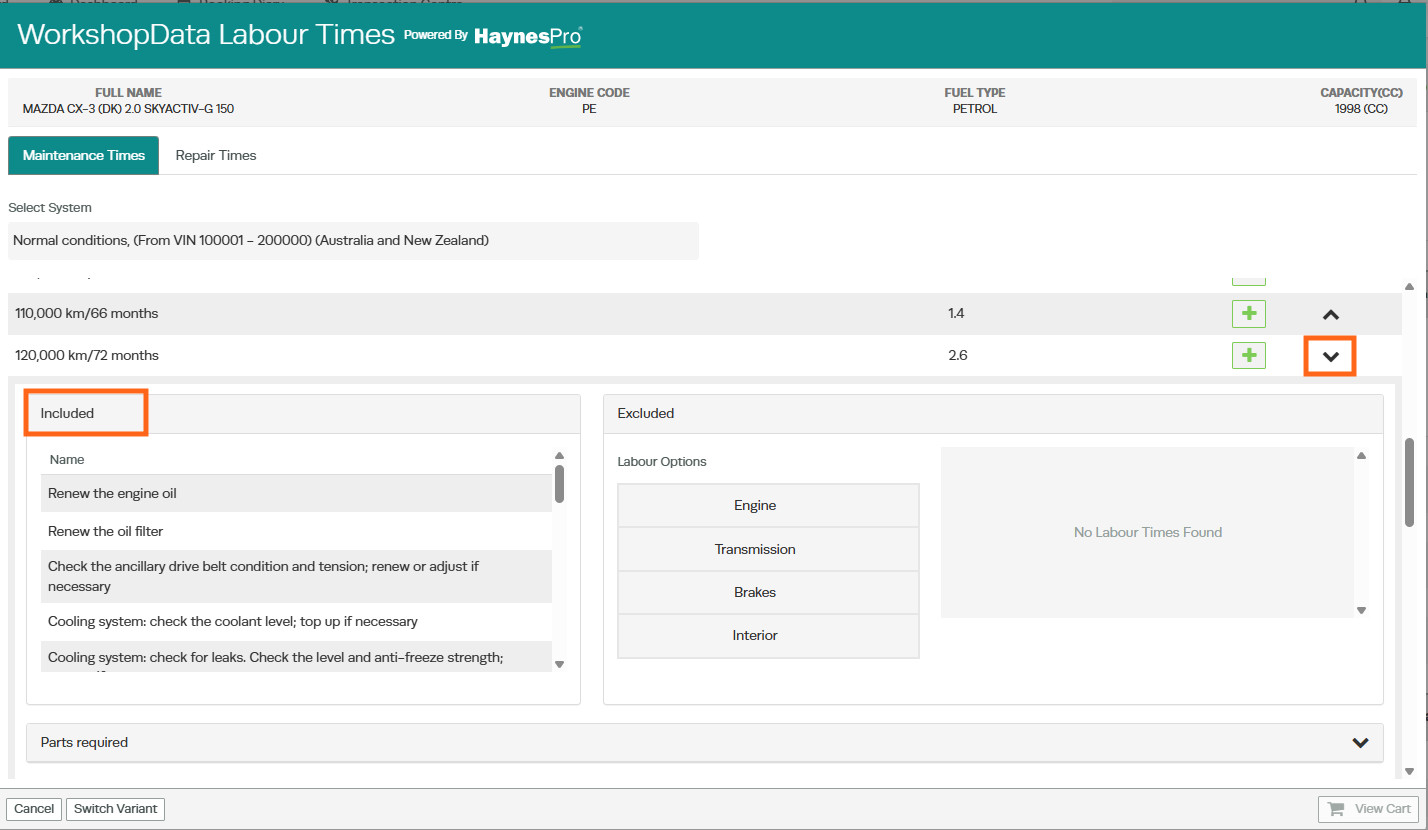
Parts Required
When viewing a maintenance interval in Maintenance Times, you can also access a detailed list of parts required for that service.
The Parts Required section appears directly below the labour options and provides a list of components recommended by HaynesPro for the selected vehicle and service interval.
How to View Parts Required
- Expand the required maintenance interval.
- Locate the Parts Required section.
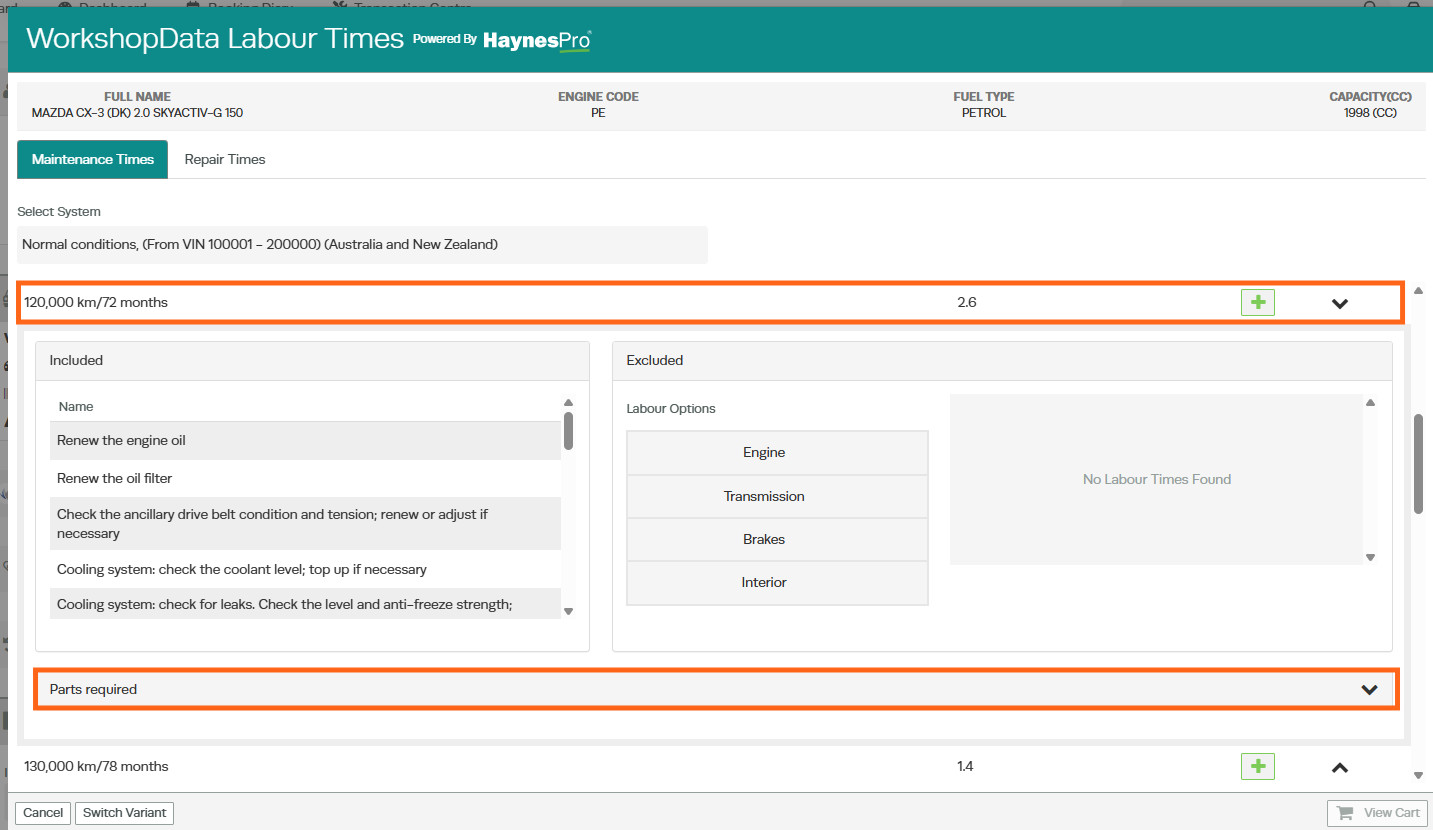
- Click the heading or arrow to expand the section.
- Select a category to view the required components.
For most vehicles, the categories include:
- Mandatory Parts
- Spare Parts
The first category opens automatically when expanded.
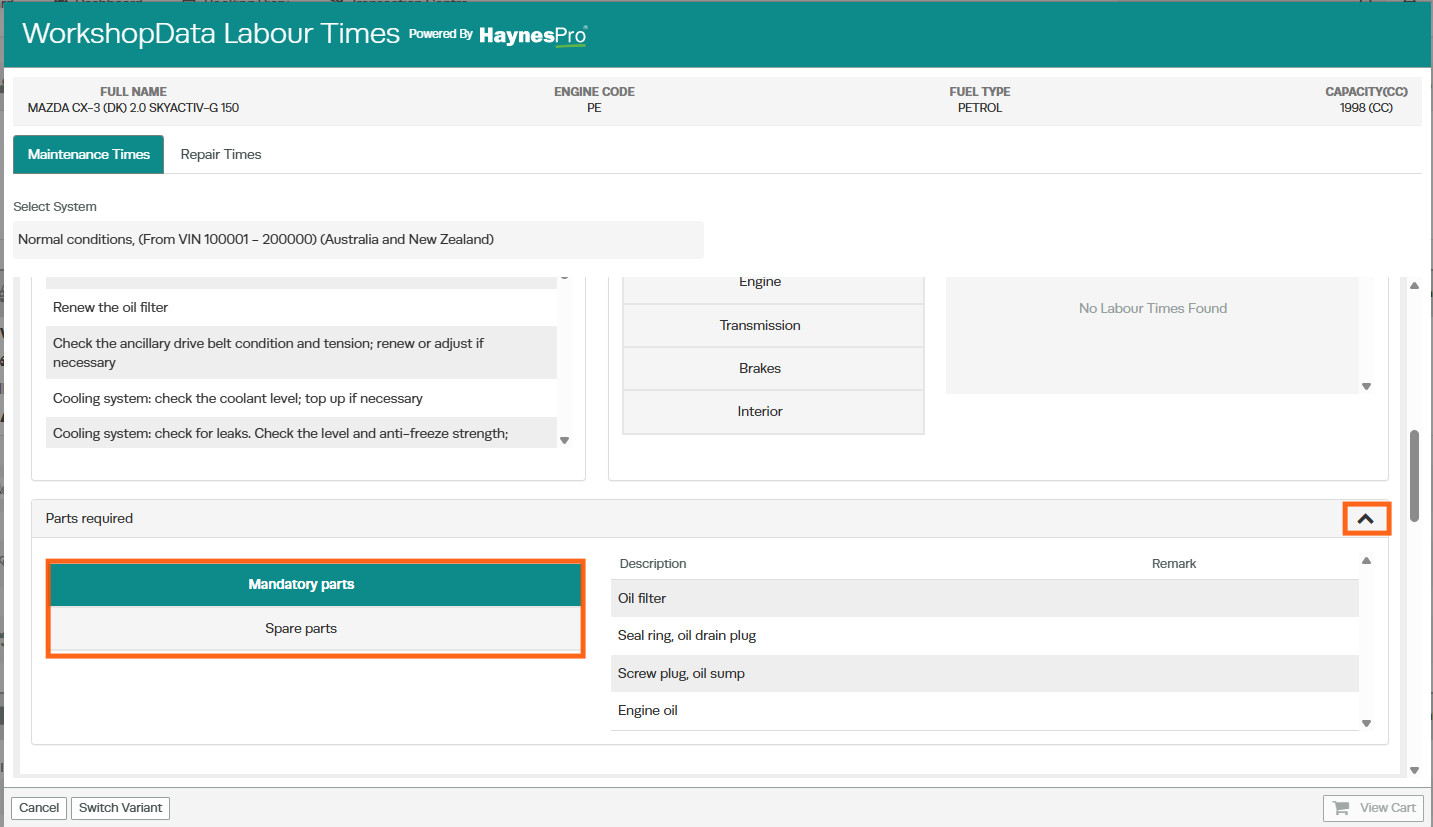
Understanding the Parts List
Each part displays:
- Description – The name of the required component.
- Remark – Additional information provided by the manufacturer or HaynesPro.
If a category appears empty, no parts information has been supplied by HaynesPro for that maintenance interval.
Adding Required Parts to the Invoice
After reviewing the parts listed in the Parts Required section:
- Select Cancel to return to the customer invoice.
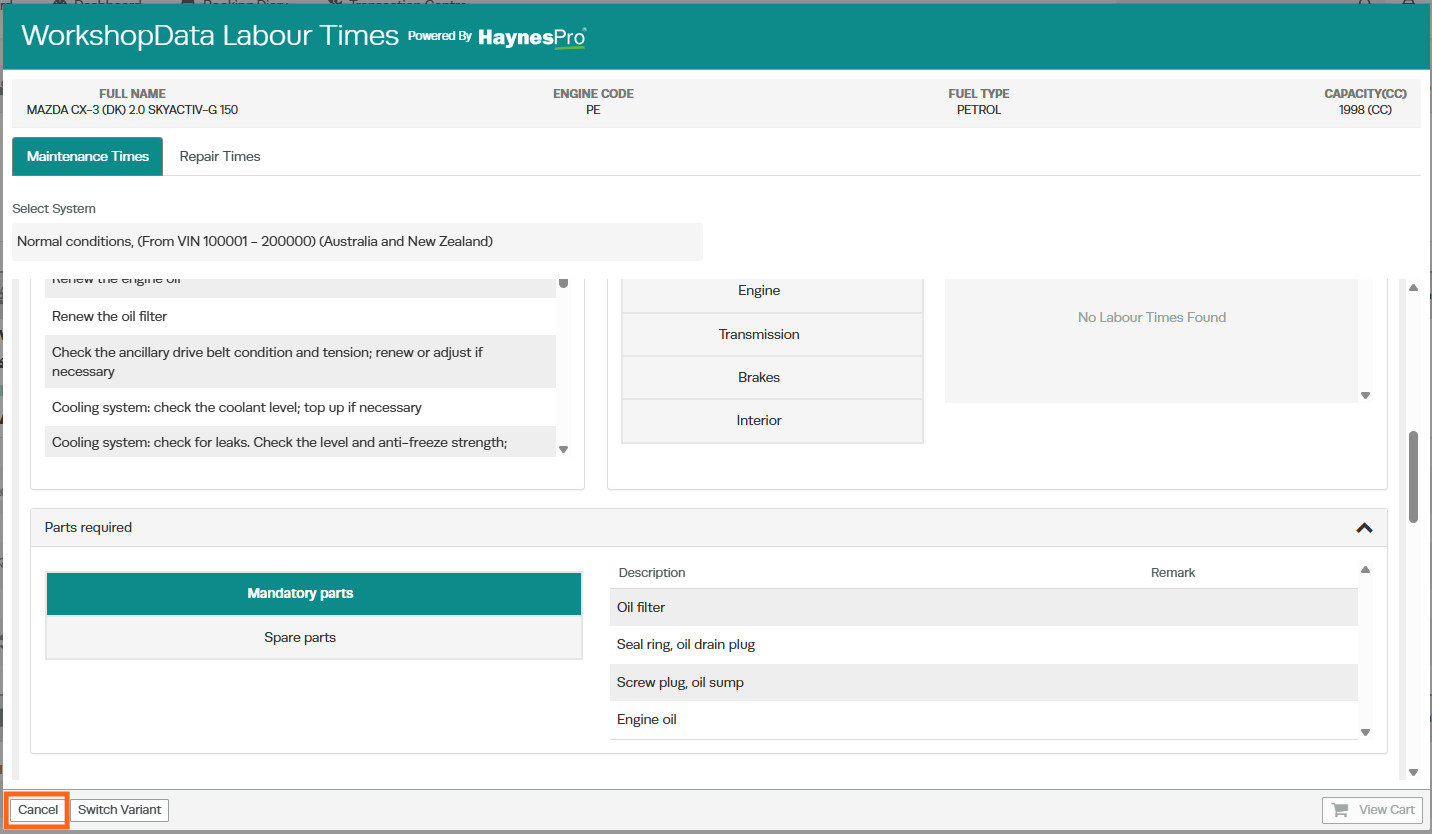
- Add the required parts to the invoice by searching for the appropriate products in your inventory.
- Select the correct products and add them to the job.
OE Codes on Repair Times
WorkshopData can display Open Original Equipment (OE) Codes alongside repair times, providing additional manufacturer-specific reference information for certain repair operations.
When HaynesPro supplies an OE Code for a repair operation, it appears as a green badge next to the labour time. The OE Code column is only displayed when OE data is available for the selected vehicle and repair. If you do not see an OE Code, HaynesPro has not provided OE information for that operation.

How to View OE Codes
- Open an existing customer invoice or create a new one.
- Under the product line, click the drop-down arrow and select WorkshopData Labour Times.
- Select Repair Times.
- Navigate through the relevant Subject, Category, and Subgroup options to locate the required repair operation.
- Review the labour time results.
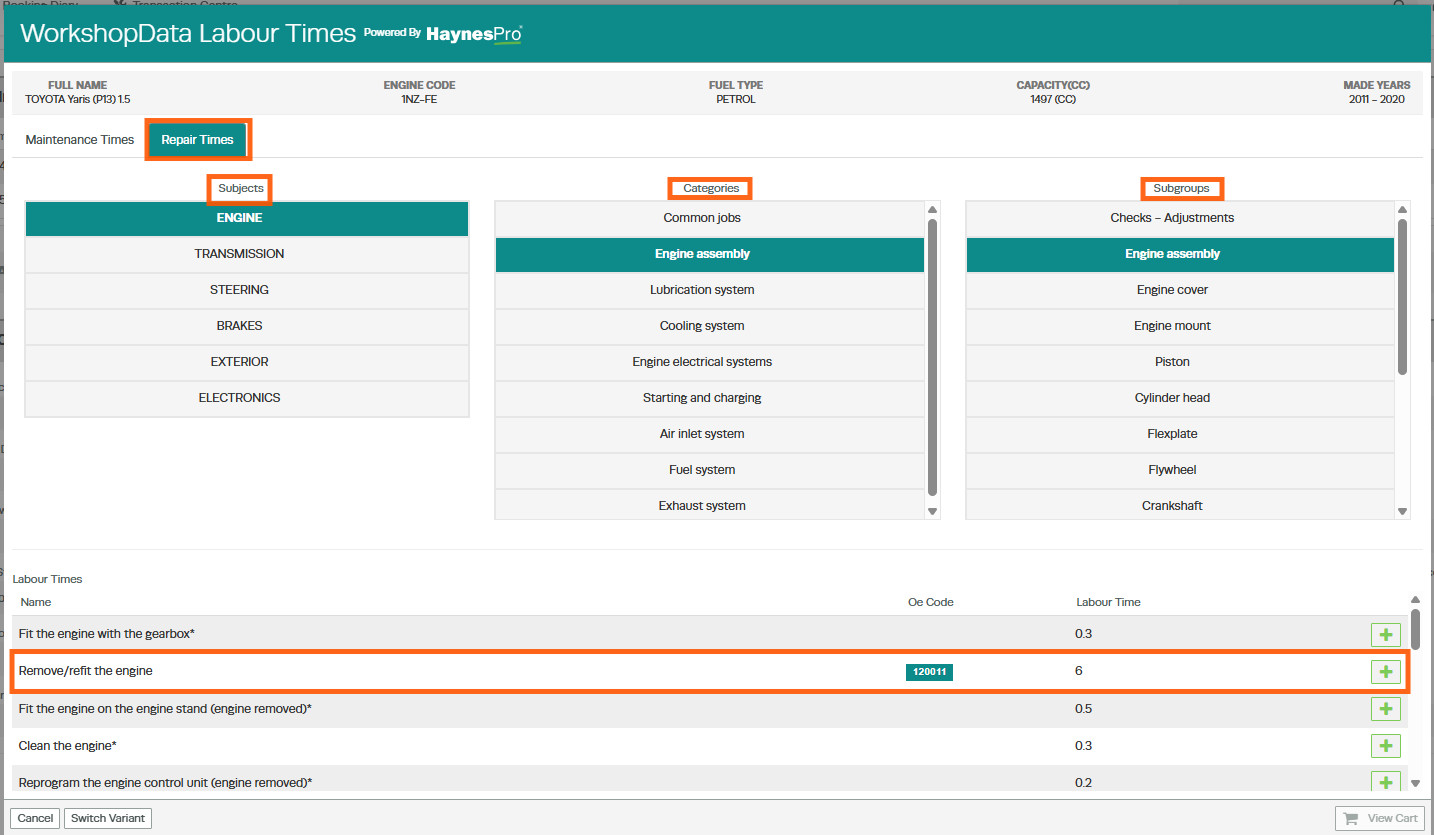
If an OE Code is available, a green OE badge will appear alongside the labour time for that repair operation.
Adding the Repair Operation to the Invoice
Once you have located the required repair operation and reviewed the labour time:
- Click the green + icon next to the repair line.
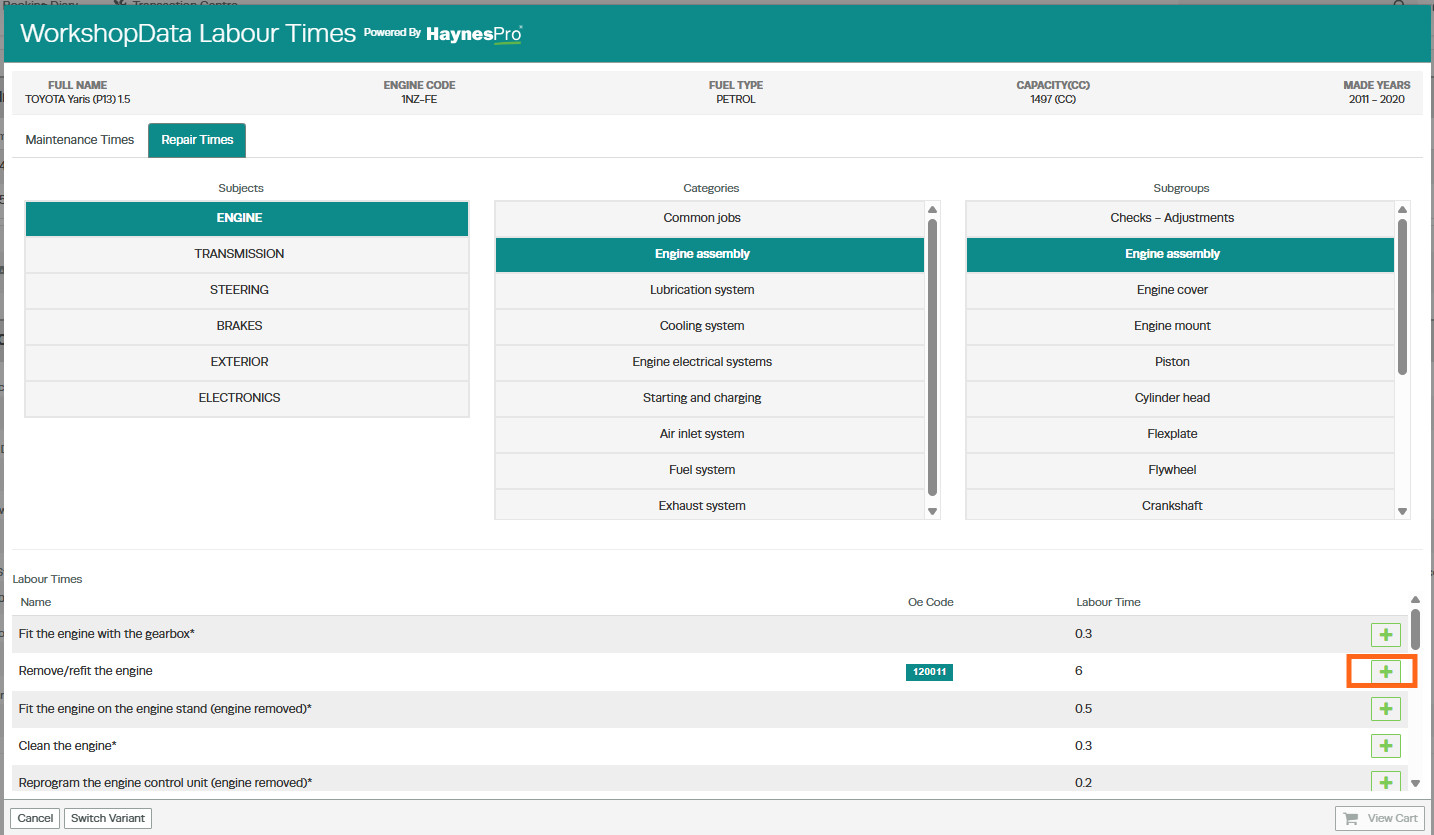
- Select View Cart
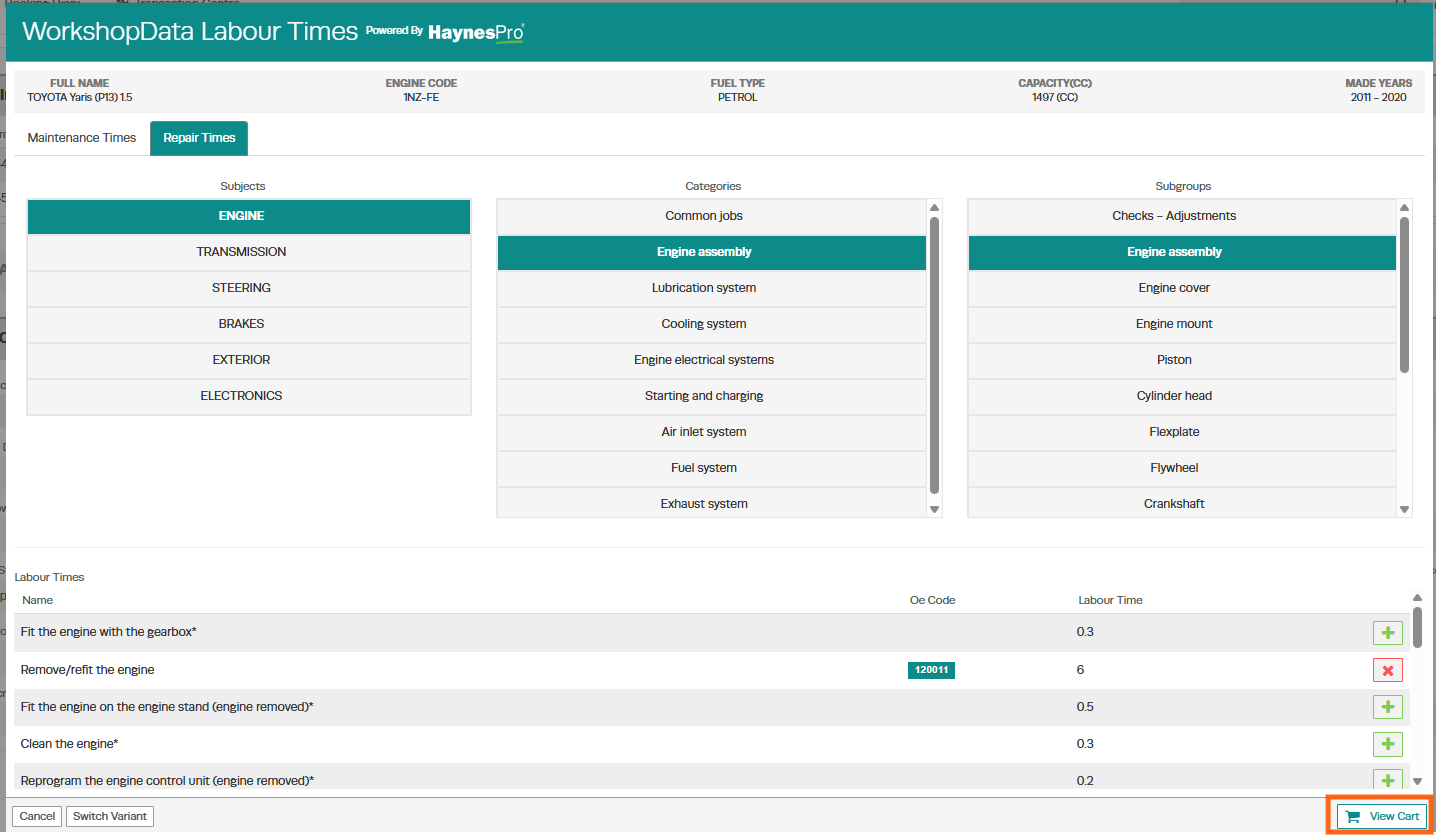
- Checkout.

- The repair operation, including the labour time, will be added to the customer invoice or job card.

Why Use OE Codes?
OE Codes provide an additional layer of manufacturer reference information, helping workshops:
- Verify repair operations against manufacturer data.
- Better understand the scope of a repair.
- Reference manufacturer-specific repair procedures where available.
Because OE Codes are supplied by HaynesPro, availability varies by vehicle make, model, and repair operation.
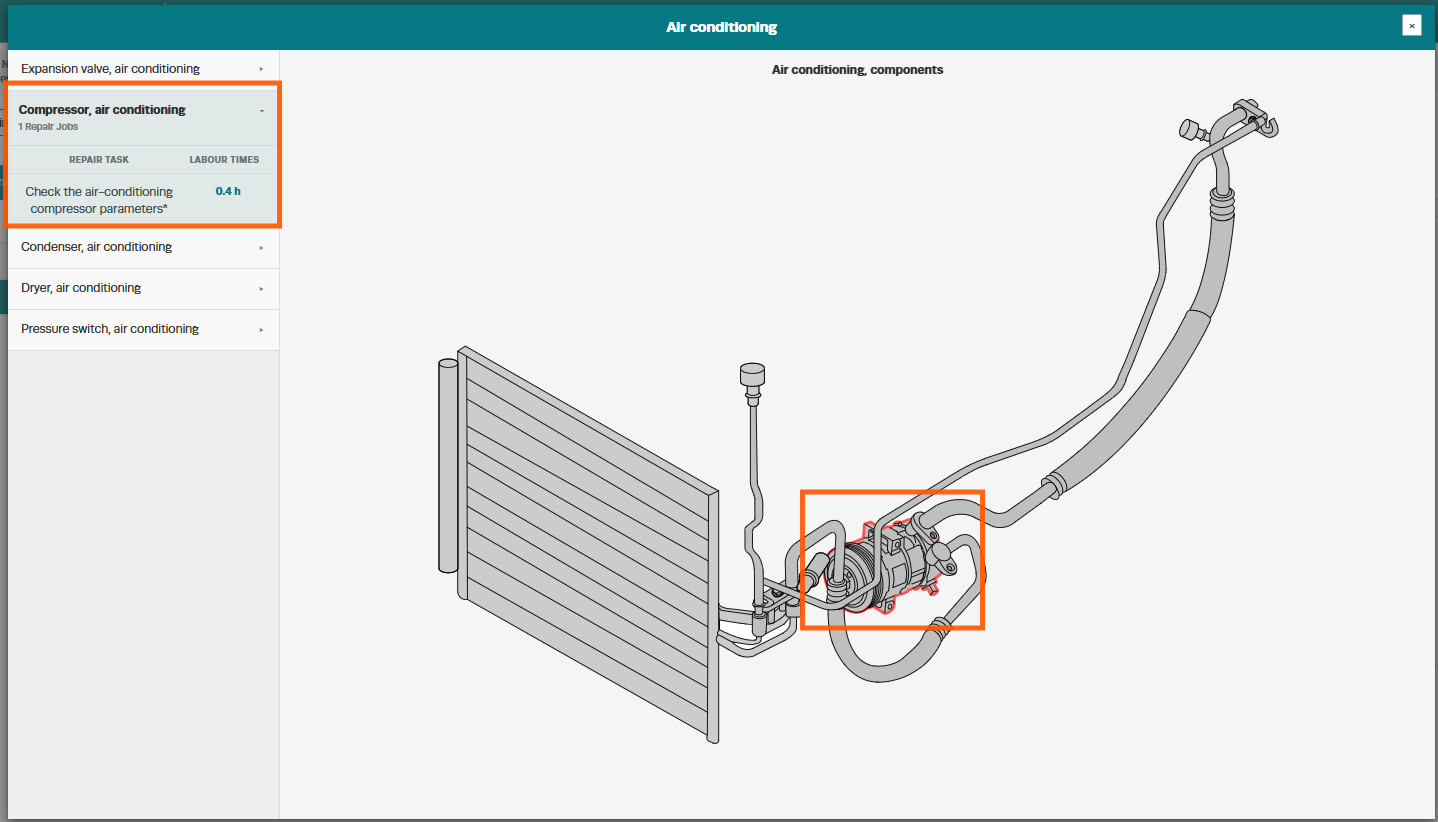
Interactive Technical Drawings
WorkshopData’s Technical Drawings provide a visual representation of vehicle components and systems, helping technicians quickly identify parts and access related repair information.
For supported diagrams, the drawings are fully interactive. Selecting a component from the parts list highlights the matching part on the diagram, while selecting a part on the diagram displays the associated repair tasks and labour times.
Note: Interactive functionality is only available on SVG drawings. If a drawing is supplied as a static image, it will open as a zoomable picture and the click-to-highlight features will not be available.
How to Access Technical Drawings
- Open an existing customer invoice or create a new one.
- In the Vehicle field, click the Action Star.
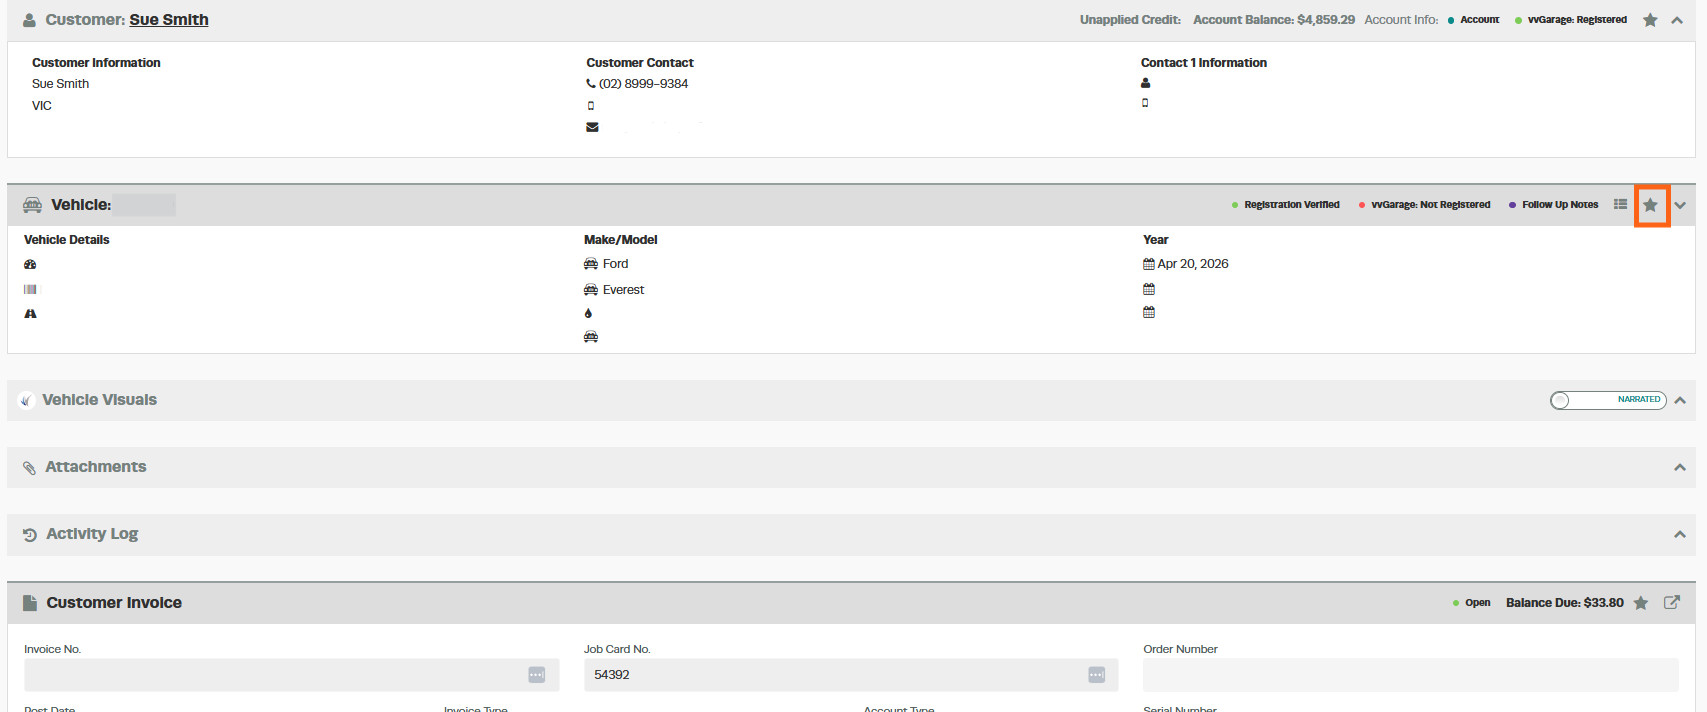
- Select WorkshopData
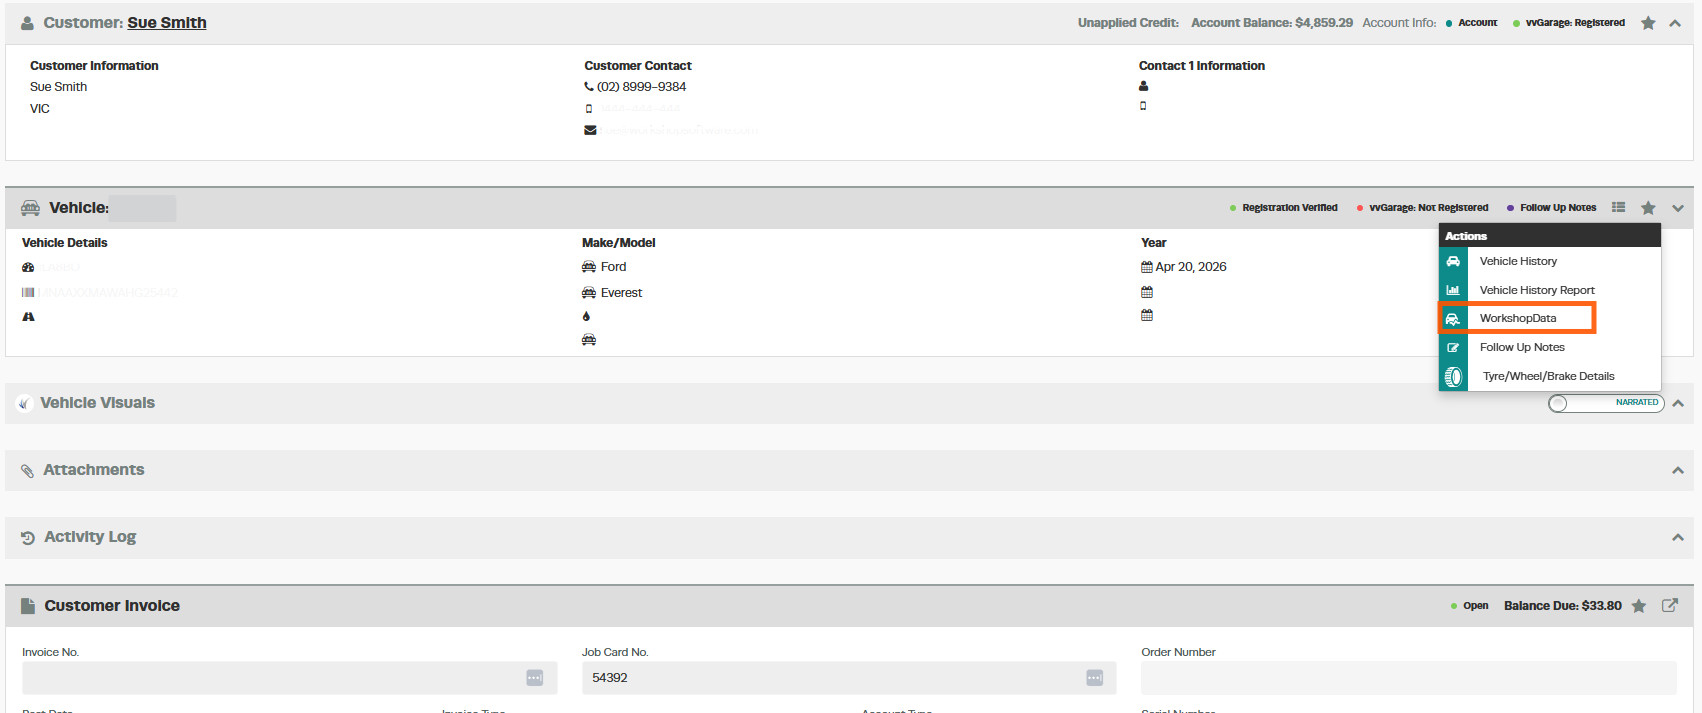
- Repairs.
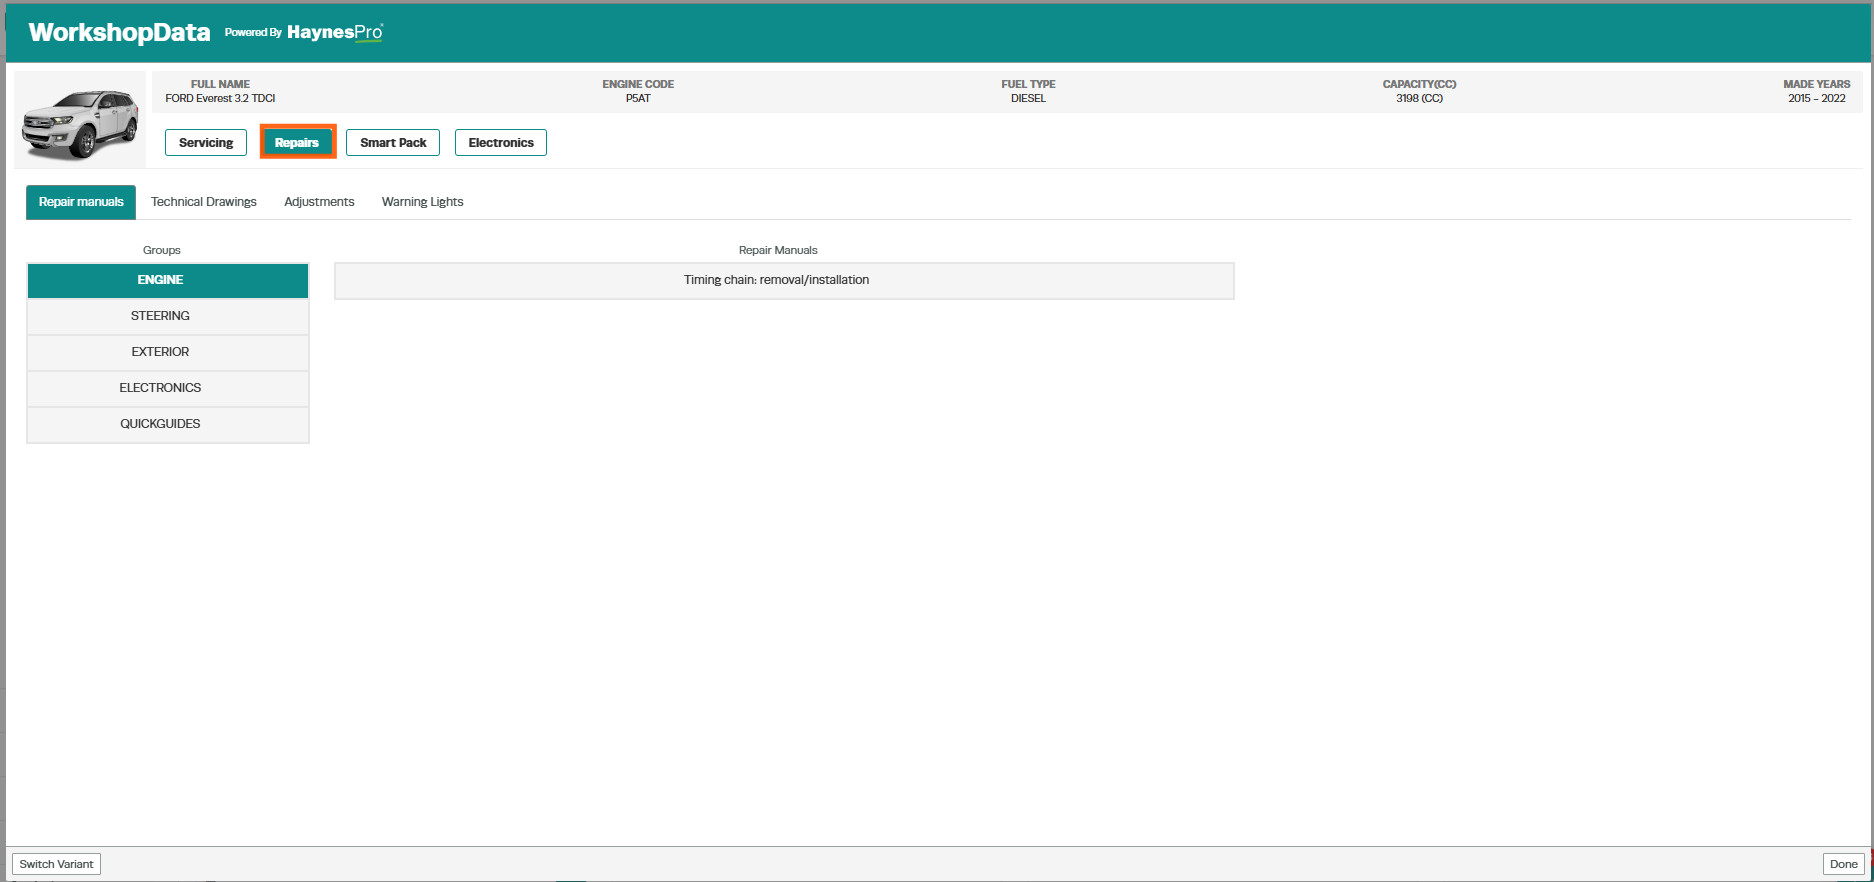
- Open Technical Drawings.
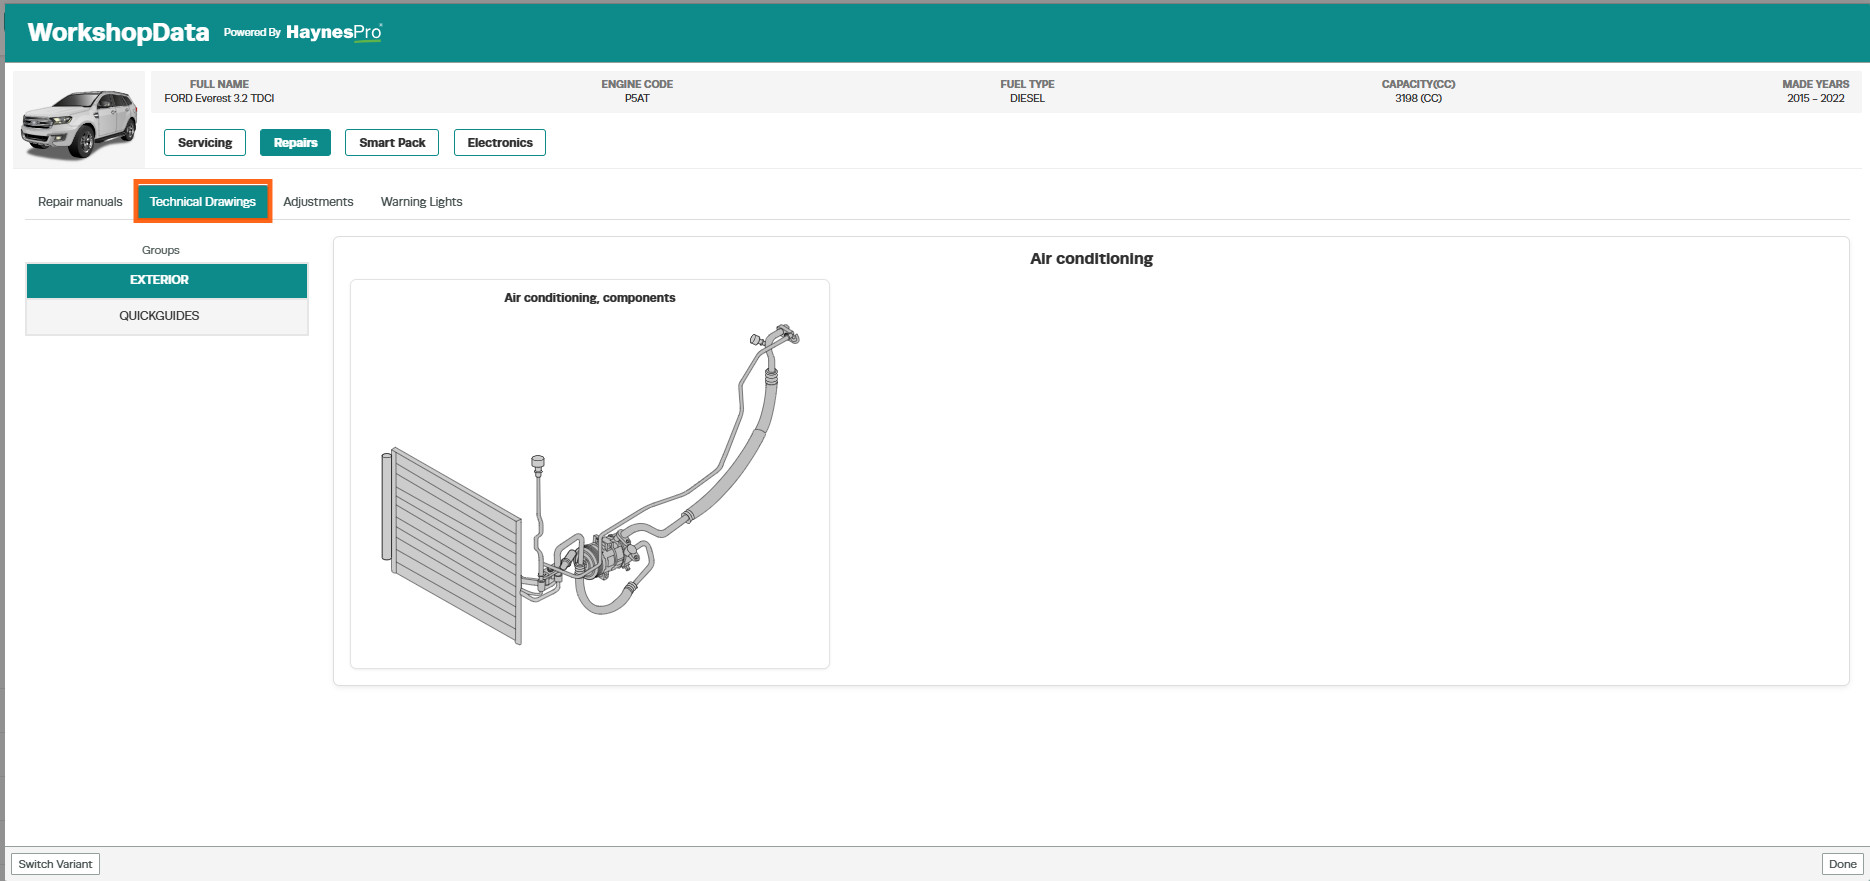
- Browse the available drawing groups and select the required QuickGuide.
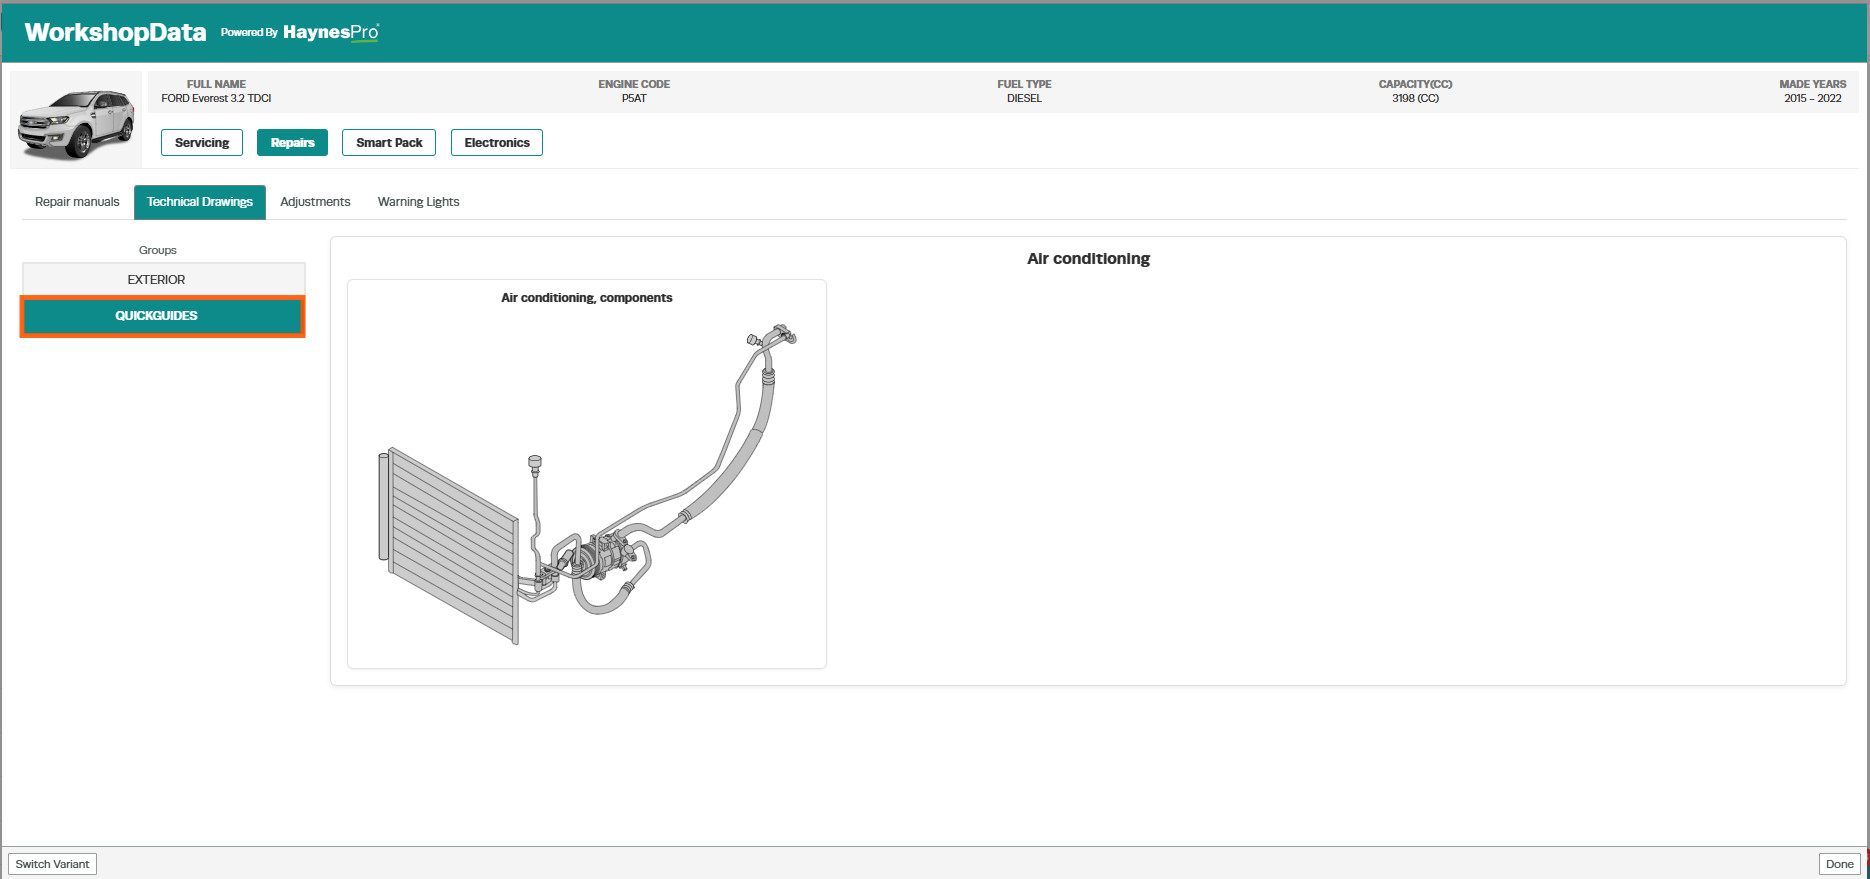
- Click on the Picture
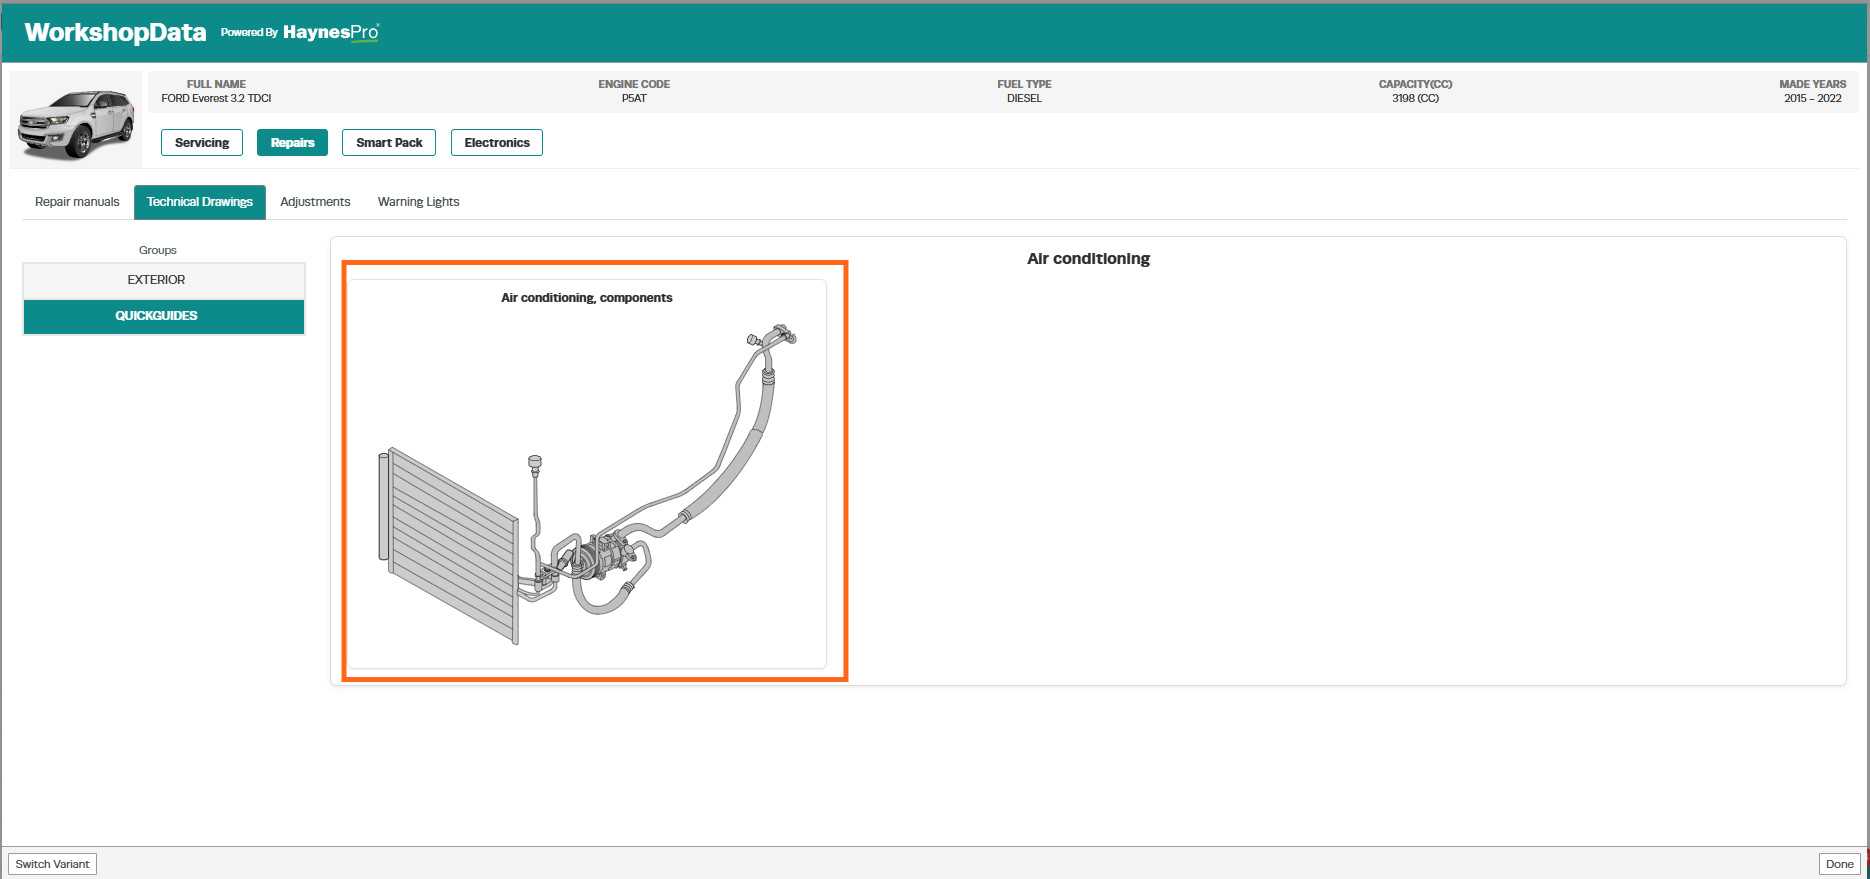
- the arrow next to a component to view the available repair tasks and labour times.
GOOD TO KNOW
- All five sections rely on data returned by HaynesPro. If a column or section is empty for a vehicle,
HaynesPro has nothing to send — try a different variant, or use WorkshopData Make and Model
Search to confirm. - Some Australian motorbikes show service intervals in miles rather than kilometres. This comes
from HaynesPro and cannot be overridden inside Workshop Software. - WorkshopData lookups count against your subscription. If you see “You have used all your
Workshop Data Lookup requests”, purchase more lookups or contact support.
Frequently Asked Questions
Why don’t I see the OE Code column for this vehicle?
The column appears only when HaynesPro has at least one OE code for the lookup. If it is hidden,
HaynesPro does not have OE data for that vehicle.
Why does the Parts Required list for a motorbike look different from HaynesPro Touch?
HaynesPro publishes parts data differently for cars and motorcycles. Workshop Software displays what
HaynesPro returns for the vehicle type. If something still looks wrong, double-check the vehicle variant in
Workshop Software matches the one in HaynesPro Touch — variants with the same name sometimes
carry different data.
Why does a Technical Drawing open as a flat picture instead of an interactive diagram?
Some HaynesPro drawings are still supplied as static images (for example, .gif files). When that happens,
Workshop Software opens the drawing as a zoomable picture so you can still inspect it; the
click-to-highlight behaviour only works on SVG drawings.
What does the red ✔ in the Mandatory Replacement column mean?
The manufacturer marks that timing-belt task as mandatory at this interval. Blank means optional from the
manufacturer’s perspective.
The data in Workshop Software doesn’t match what I see in HaynesPro Touch — why?
HaynesPro Touch sometimes lists vehicles with identical names and specs as different internal records.
Make sure the variant in Workshop Software matches the one you are comparing in HaynesPro Touch. If
they match and the data still differs, the discrepancy is on HaynesPro’s side, not Workshop Software’s.
What happens if my WorkshopData subscription is inactive?
You will see “Please activate Workshop Data in your integration settings to use this feature.” Contact
support to enable the integration on your account.
