Filter Stocktake by Location

StocktakeUpdated 20 Sep 20262 min read

If you store parts across several locations (bays, shelves, a service van), you can filter a stocktake to one location at a time and count in manageable chunks. This article explains how.

Handling stocktake can be a bit of a challenge, but we've got a solution to make it more manageable. We've introduced a feature that lets you sort items by location. Once you've set a location, you can generate a stocktake report that specifically lists products assigned to that location. Simplifying the process, one location at a time.

Here's how to do a stocktake by location

Note: The ability to view stock by location requires the location to be entered for the product. Please see below for more information on how to enter a location.

Workshop Software screen showing please see below for more information on how to enter a location

1. Go to Products > Stock Take > Location
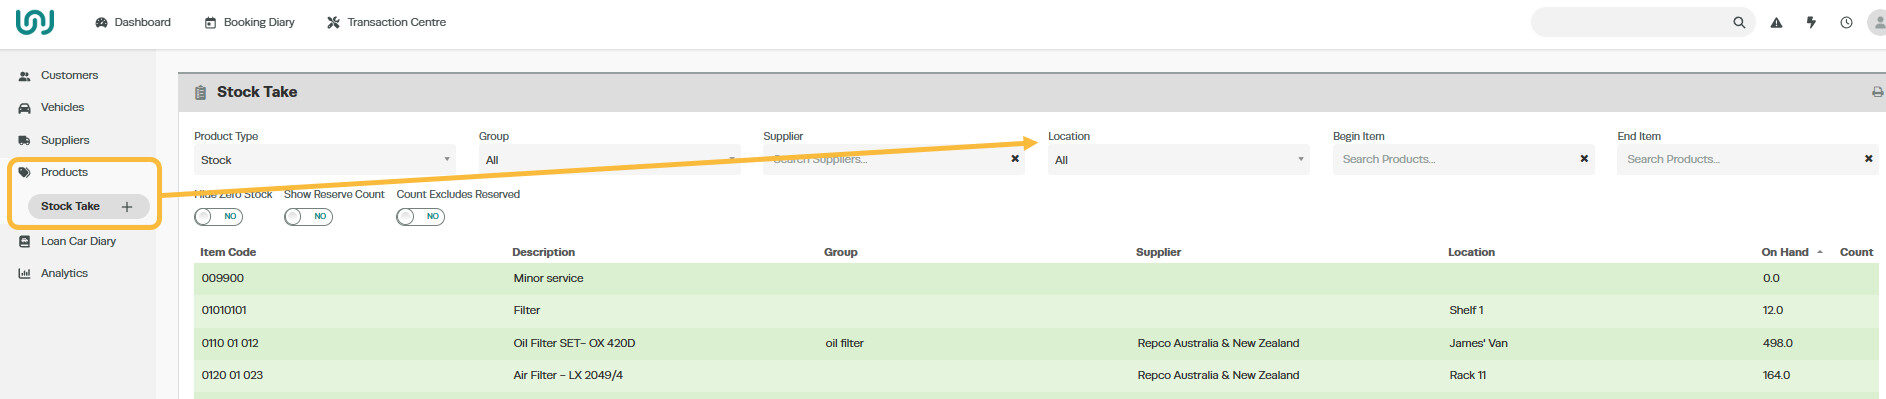
Workshop Software filter stocktake by location showing products > stock take > location

2. Select the location you want further details on.

Workshop Software filter stocktake by location showing location you want further details on

3. Choose whether you want to view the details on the screen or print

Workshop Software filter stocktake by location showing whether you want to view the details on the screen or print

Stock Take report listing item code, description, location, quantity on hand and a blank count column


Good to Know

  • Keeping your product list tidy helps your team find items quickly when building invoices and job cards.

Frequently Asked Questions

Will this change affect existing invoices that already include this product?

No. Existing invoices and job cards retain the product details as they were at the time the invoice was created. This change only applies when the product is used on future invoices.

Related Articles

Also Explore

Was this article helpful?